skip to main |
skip to sidebar
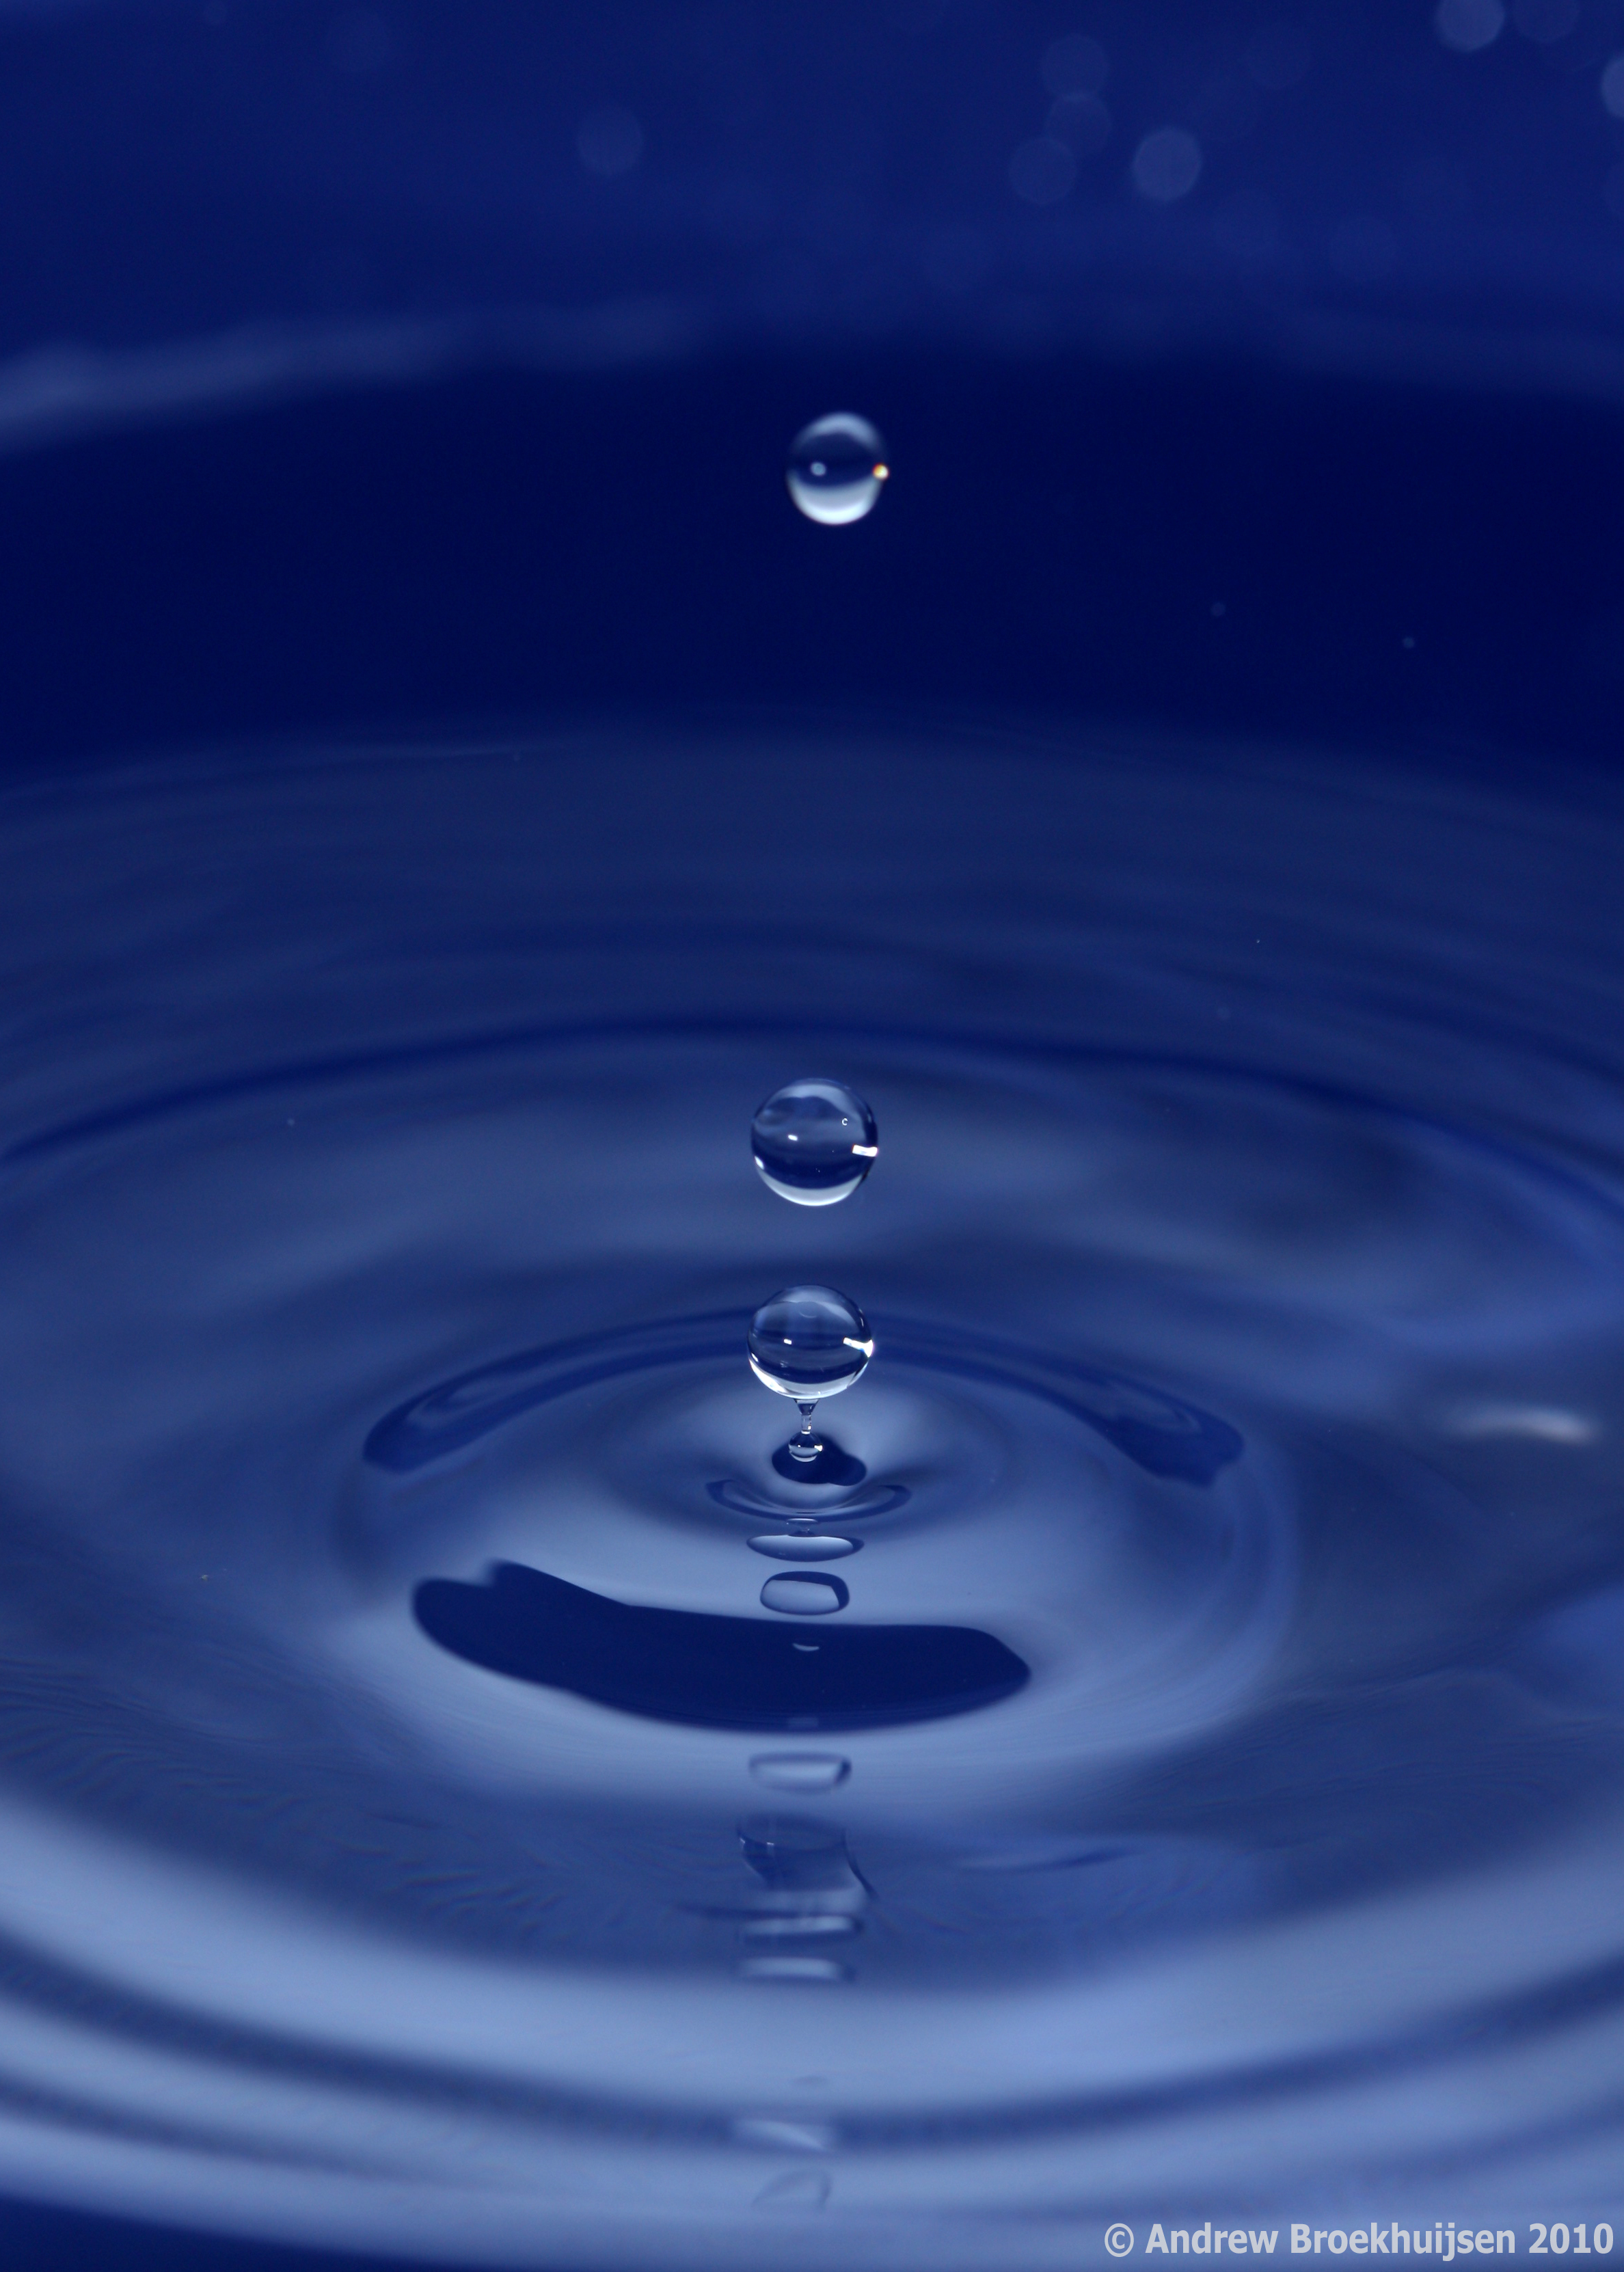
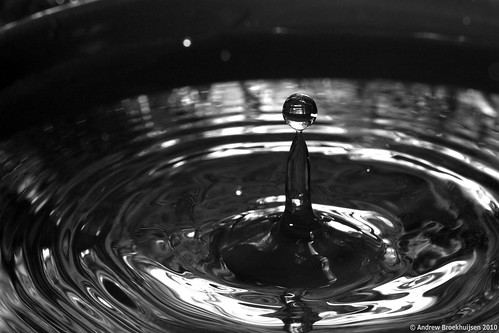
I did a little reading, and it turns out external flashes don't actually get brighter or dimmer. How a flash simulates getting brighter and dimmer (how it adjusts its "power" output) is actually by staying on for an infinitesimally longer or shorter period of time. So if the flash is your only effective light source (your shutter isn't letting in really any ambient light at ISO 100, inside, 1/200th of a second shutter, and f/10), your effective "shutter speed" is much faster than a camera is really capable of. So when my dad's 580EX Speedlite is set at 1/16th power, for instance, I have an effective shutter speed of 1/11000th of a second. Perfect for freezing REALLY fast-moving objects.
Like water droplets.

click to enlarge, or see it on Flickr
Aperture: f/7.1
Shutter Speed: 1/200 (effective: 1/11000)
ISO: 100
Focal Length: 100mm
Tripod
click to enlarge, or see it on Flickr
Aperture: f/13
Shutter Speed: 1/200 (effective: 1/11000)
ISO: 100
Focal Length: 100mm
Tripod

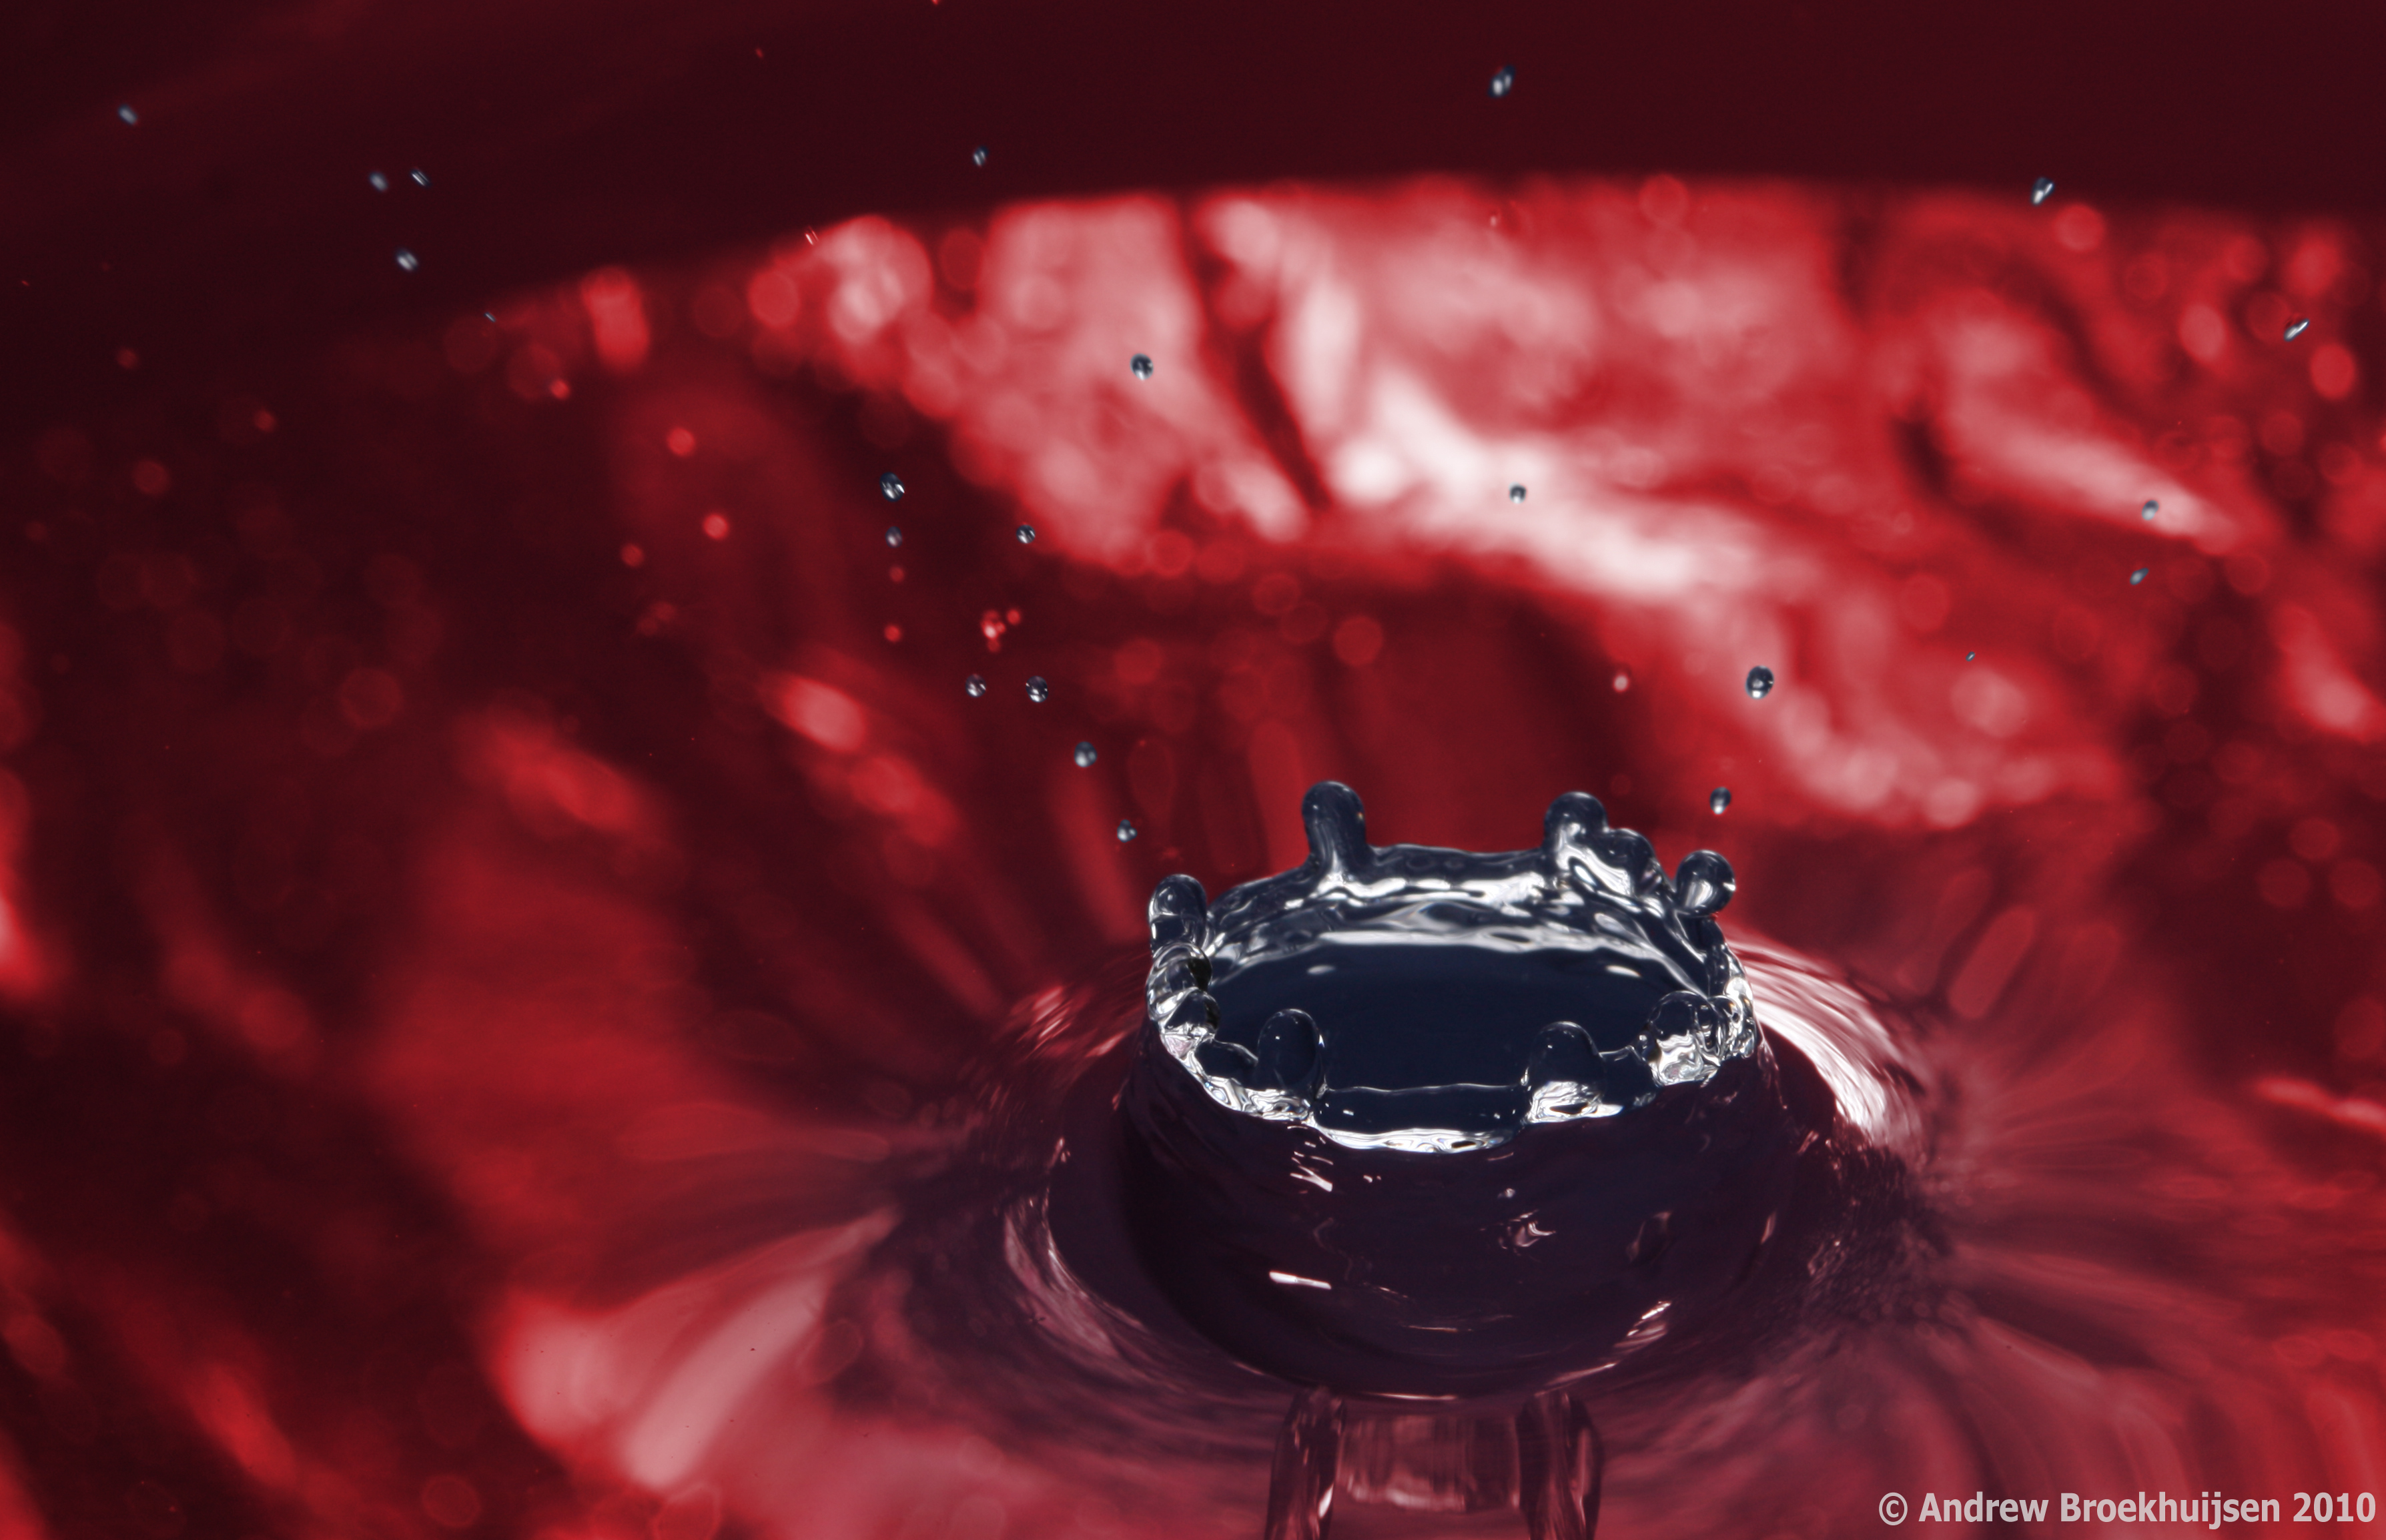
click to enlarge, or see it on Flickr
Aperture: f/13
Shutter Speed: 1/200 (effective: 1/11000)
ISO: 100
Focal Length: 100mm
Tripod
The first was shot in "Tungsten" white-balance, which casts it quite blue. The second was shot in "Sun" white-balance, which is pretty much irrelevant as I converted it to monochrome. The third was shot in "Sun" as well, but I played with it for fun in Photoshop using a few masks and recolor layers.
One thing I found interesting was that in the third one, you can see motion blur in the tiny specks of water zooming away from the splash zone. They must be moving incredibly quickly if 1/11000th of a second isn't freezing them.
The setup for this is quite simple; much more simple than for smoke photography. Just put your flash off-camera using a TTL cord or wireless system. I set mine to the left of the camera, at about a 45° angle, pointing at the same bowl of water as the lens. The bowl of water was directly in front of the lens. I varied the height of the camera on the tripod via the center column a few times during the shoot; it's not critical. Behind the bowl of water was first a sheet of white paper (in the first photo, the light was bounced off a plain white sheet of paper, giving it that smoother look), then a sheet of rather crumpled aluminum foil (as seen in the second and third photos). That's about it. Use any method to drip water steadily into the bowl. If possible, try to make the drops hit the same area of the water; this will make your focus end up better. Manually focus your camera (and re-focus every time you change angles or anything) by placing some object exactly where the drops are hitting, and focusing on that. A pencil works great. Then shoot a whole lot of photos.
You will quickly learn about the different stages a drop of water goes through. The drop of water hits the surface from above, causing a crater-like dent in the surface, quickly followed by a column of water rising from the center which launches one or more round droplets of water in the air; they then fall down and the surface returns to its original smoothness. So the first photo is near the end of the cycle. The second is at the apex of the column, and the third is just before the column begins to rise.
Experiment with various backdrops to bounce different colors, styles, etc. of light through your water. Also play with white-balance settings, flash and aperture settings, compositions, etc. Lots of trial-and-error. I imagine you can play with ISO as well, but I had no trouble leaving mine on 100, even with rather closed aperture settings for the deeper DoF, which is easier to work with. Keep in mind that you're halving the amount of light you let in every time you double your effective shutter speed, so use your aperture and/or ISO settings to compensate accordingly. And leave your shutter speed at 1/200th (or whatever your maximum sync speed is), it doesn't affect anything.
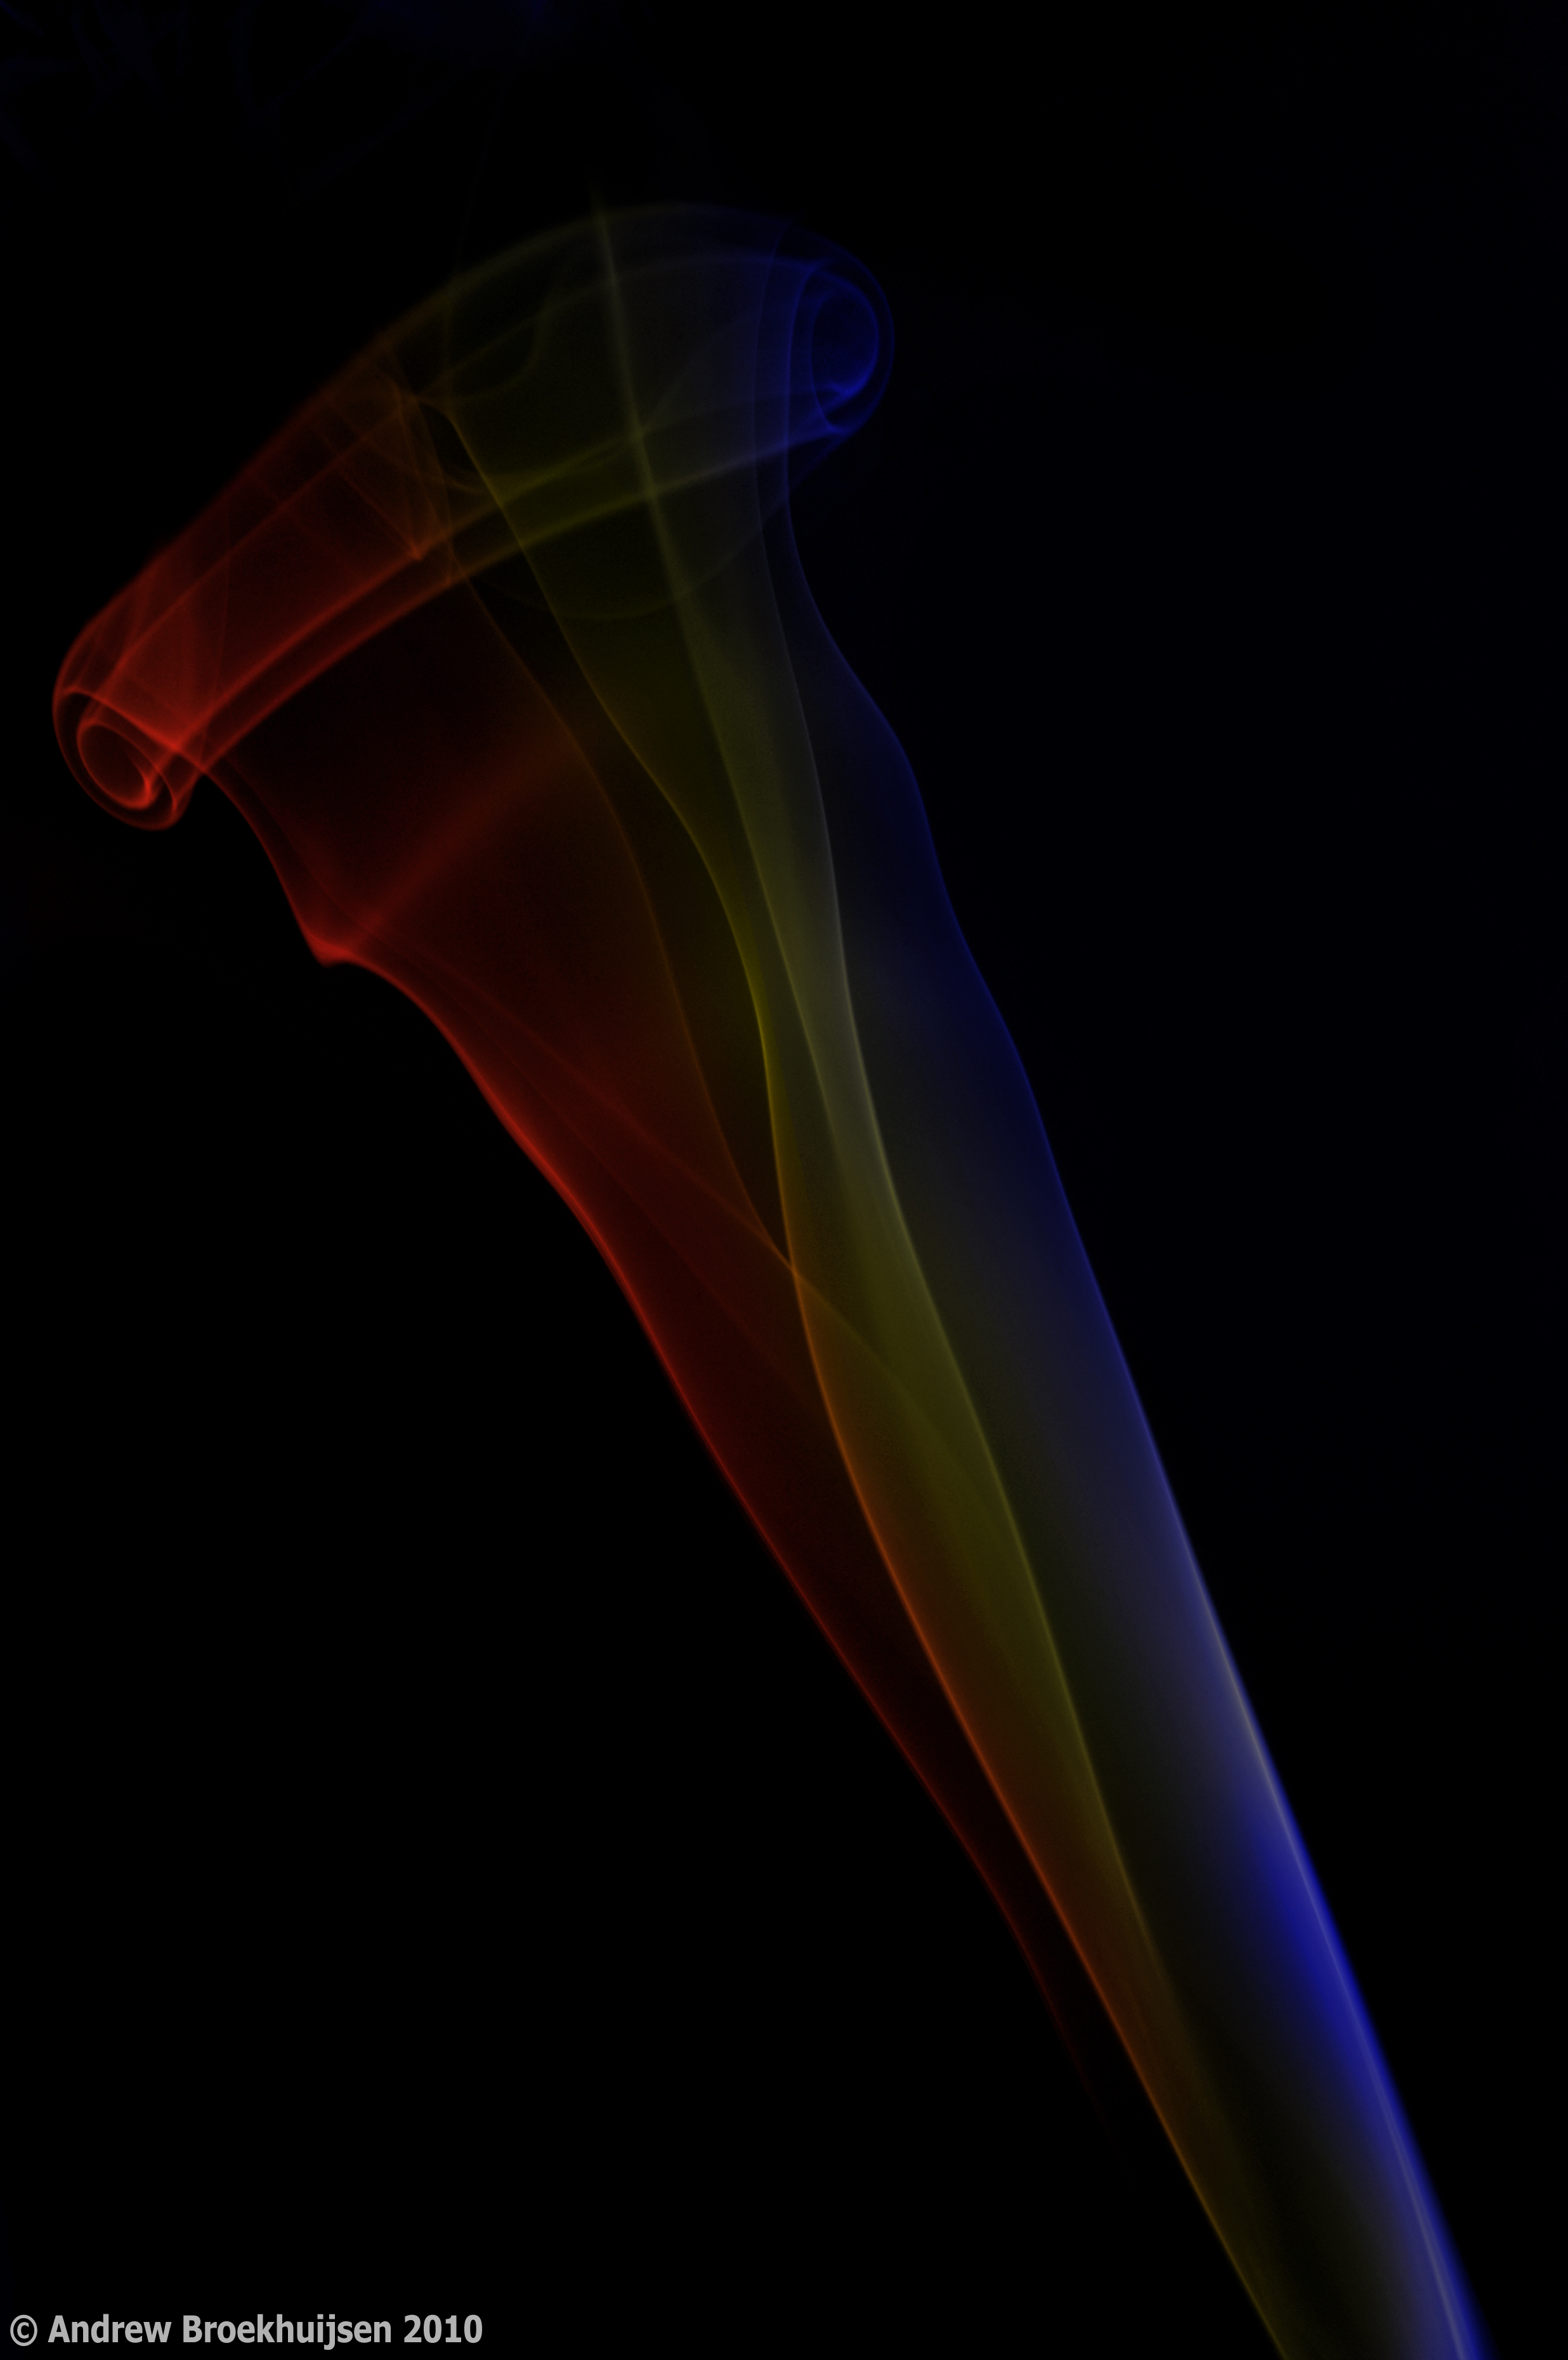
If you remember a while back, I was playing around with smoke photography. Due to the fact that I didn't have a DSLR, or an external flash, I had to use a bit of a workaround. Now that I've upgraded my camera, and have access to my dad's 580EX Speedlite, I was able to do the "correct" setup this time.
The basic technique involved is to set up some smoking object against a black background (I used a black posterboard this time instead of just shooting in a pitch black room). You have to make sure light hits it from the side without spilling onto your background (which you want to remain totally black with no detail). In order to do this, I made a crappy snoot out of another piece of black posterboard. It wasn't pretty, but it got the job done. Since you want a wide depth-of-field to capture the smoke throughout all the planes it wafts through, a small aperture is required. To avoid any image noise, you must have a fast shutter speed (which also freezes the action) and a low ISO. So to counteract all of your settings that tend not to let in a lot of light, it's necessary to introduce a vast amount of light from your side light source. I cranked the flash brightness REALLY high. It worked.

click to enlarge, or see it on Flickr
Aperture: f/14
Shutter Speed: 1/250
ISO: 100
Focal Length: 48mm
Tripod
From there, you just light something on fire. I used paper because the incense I bought for this purpose freaking smells like someone died. It's that bad. So paper got the job done. Once that something burns out, smoke plumes start going up. Generally if you're in a ventilated room (which I highly recommend), the smoke will go smoothly up in a nearly straight or straight plume. To disrupt it and make a slightly more interesting picture, you can block the smoke's path with an object, fan it lightly, blow on it, etc.
Once you have your shots, take them into Photoshop and adjust the levels to make sure your background is true black. You may also have to use a black brush to flatten a few areas and remove distracting pieces of smoke from others. Many people choose to invert their image at this point to put the smoke on a white background. I felt the colors I used looked better on black. You can then use any method you want to colorize the smoke if you so desire. I like to make multiple layers of different colors and then blend them with masks so the smoke is multicolored.
As a last step, you can add some contrast or adjust levels further. Be careful with adding contrast or saturation; this tends to cause posterization very quickly. The blacker you get your background in-camera and the better you separate your smoke (hint: more light), the less contrast you will be tempted to add, and the smoother your smoke will turn out. The above example is actually posterized pretty badly.
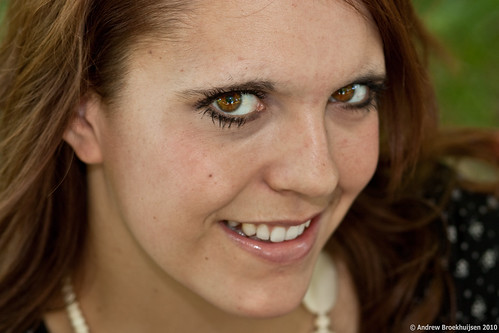
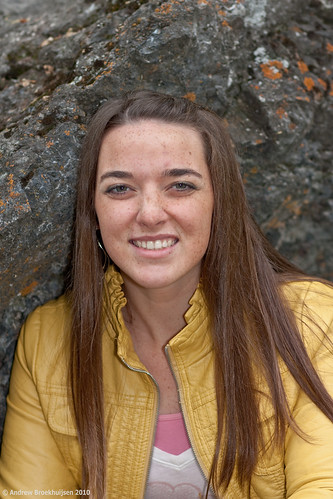
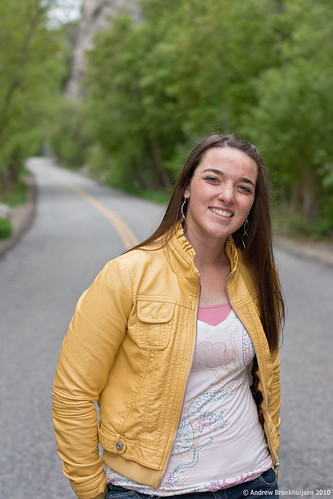
Okay, so she's a friend of mine, and I'm letting her pay with cookies. But it's progress. And I've decided I like fixing the white balance to fit the mood of the photo. These were summer portraits, it must have been 95 degrees when I shot them, so I warmed them up quite a bit.
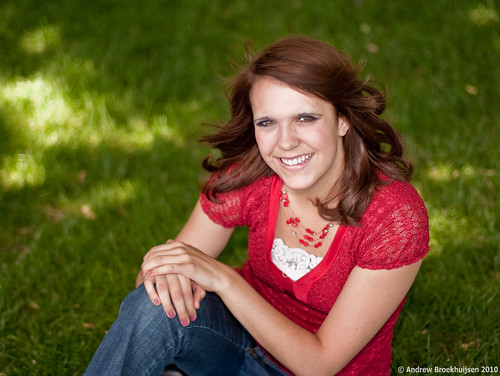
click to enlarge, or see it on Flickr
Aperture: f/1.4
Shutter Speed: 1/400
ISO: 100
Focal Length: 50mm
Tripod
click to enlarge, or see it on Flickr
Aperture: f/4
Shutter Speed: 1/30
ISO: 100
Focal Length: 85mm
Tripod
Right now I'm pushing REALLY hard to finish my guitar, so things on the more creative side of the photography front are a bit quiet. I'll pick it up soon though.
So before I continue with my post, I'll say that I've realized I can't really continue trying to post a photo a day here. I don't take a photo I feel is worth sharing every day, and my time is somehow more limited now than it was during the school year. So I'll be posting photos whenever I feel like I've taken one worth sharing from here on out.
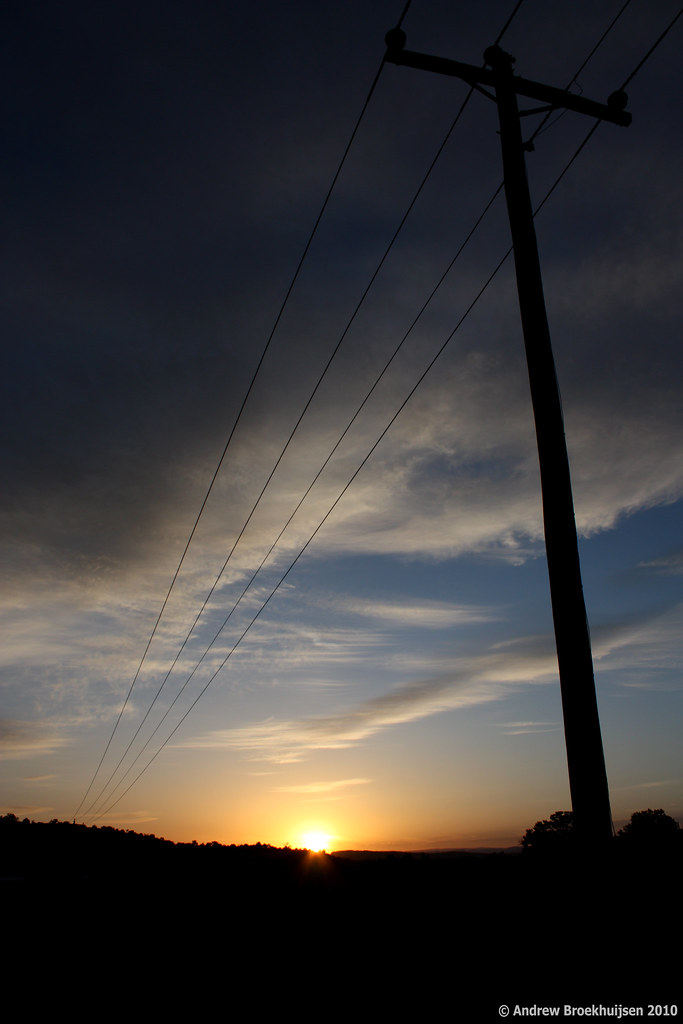
I just spent three days in southern Utah on a camping trip. Photography opportunities were a little more scarce than I had hoped, but I still got what I feel were two good shots.
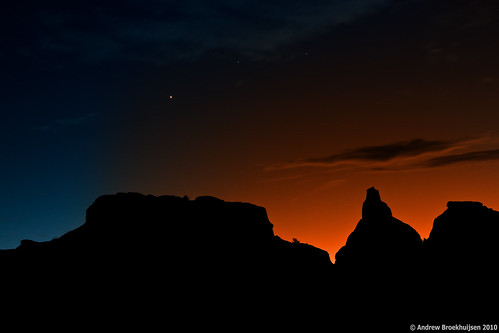
click to enlarge, or see it on Flickr
Aperture: f/7.1
Shutter Speed: 10 seconds
ISO: 100
Focal Length: 39mm
Tripod
click to enlarge, or see it on Flickr
Aperture: f/8
Shutter Speed: 1/250
ISO: 100
Focal Length: 18mm
Tripod
Turns out sunset and sunrise are really good times for photography. Who knew?
I admit to some artistic recoloring of the first photo, that probably got a bit out of hand. But I decided the red was a little more interesting than a completely blue photo. Looking at it now, I think I'll go back and re-do it to look more believable sometime. That red of red is overkill.
The second one I really like, except I'm kicking myself for not using a narrower aperture and really cranking an awesome star-flare out of the sun. Oh, wait, I did. But somehow on all the shots I took at f/22, the entire picture was overexposed without my correcting for it in-camera. And since I forgot to switch to RAW shooting before I took this, I didn't have the tools to fix the exposure and keep my flare. Oh, well. Live and learn. There are other great places to shoot sunrises.
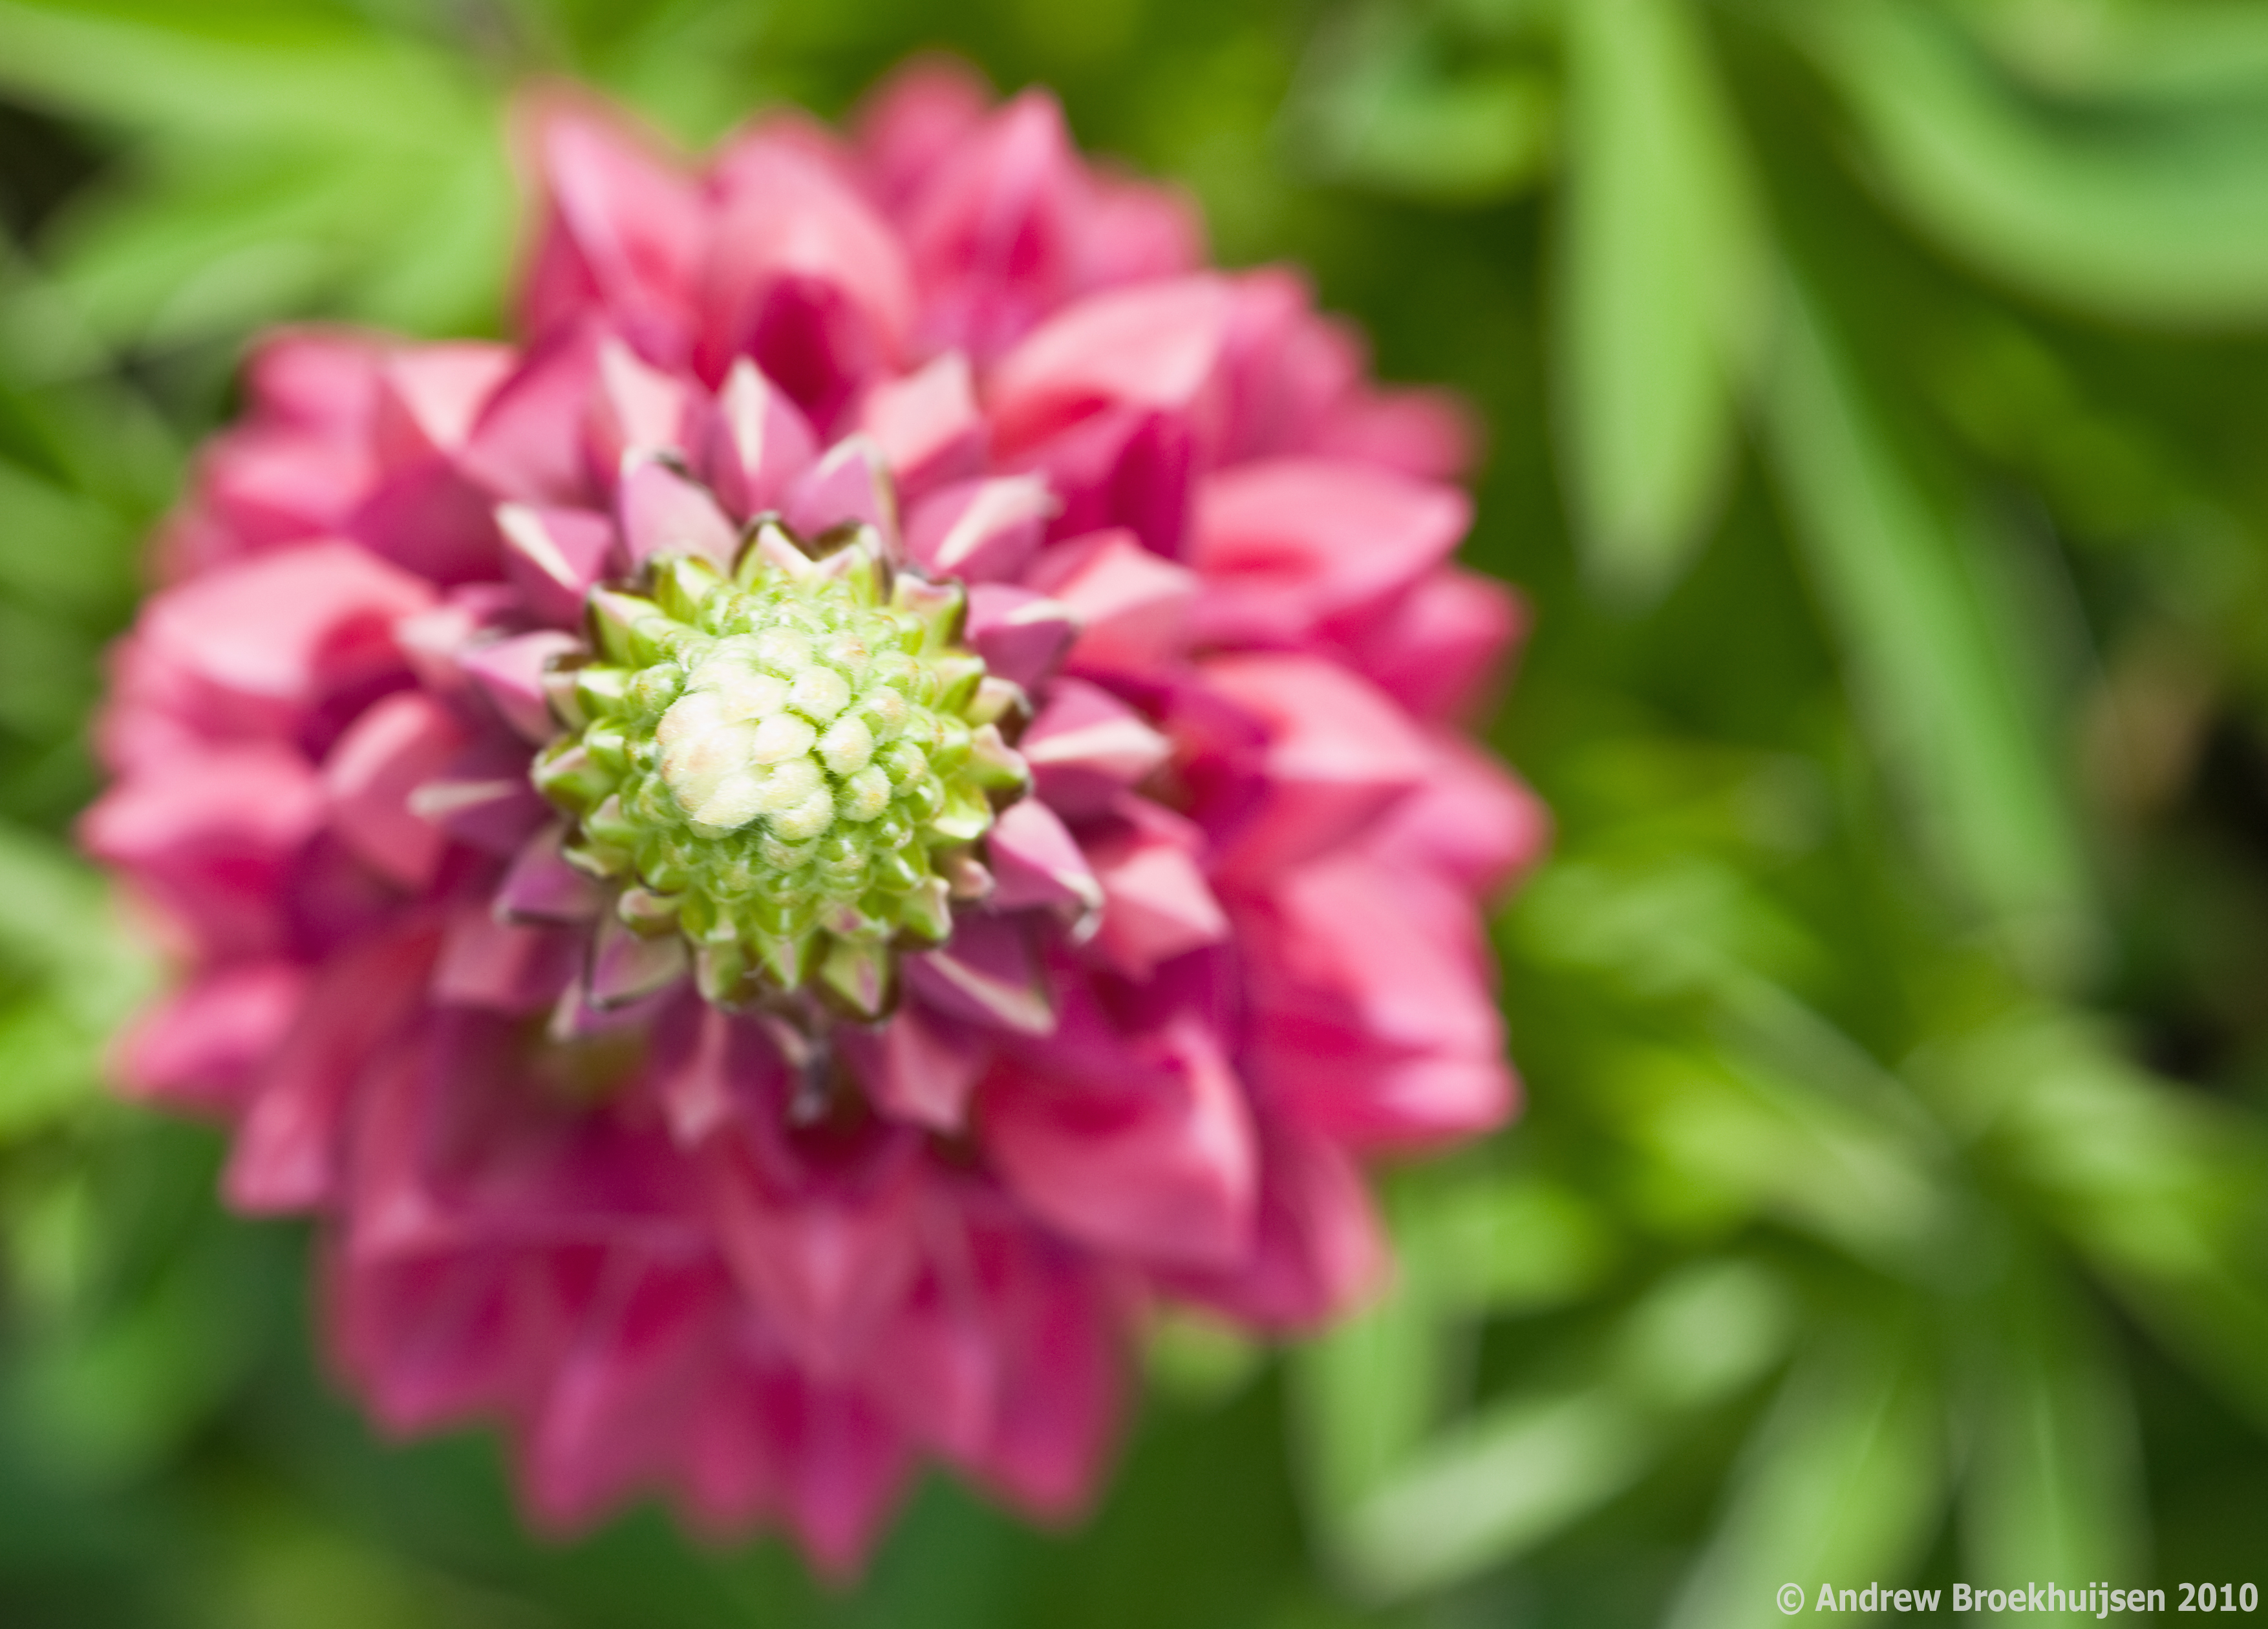
I noticed a cool-looking flower today while doing some yard work. It looked pretty symmetrical from the top, in an interesting way. So I decided to photograph it from that angle.

click to enlarge, or see it on Flickr
Aperture: f/8
Shutter Speed: 1/40
ISO: 100
Focal Length: 100mm
Tripod
Didn't turn out quite like I hoped. Though the angle is good and the DoF is okay, I think I want to be more careful on the focus for the very top part of the flower. Also, as the top of the flower is a definite highlight, the exposure was clipped to high for it. So I'll probably go back and re-shoot this one on a cloudy day (or using some sort of diffuser to block the sunlight).
This is it, now that my site is launched and my portfolio is filled out, I will no longer be doing free portrait sessions. I have yet to decide on prices, but no more free ones. Anyway, I think it's a good thing I did all these free ones though - it really helped me get used to the settings and equipment I need to get good portraits.
click to enlarge, or see it on Flickr
Aperture: f/2.8
Shutter Speed: 1/60
ISO: 100
Focal Length: 85mm
Monopod
click to enlarge, or see it on Flickr
Aperture: f/3.2
Shutter Speed: 1/200
ISO: 100
Focal Length: 50mm
Monopod
I've definitely noticed some growth in my skills as a portrait photographer. Out of my favorite two shots, neither of them had to be cropped; I had them framed and composed correctly in-camera. This is nice because it makes for faster editing later on. Also, there were fewer necessary adjustments to get everything correct; most notably that I didn't need to use the "Recovery" slider in Lightroom this time around.
I think I'm ready to head into the world of paid portraiture.
Sorry for the late post this month. Here's the calendar. Feel free to distribute freely, as usual. Also, if you need an aspect ratio other than 4:3, I can do that no problem, just let me know in the comments.
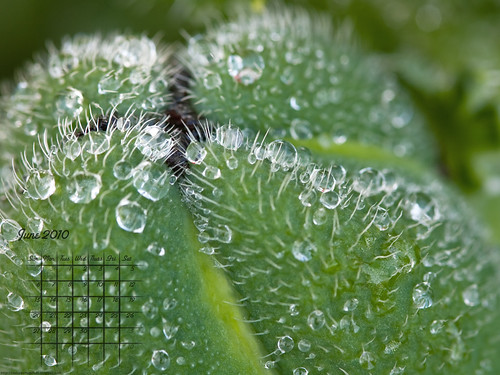
Click to enlarge
Also, I think I turned the opacity on the calendar layer down a little more than I usually do. Sorry about that.