skip to main |
skip to sidebar
I recently took my camera down to the Sandy Aquarium not too far from where I live. Despite bringing some of the fastest glass I have access to (50mm f/1.4, 85mm f/1.8, 100mm f/2.8 Macro), I was maxing out my skills at holding a camera steady, even on a monopod at 1600 ISO.
Many aspects of my photography still have a "trial & error" approach, but I can't remember the last time I shot so many pictures with such a low percentage of keepers. I think I had 2.5 keepers from the close to 200 shots I took.
Along the way, I learned a few valuable lessons about aquatic photography that I figure I'll pass along to you guys. But first, the pictures.
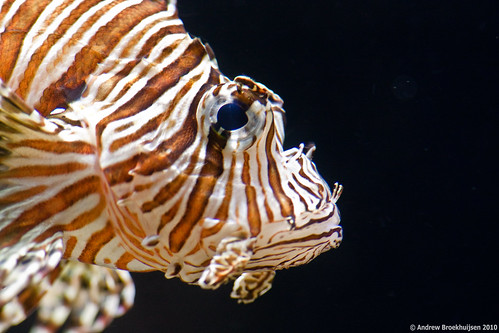
Aperture: f/2.8
Shutter Speed: 1/160
ISO: 1600
Focal Length: 100mm
Monopod
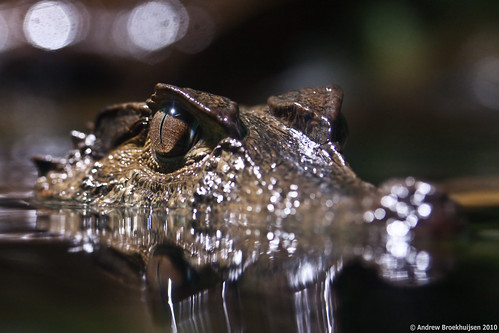
Aperture: f/4
Shutter Speed: 1/30
ISO: 1600
Focal Length: 100mm
Monopod
The first thing I picked up pretty quickly was that you need support. I am somewhat of a perfectionist with the technical aspects of my photography. Therefore, high ISO settings, motion blur, etc. really bother me. I don't like shooting at ISO 1600 when I can avoid it, but I couldn't here. A tripod really would have been the best choice, but I didn't bring mine. A monopod was a fair tradeoff. Even with really fast glass and a maxed-out ISO setting, I was getting barely usable shutter speeds for most of the aquariums. The other tip I can give you is to use a rubber lens hood. This enables you to support the end of your lens against the glass of the aquarium, giving you a couple of advantages. First, it's another point of support, turning your monopod into a bipod. Second, if you're shooting perpendicular to the glass (more on this later), it blocks out light from the edges and helps prevent glare.
Another important aspect to pay attention to is white balance. The different aquariums all had radically different lighting. Definitely shoot RAW. I left my WB on Sunny and just fixed the keepers later in Lightroom. If you are going to shoot JPG, try a few different settings on each aquarium to see what works best for the image you're trying to achieve.
Focusing was the most frustrating aspect for me to get down during the shoot. There was rarely enough light in the aquariums even for my USM AF drives to lock onto something. I ended up manually focusing most of the time. I was continually finding myself unable to achieve sharp focus at all, even on completely static subjects. Eventually I figured out that any kind of curved glass is likely going to nuke your ability to achieve perfect focus. On aquariums with flat glass, you have to shoot as close to perpendicular through the glass as possible. The steeper the angle you are trying to shoot through, the more the glass is distorting things and it doesn't take long to ruin your ability to achieve perfect focus.
So to sum things up:
-Shoot supported, using a rubber lens hood if possible.
-Pay attention to WB.
-Focus manually whenever necessary.
and
-Shoot through glass at a 90° angle whenever possible.
Happy shooting!
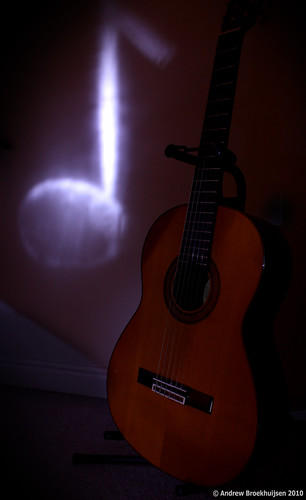
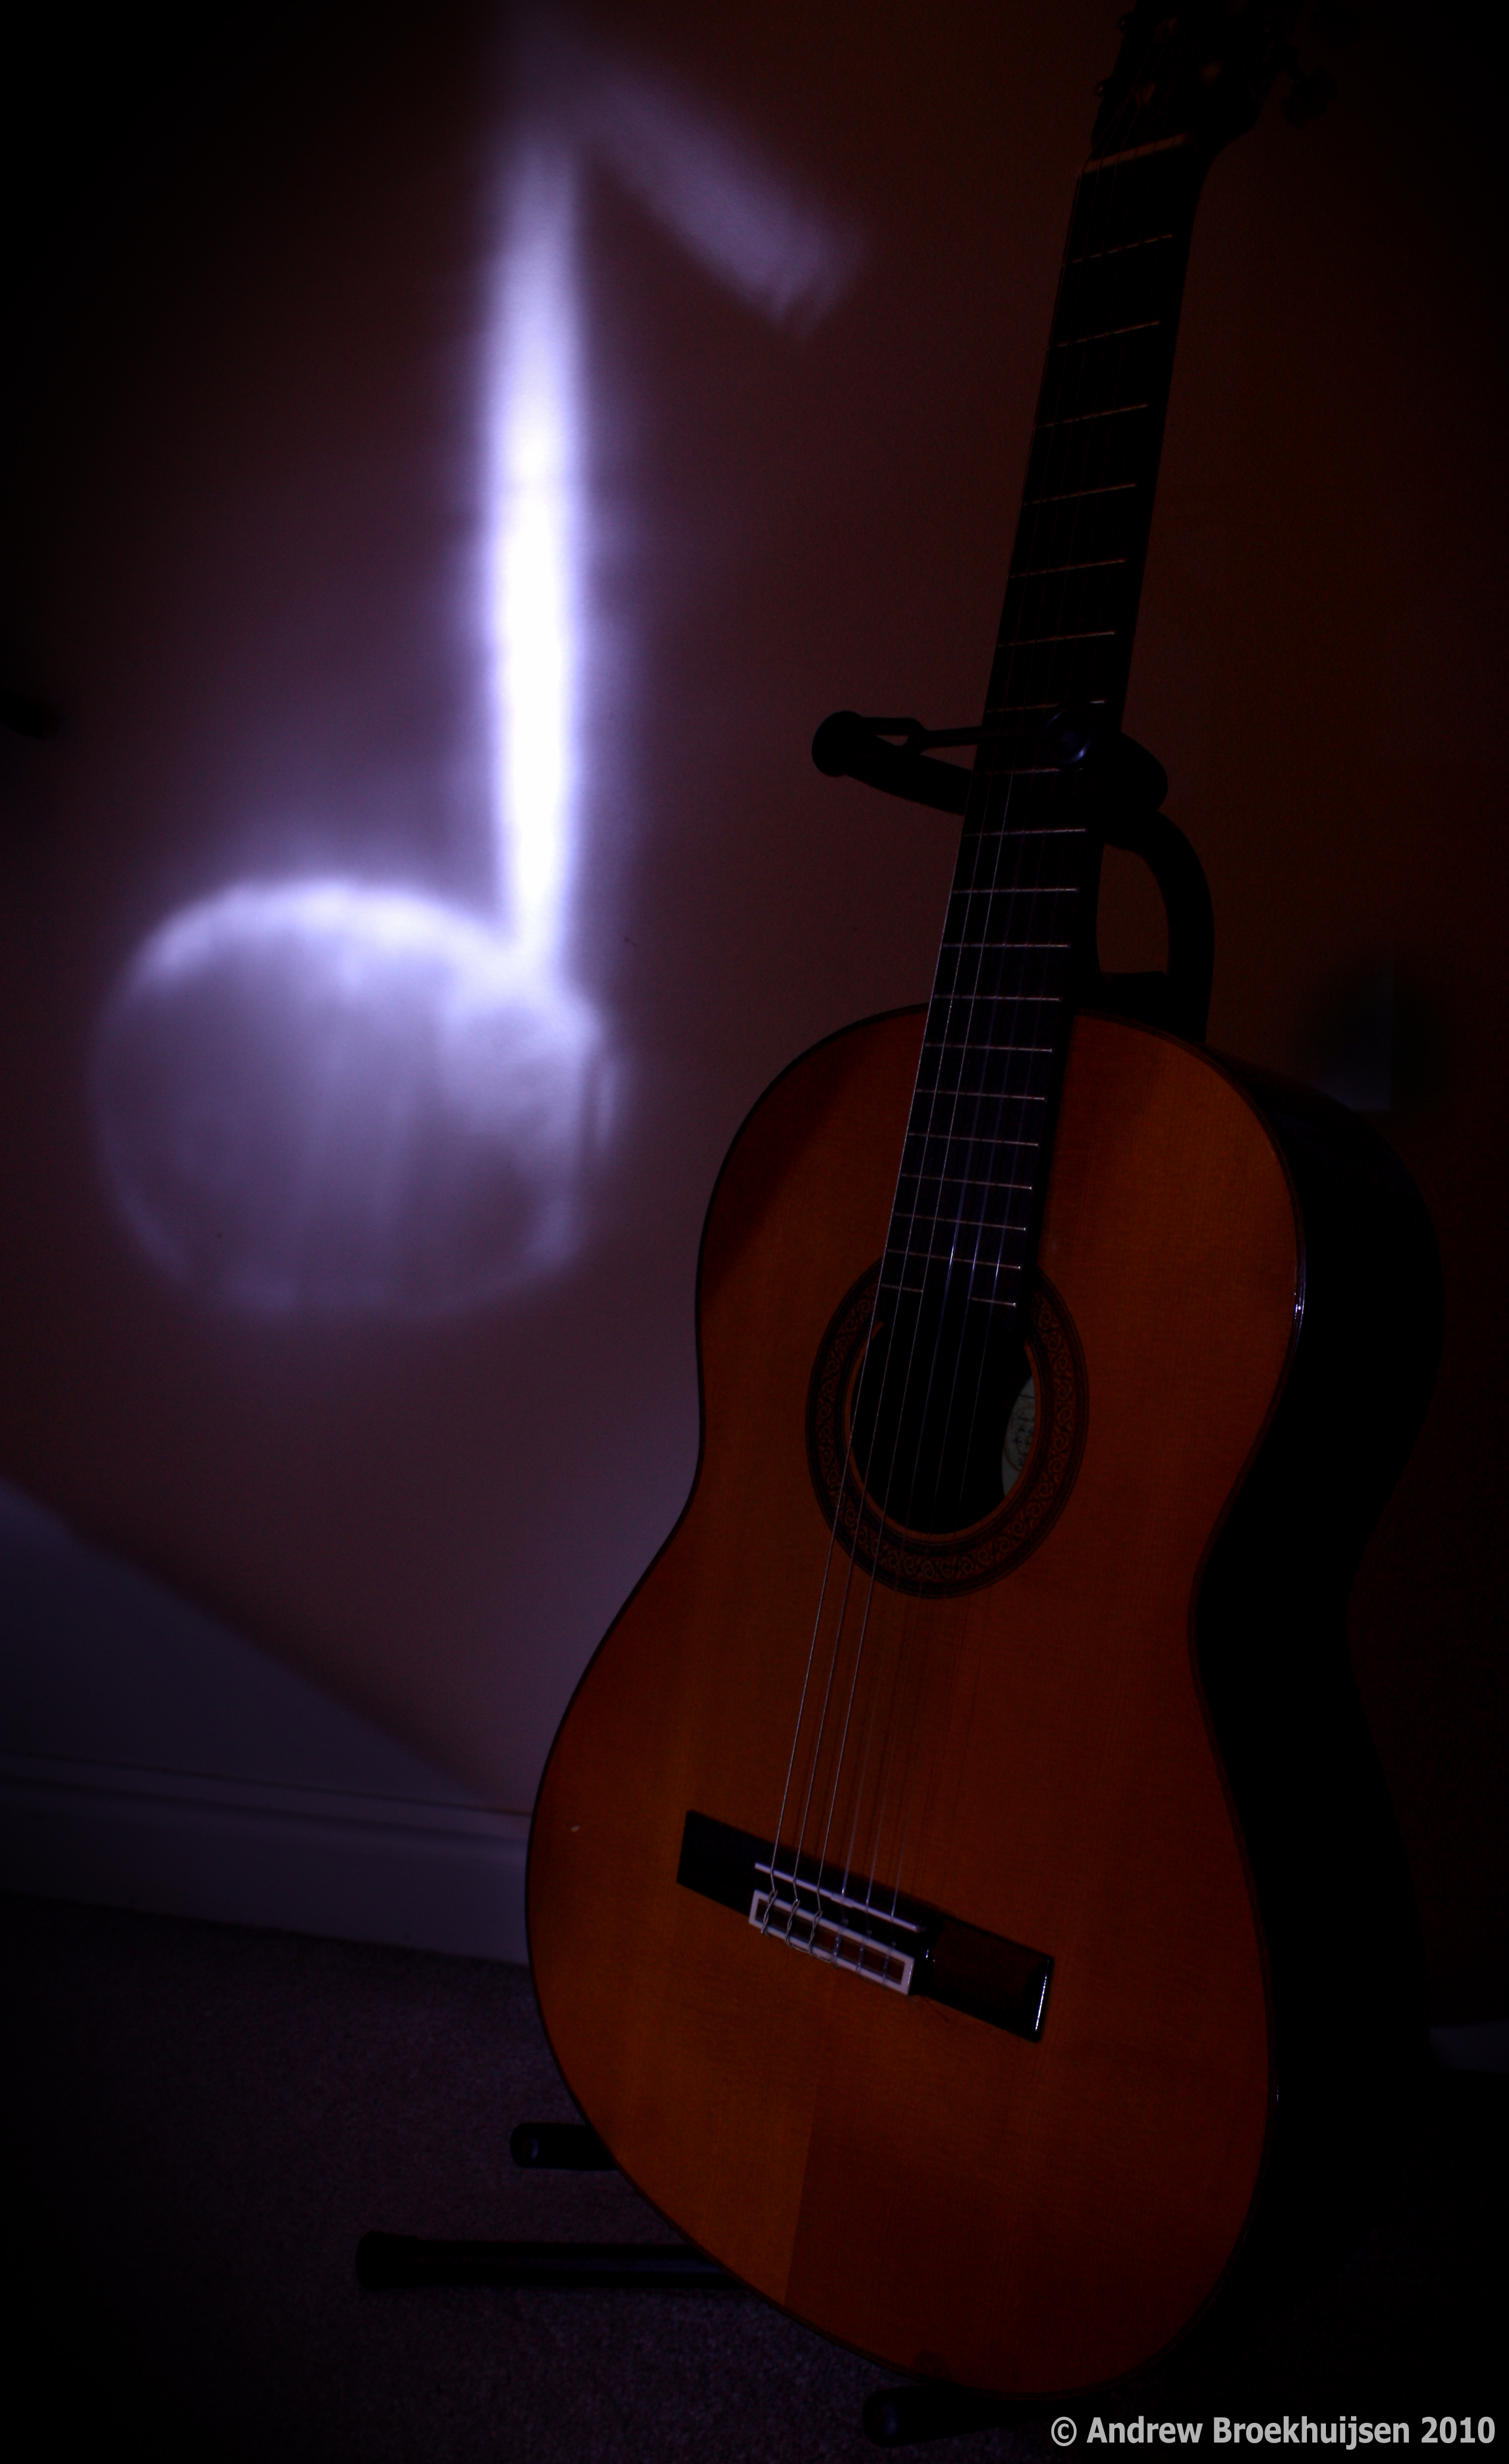
I don't recall if I've posted about my guitar on this blog or not, but I finally generated a nice photo of it.
Long story short, I started building a custom guitar for myself about 18 months ago (last July). Lots of things like school, etc. got in the way of my having as much time as I wanted to work on it, so it took a really long time. But now it is very nearly finished. I am expecting to sand flat the last 10 coats of lacquer and then cut polish to a finish this Wednesday.
But for the time being, the guitar looks awesome in the sunlight. The slightly excessive amount of lacquer on it is extremely reflective, but not yet flat; so the reflections take on interesting textures.
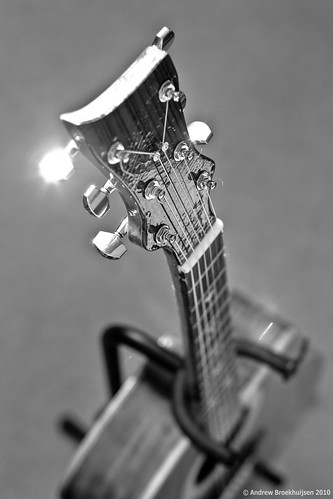
Aperture: f/2.8
Shutter Speed: 1/125
ISO: 100
Focal Length: 50mm
Handheld
I'm proud of the guitar, and have been enjoying playing it—the tone worked out to be exactly how I planned it back when I was first selecting my materials.
Not far out of Death Valley, there's a small ghost town called Rhyolite. It's the first opportunity I've had to shoot anything like this, and I really really enjoyed it. The ruins really made for some awesome black and white shots, and the clouds were being particularly cooperative.
At any rate, here's my favorite shot from there, although to be fair, I haven't tried editing any of the others yet.
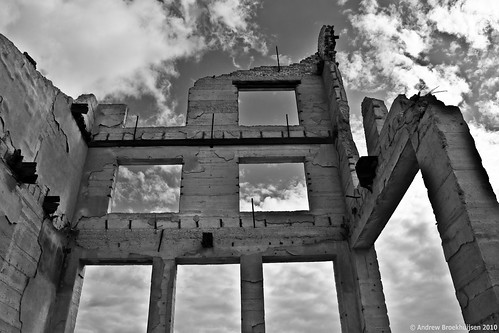
Aperture: f/8
Shutter Speed: 1/250
ISO: 100
Focal Length: 18mm
Monopod
Depending on the weather (it snowed 4 inches here last night), I may try to hit a bunch of ghost towns in Utah and do some photography.
When we were in Death Valley National Park this past week, I had something really awesome happen to me. As my dad and I were driving from one part of the park to the other, we passed a coyote walking up the road in the opposite direction. I'm not much of a wildlife photographer, but I figured it would be worth the picture. So we stopped in the middle of the desolate road and turned around. By the time we were facing the other direction, I looked out the windshield and saw... the same coyote, running back towards our car. It proceeded to sit politely about 5 feet from my window, waiting for me to feed it something. He didn't seem to mind when I switched lenses twice to get a variety of different shots. And at one point, when I had the 100mm f/2.8 macro lens out, he yawned, timing it perfectly with my burst shooting.
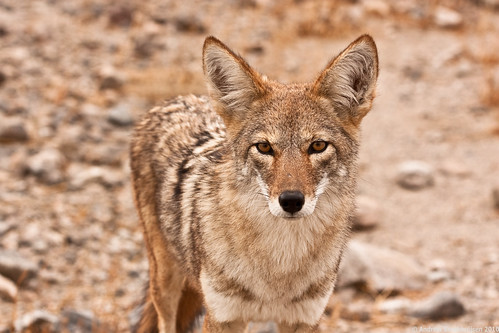
Aperture: f/5.6
Shutter Speed: 1/160
ISO: 100
Focal Length: 100mm
Handheld
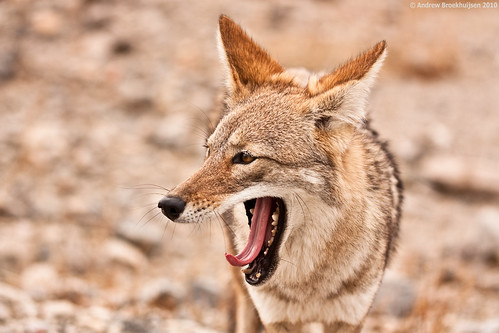
Aperture: f/2.8
Shutter Speed: 1/400
ISO: 100
Focal Length: 100mm
Handheld
So let's stop for a moment and list all of the things that converged for these lucky shots:
1) We saw a coyote
2) This coyote had been fed, and was therefore extremely tame
3) I was within easy reach of my camera gear
4) It was overcast, in Death Valley (which happens maybe once a year), providing bright, but very diffuse light
5) It was 78°F outside, rather than 120°F, which I suspect is why the coyote was out in the first place
6) He yawned just like that exactly when I had my best lens on for the job.
I couldn't have planned for better conditions. Thank you, nature.
I just got back from a lovely vacation with my dad, where we hit various photo locations, saw family, etc. One of my favorite pictures from the trip was taken at Seal Beach in Orange County, California.
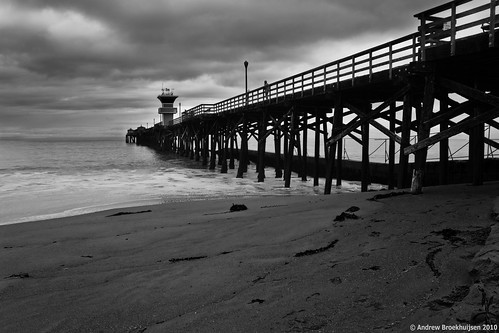
Aperture: f/16
Shutter Speed: 1/20
ISO: 100
Focal Length: 18mm
Tripod
It was an uncharacteristically cloudy and rainy day at the beach, which had several nice side-effects: diffuse light, awesome moody clouds (recovered from the RAW file via Lightroom), and very few people at the beach to clutter up my shot. The one guy standing about halfway down the pier kind of bothers me, but he fits in with the shot okay, and I didn't want to spend an hour cloning him out.
Anyway, I got this and a whole bunch of other shots I'm very happy with on the trip. More to come as I get around to editing them.
Remember when I used to post on this blog? Yeah, I know I've been awful. The worst part is that I don't even have any excuses. On the contrary. I have tons of free time. I've even been shooting a lot of photos. Just not posting.
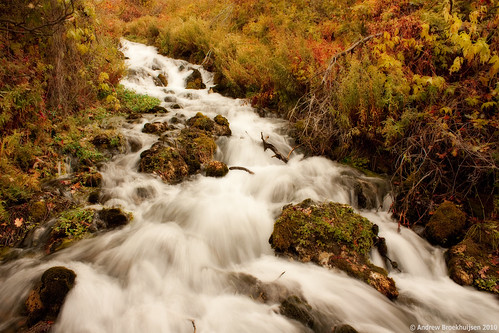
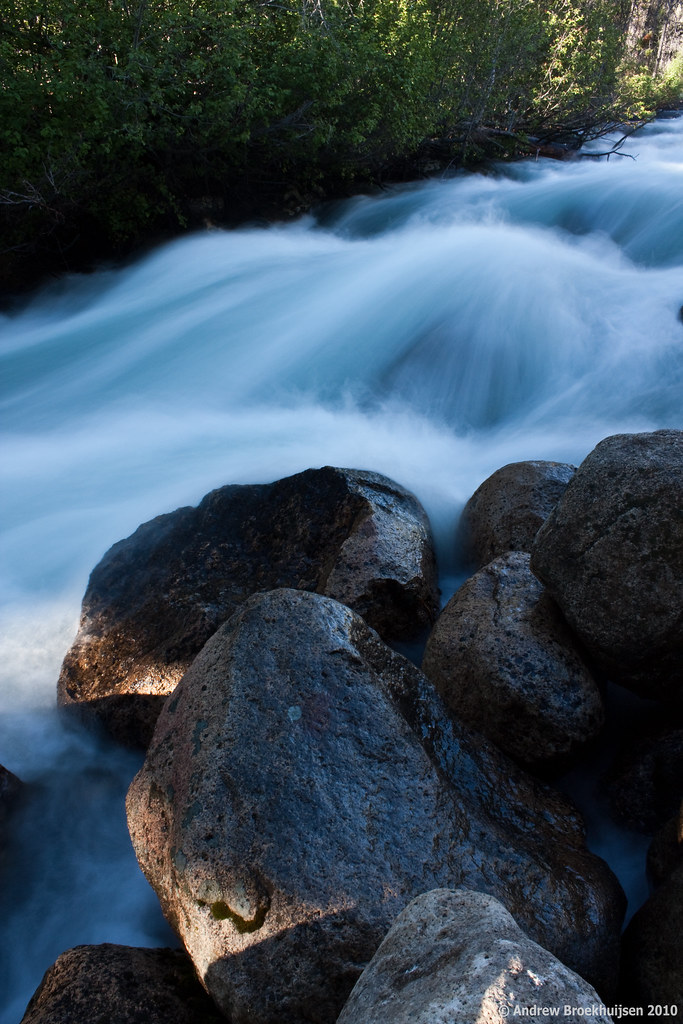
Anyway, there's your sad excuse for an explanation. On to the photos. I've been going out and about, up various local canyons, etc. for a couple of weeks now, looking for those magical fall landscapes, especially waterscapes. I went a long way up American Fork canyon this morning/afternoon with my dad and finally got some good shots.
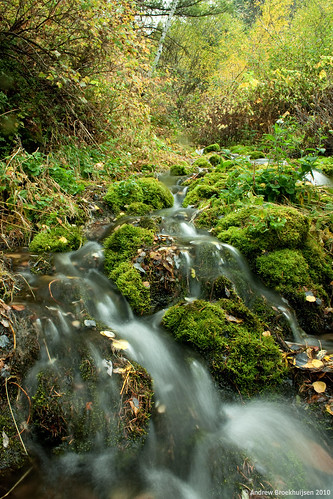
Aperture: f/16
Shutter Speed: 1.3 seconds
ISO: 100
Focal Length: 18mm
Tripod
Aperture: f/3.2
Shutter Speed: 1/200
ISO: 200
Focal Length: 100mm
Handheld
Aperture: f/11
Shutter Speed: 1/6
ISO: 100
Focal Length: 18mm
Tripod
On an unrelated note, Flickr stopped letting me get to the actual URL of where my images are hosted, because they had problems with people hotlinking without putting links back to Flickr. I proudly say I was never part of that problem. But regardless, my images will be a little differently sized now, and clicking on them leads to the Flickr page rather than a direct enlargement. If you want to see the photos bigger, you can do so from the Flickr page.
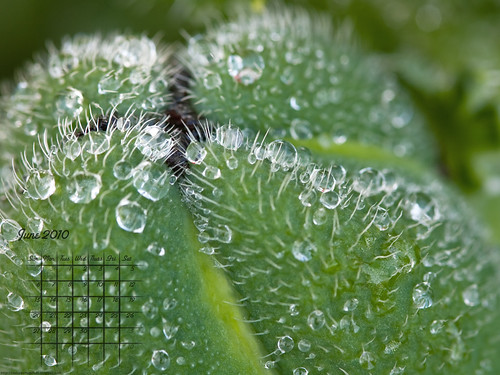
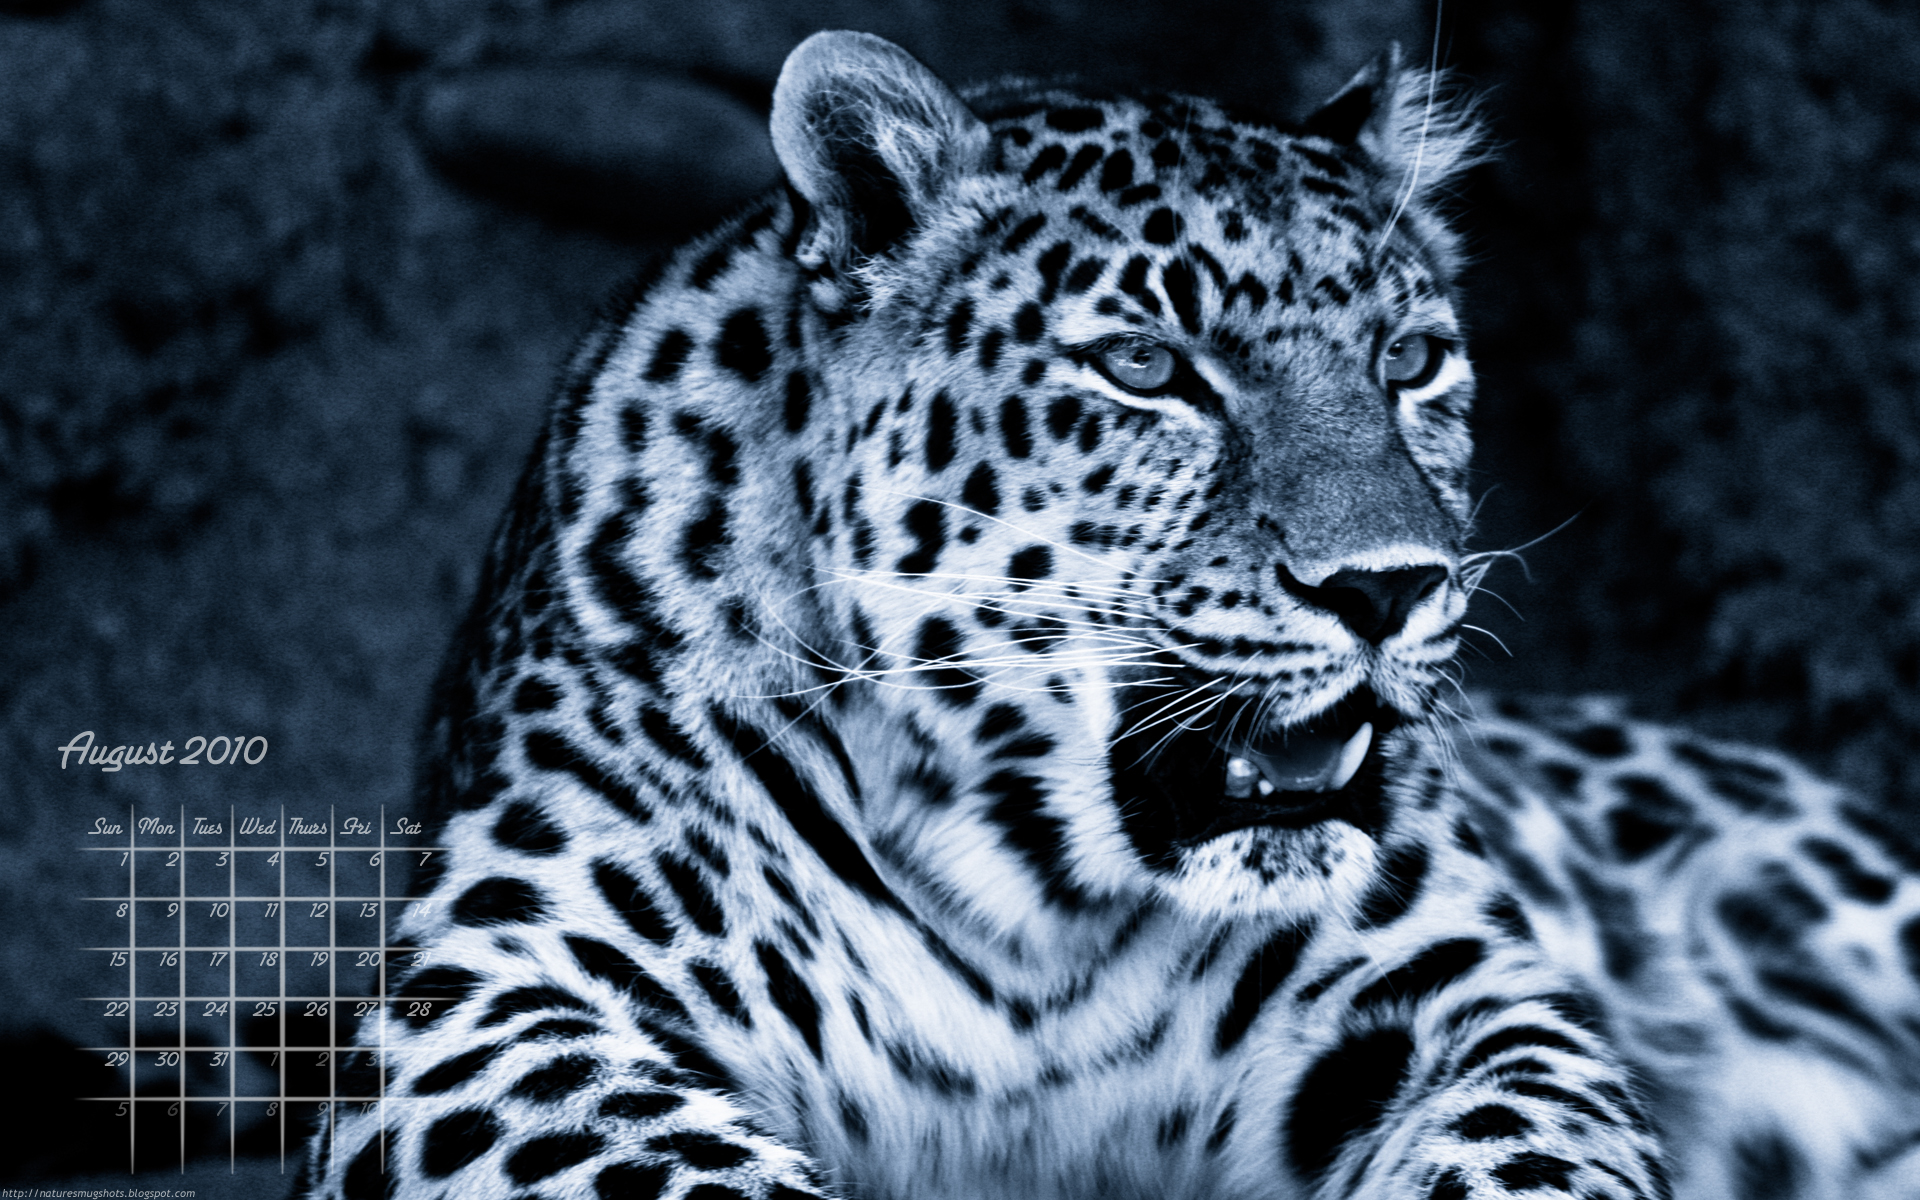
Here's the calendar for August 2010. I know of a couple of people using these that have odd screen resolutions, so if I haven't uploaded one that fits your screen and you want one, just let me know in the comments and I'll throw one together. It only takes me about a minute.
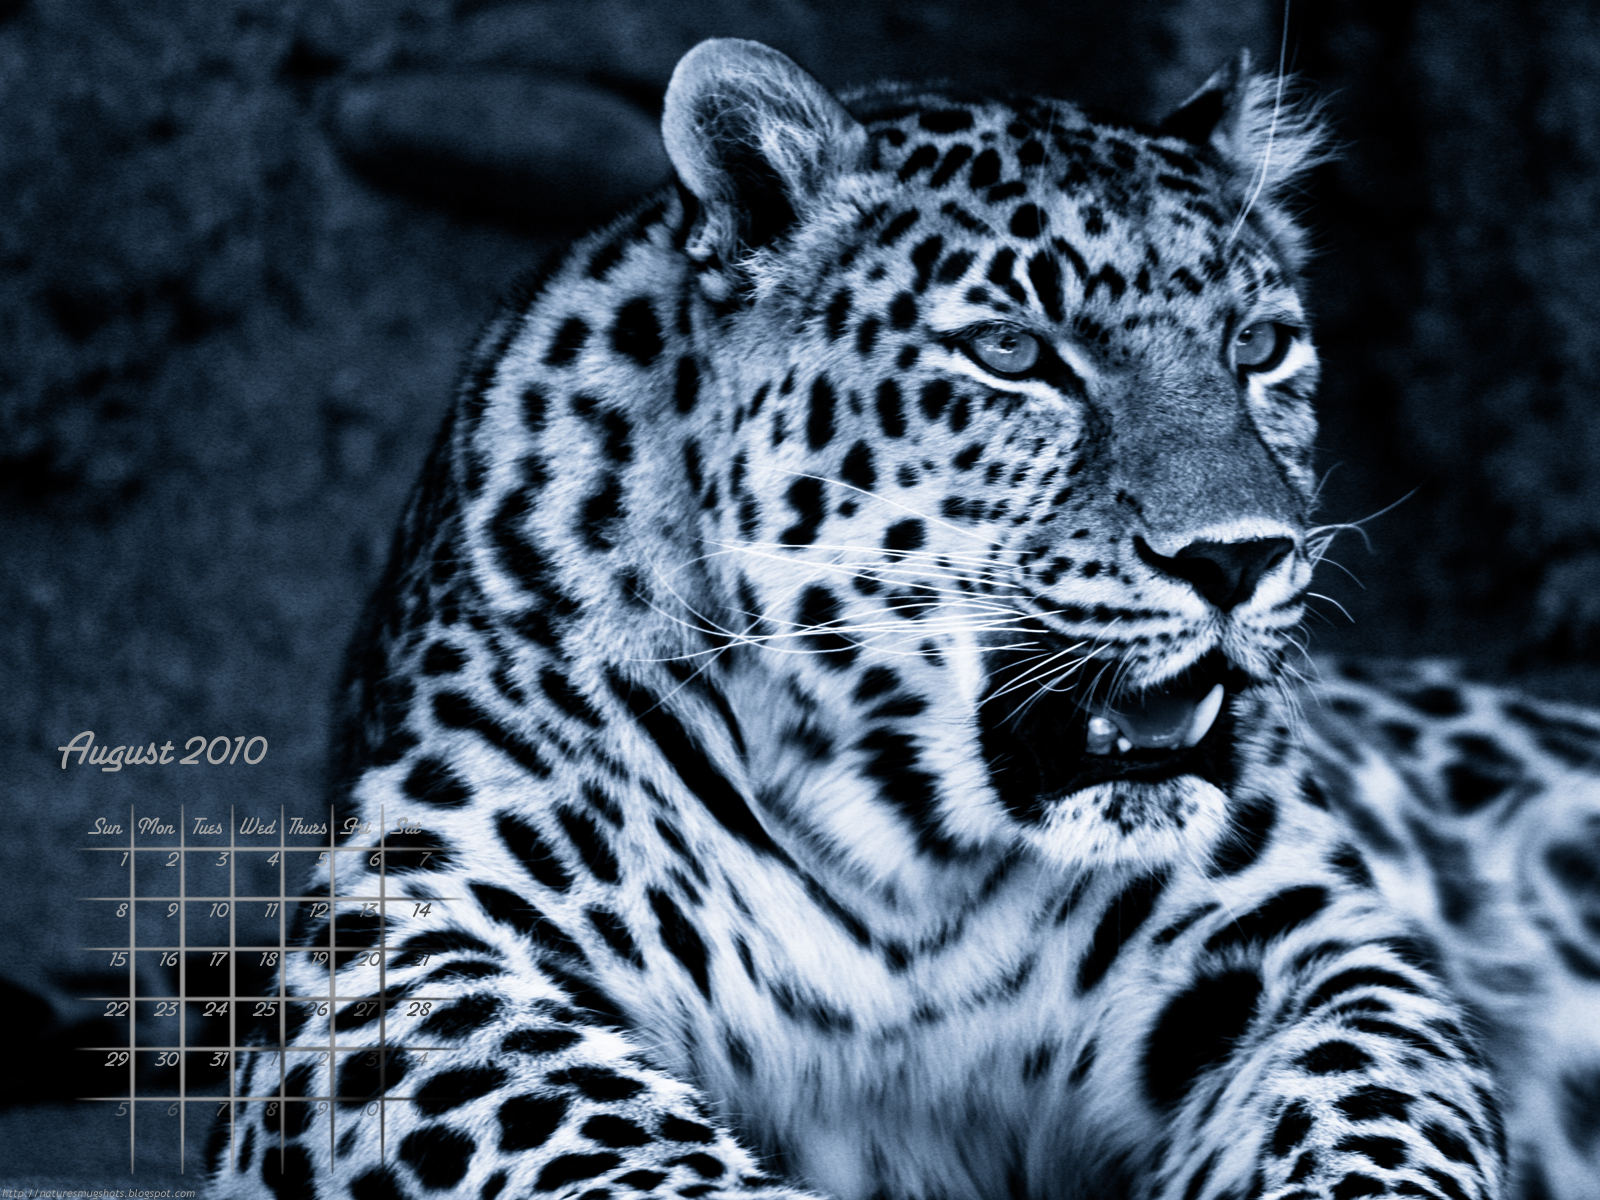
1600x1200
1920x1200
I apologize for those of you using the 1600x1200 aspect ratio version—neither black nor white turned out to be a good choice all the way through for the calendar part due to the spots on the leopard. I tried to make it look readable at least throughout the whole thing but it's not exactly pretty.
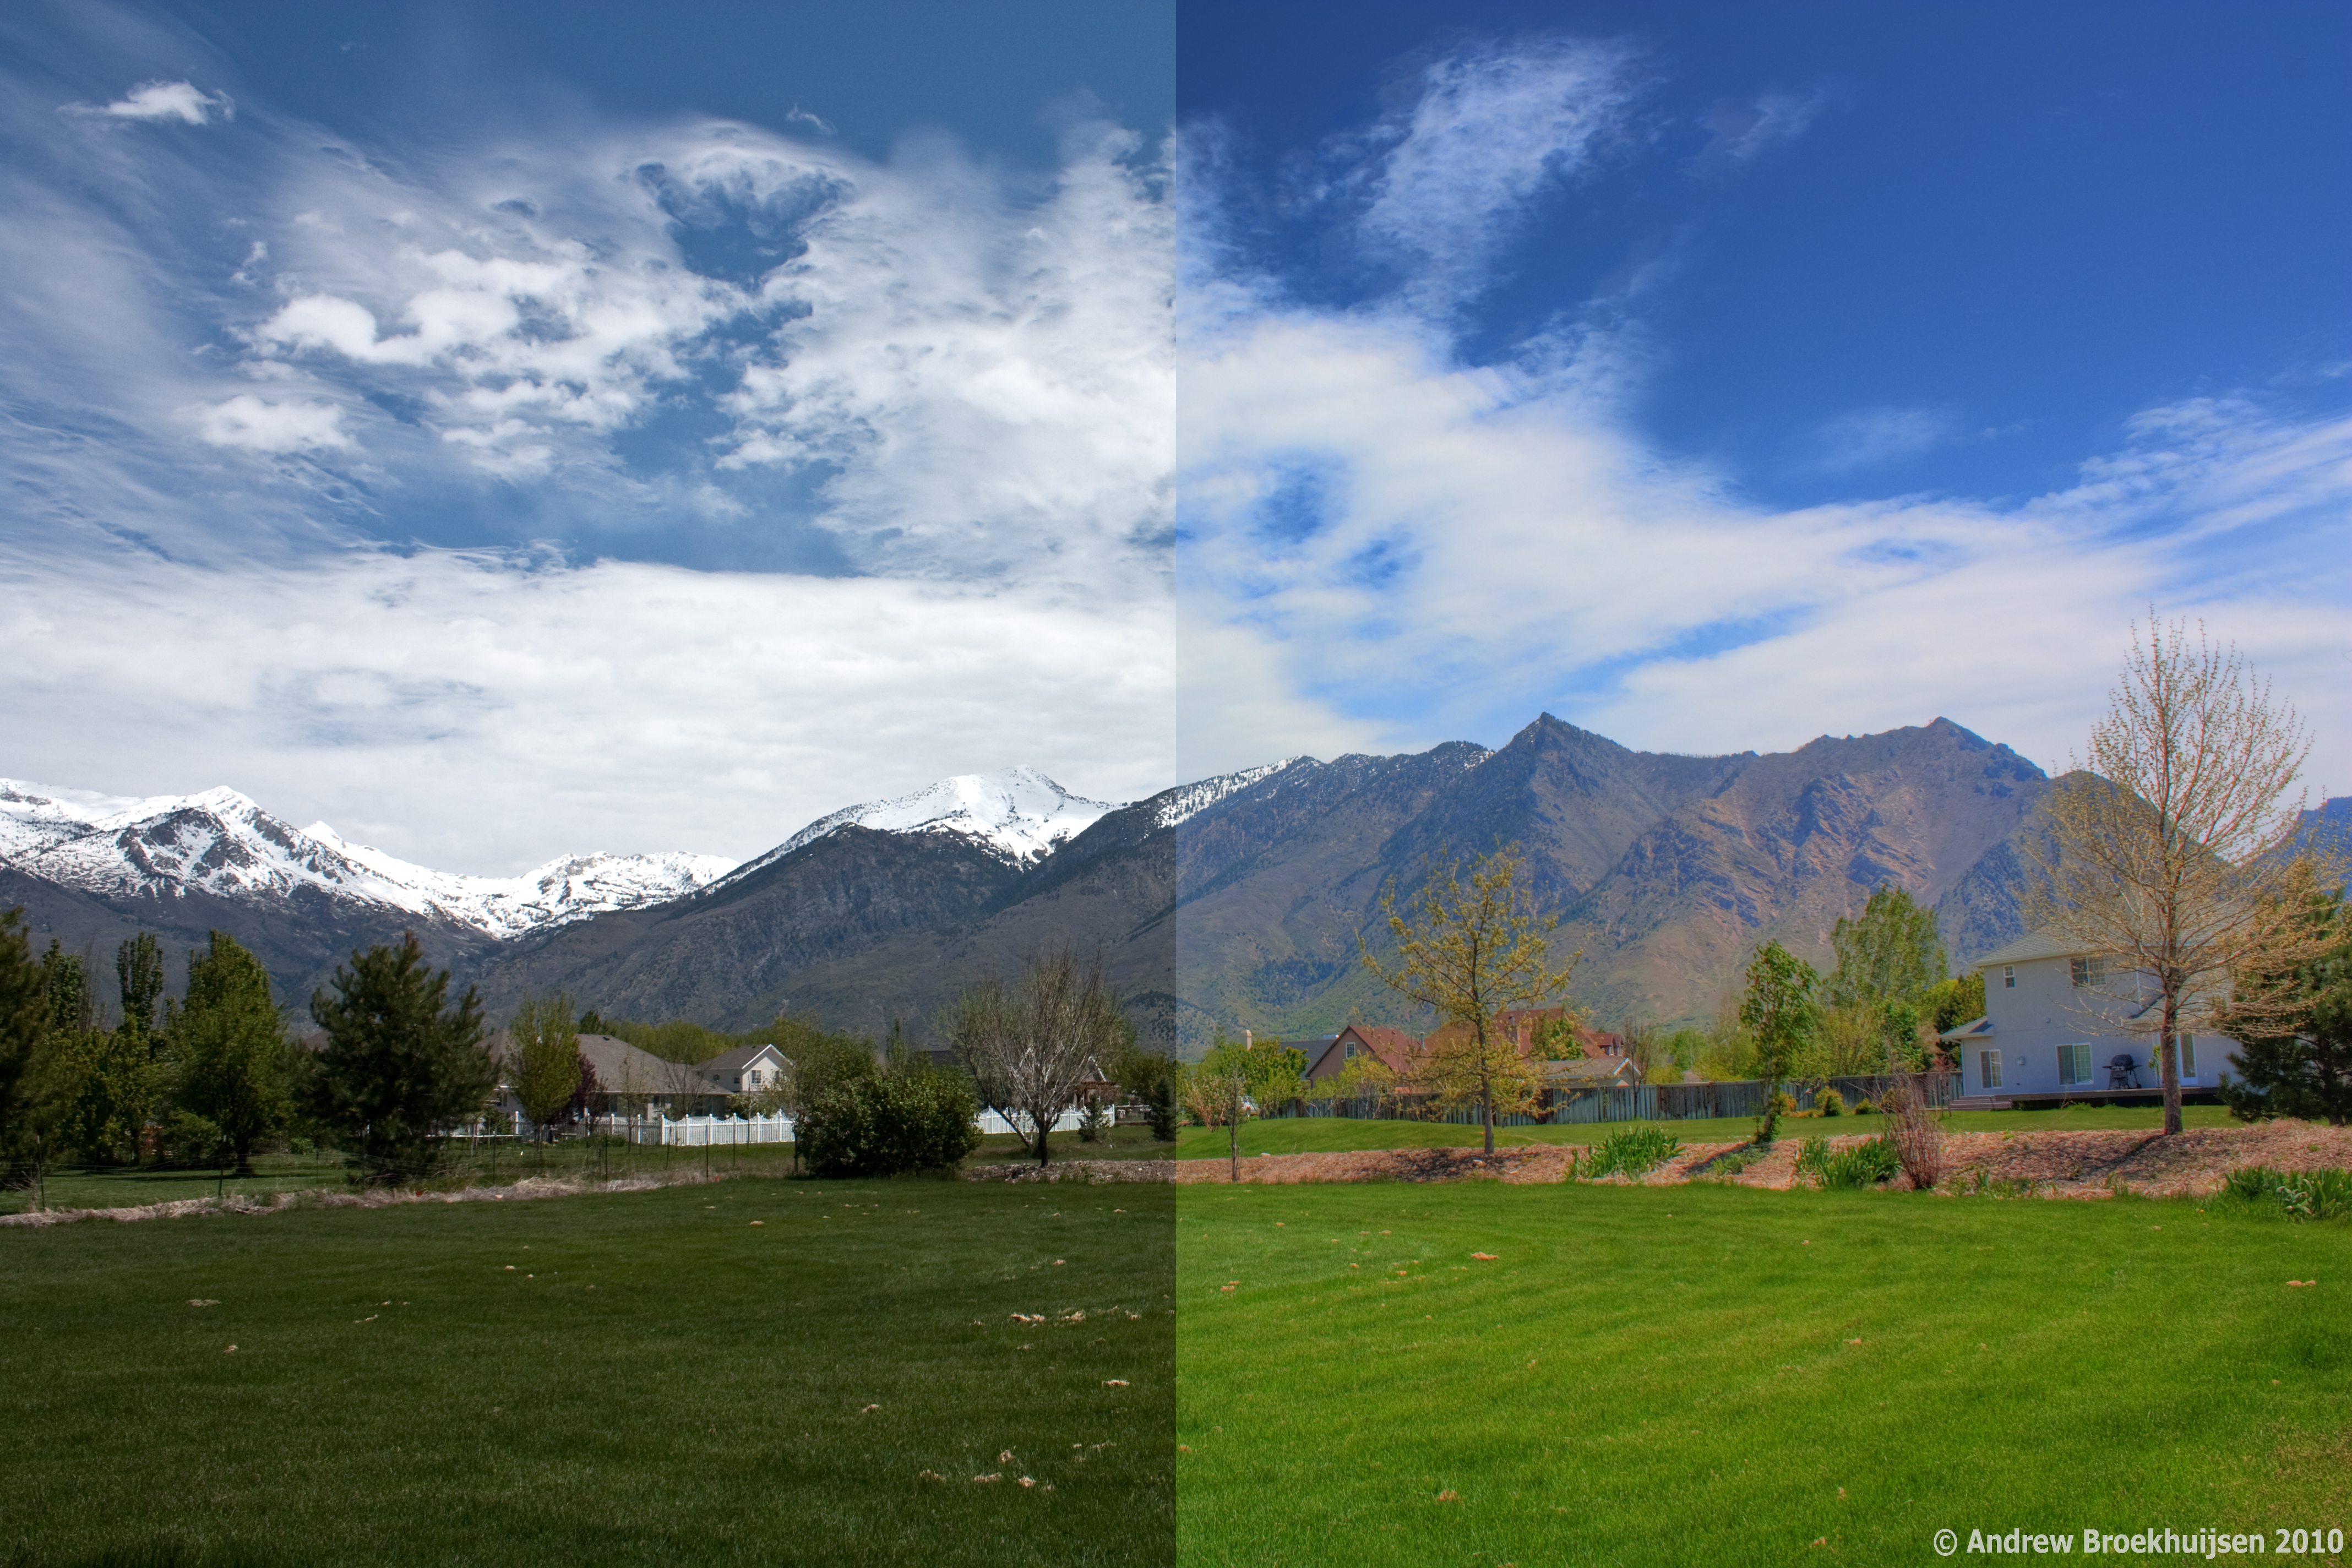
I know there are some "purists" (see "snobs") out there who refuse to do any post-processing on their work, claiming that any editing ruins what the scene really looked like, or is dishonest about portraying the photo, or any other number of pretentious reasons. Today I went to the zoo, and after editing one of my "keepers," it really drove home the point that editing can have a HUGE impact on the quality of a photo.
This isn't to say I support over-editing. There's definitely a line, and all too many people cross it. But those purists would have ended up with a shot looking like this, even if they were using regular (daylight balanced) film:
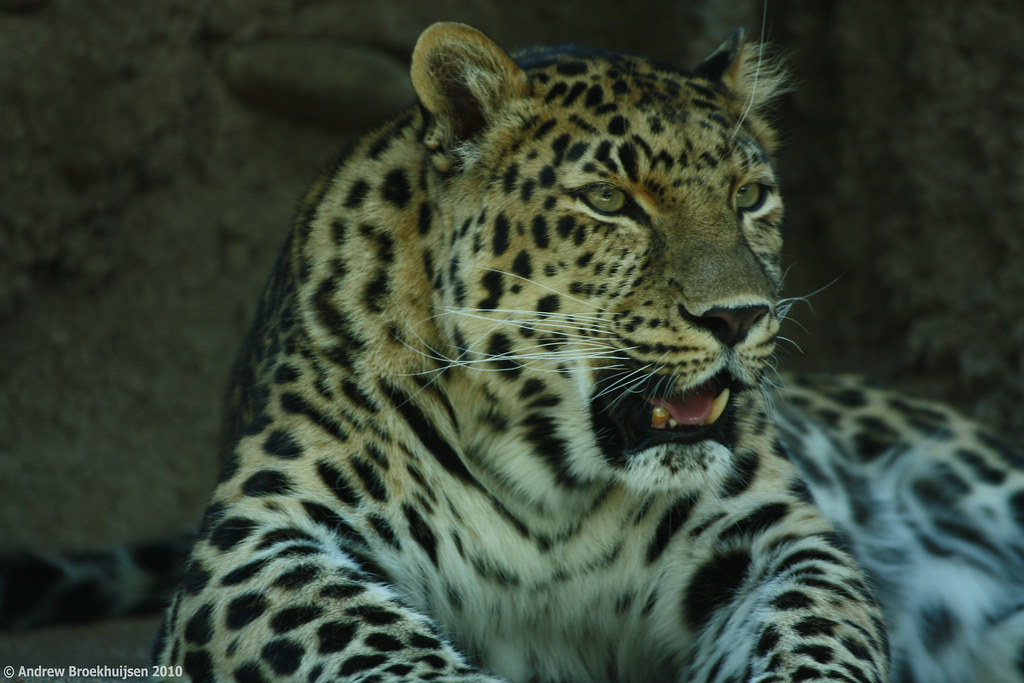
click to enlarge, or see it on Flickr
Aperture: f/5.6
Shutter Speed: 1/60
ISO: 200
Focal Length: 300mm
Monopod
Granted, it's not too bad of a shot. But the evidently fluorescent bulbs used to light the habitat gave off a pretty greenish tint which was very apparent with the white-balance set to "daylight." Also, because it was a moving subject and I didn't have time to make EV adjustments between shots, I underexposed by a bit.
Between fixing those things and other regular optimizations I do to every photo in Lightroom, I ended up with this:

click to enlarge, or see it on Flickr
Aperture: f/5.6
Shutter Speed: 1/60
ISO: 200
Focal Length: 300mm
Monopod
It's just a better photo now, thanks to regular editing techniques. Now for this photo, I actually took it a step further and cast the whole thing in a strong monochrome blue with added contrast to make it really punchy.

click to enlarge, or see it on Flickr
Aperture: f/5.6
Shutter Speed: 1/60
ISO: 200
Focal Length: 300mm
Monopod
In this case, I think this more extreme treatment works for the photo. However, it's somewhere on the line of "too much post-processing." I'm okay with that as I have a "regular" version to call the photo. This isn't so much a photo as a creative manipulation of a photo. I wouldn't say either of the two images is "better," they're just different.
Feel free to share your own thoughts on post-processing in the comments.
Also, for those of you who noticed/cared, I did switch the links on the images back to a large version of the photo rather than a full-res version. If you want to view the full-res version, just go to it via my Flickr link.
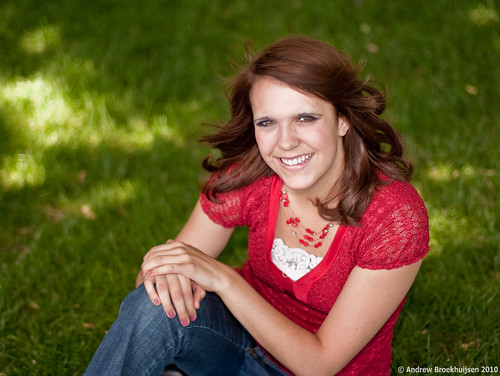
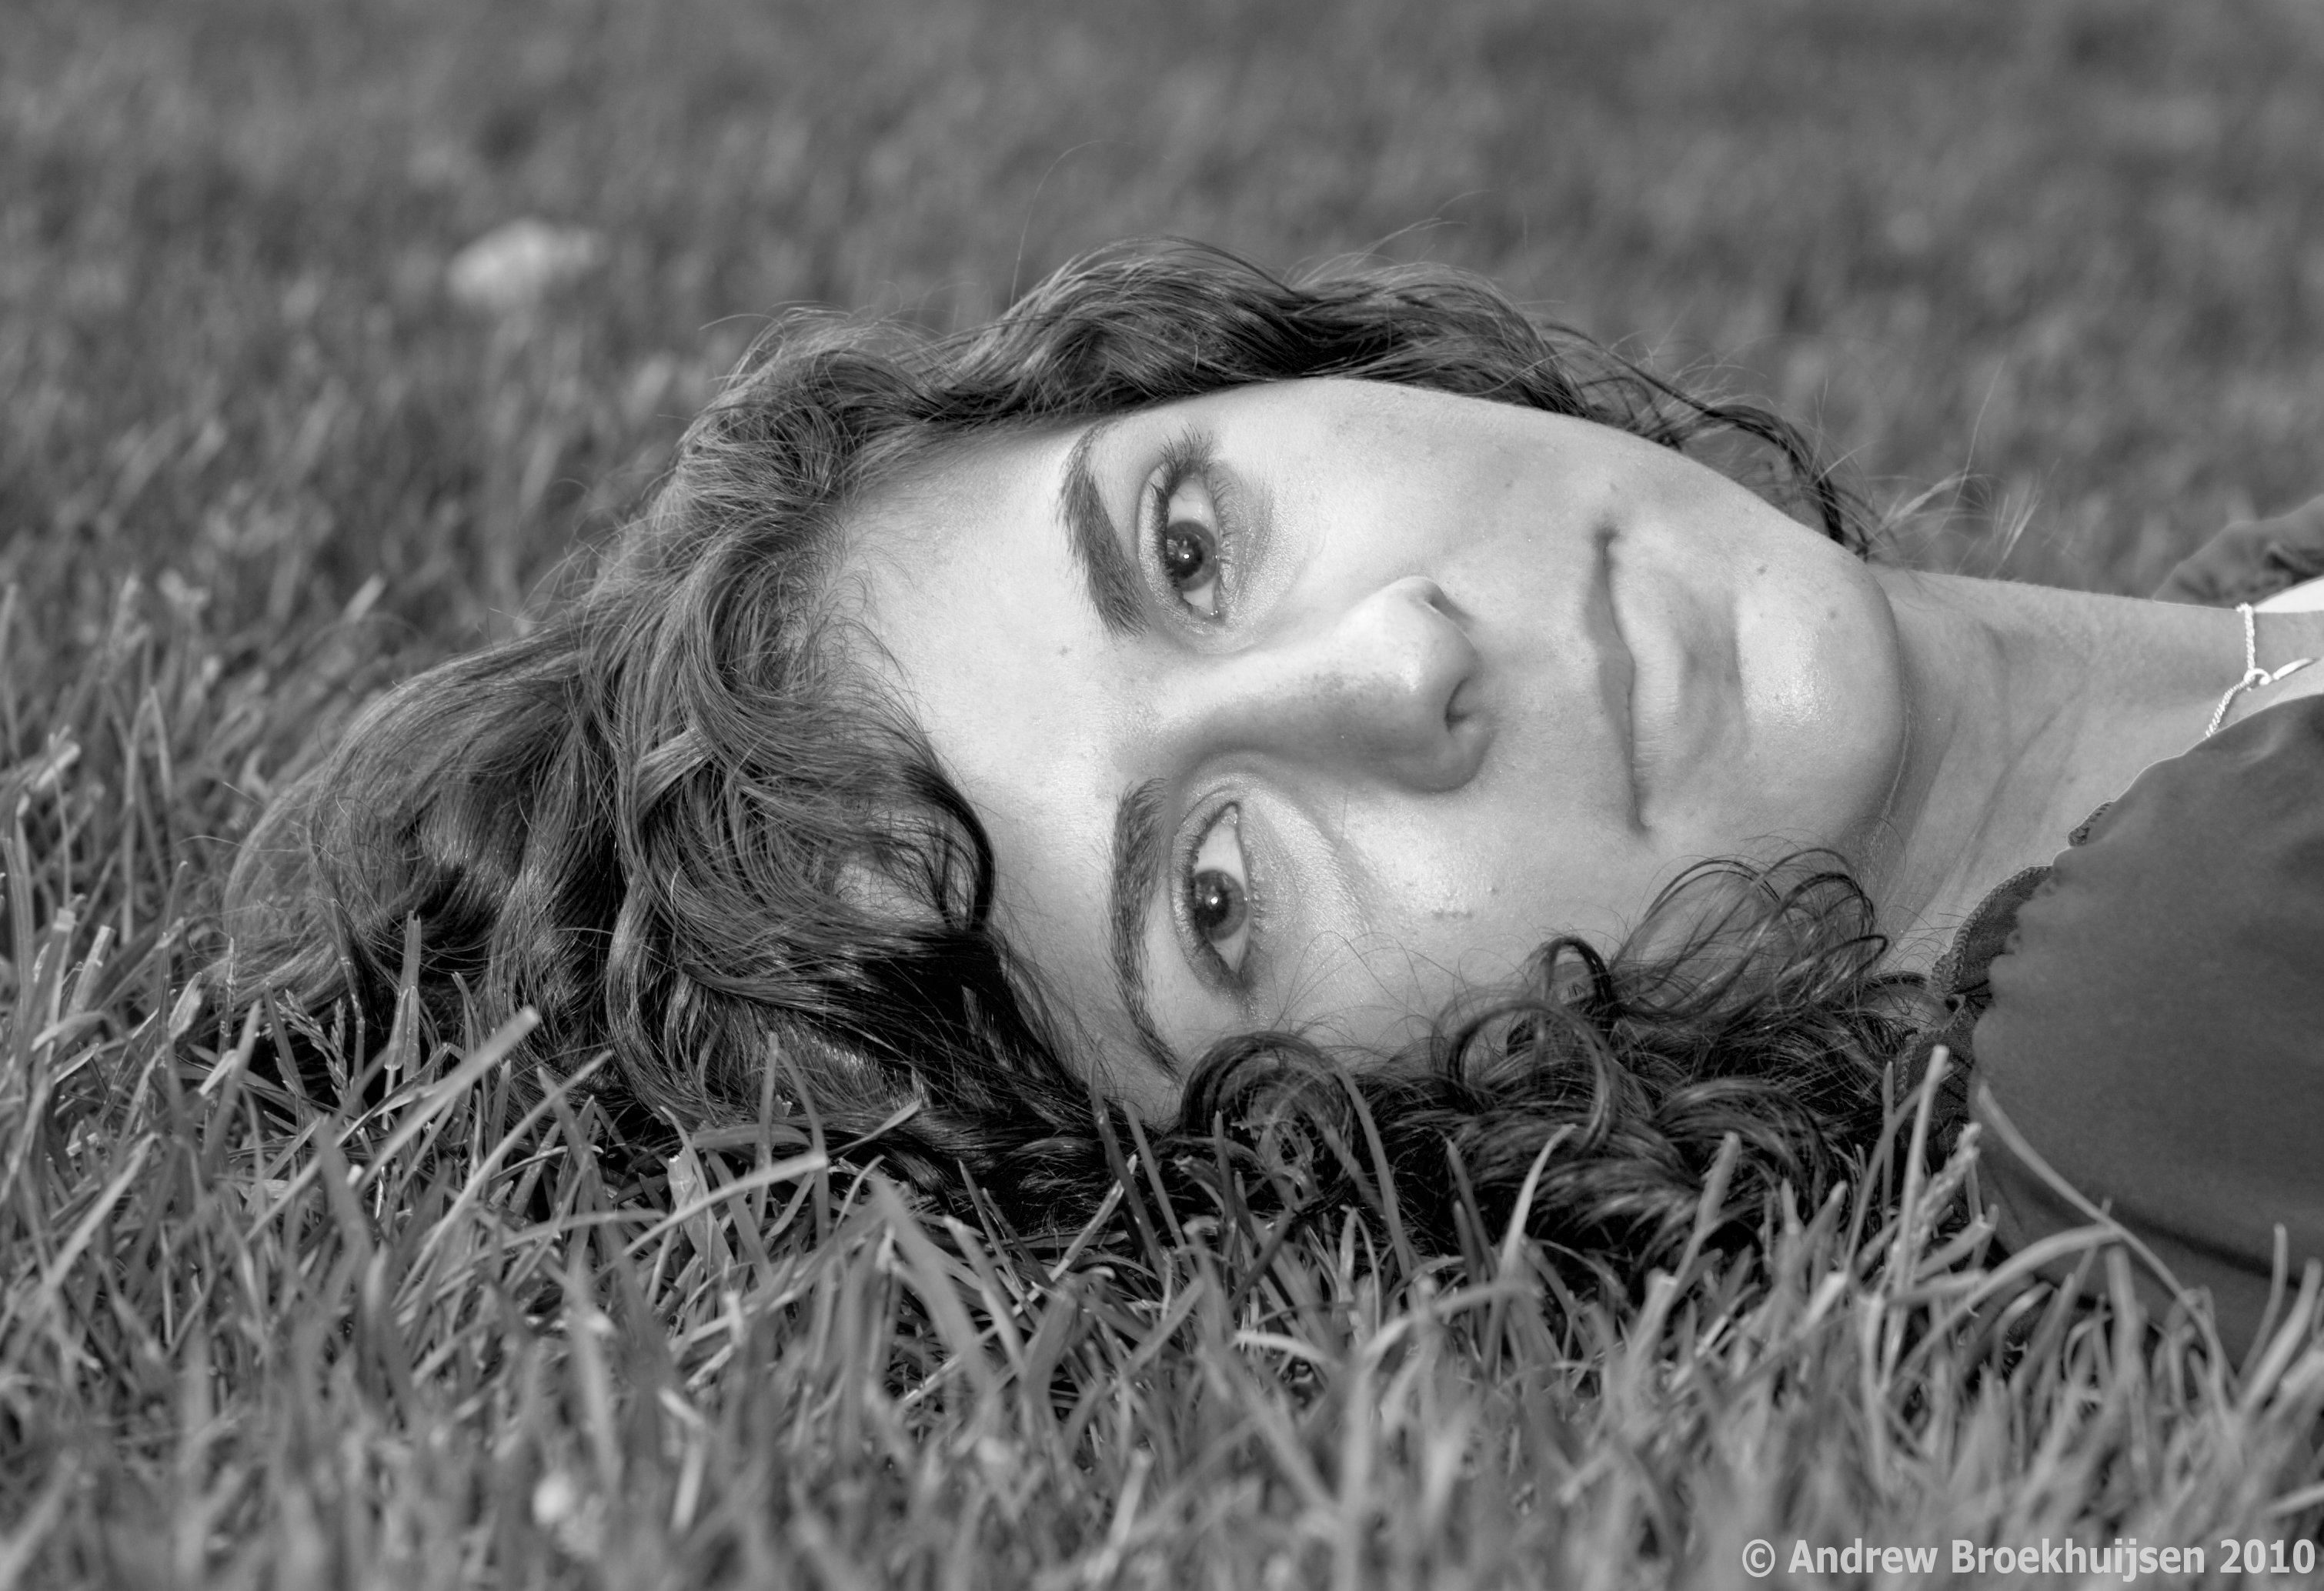
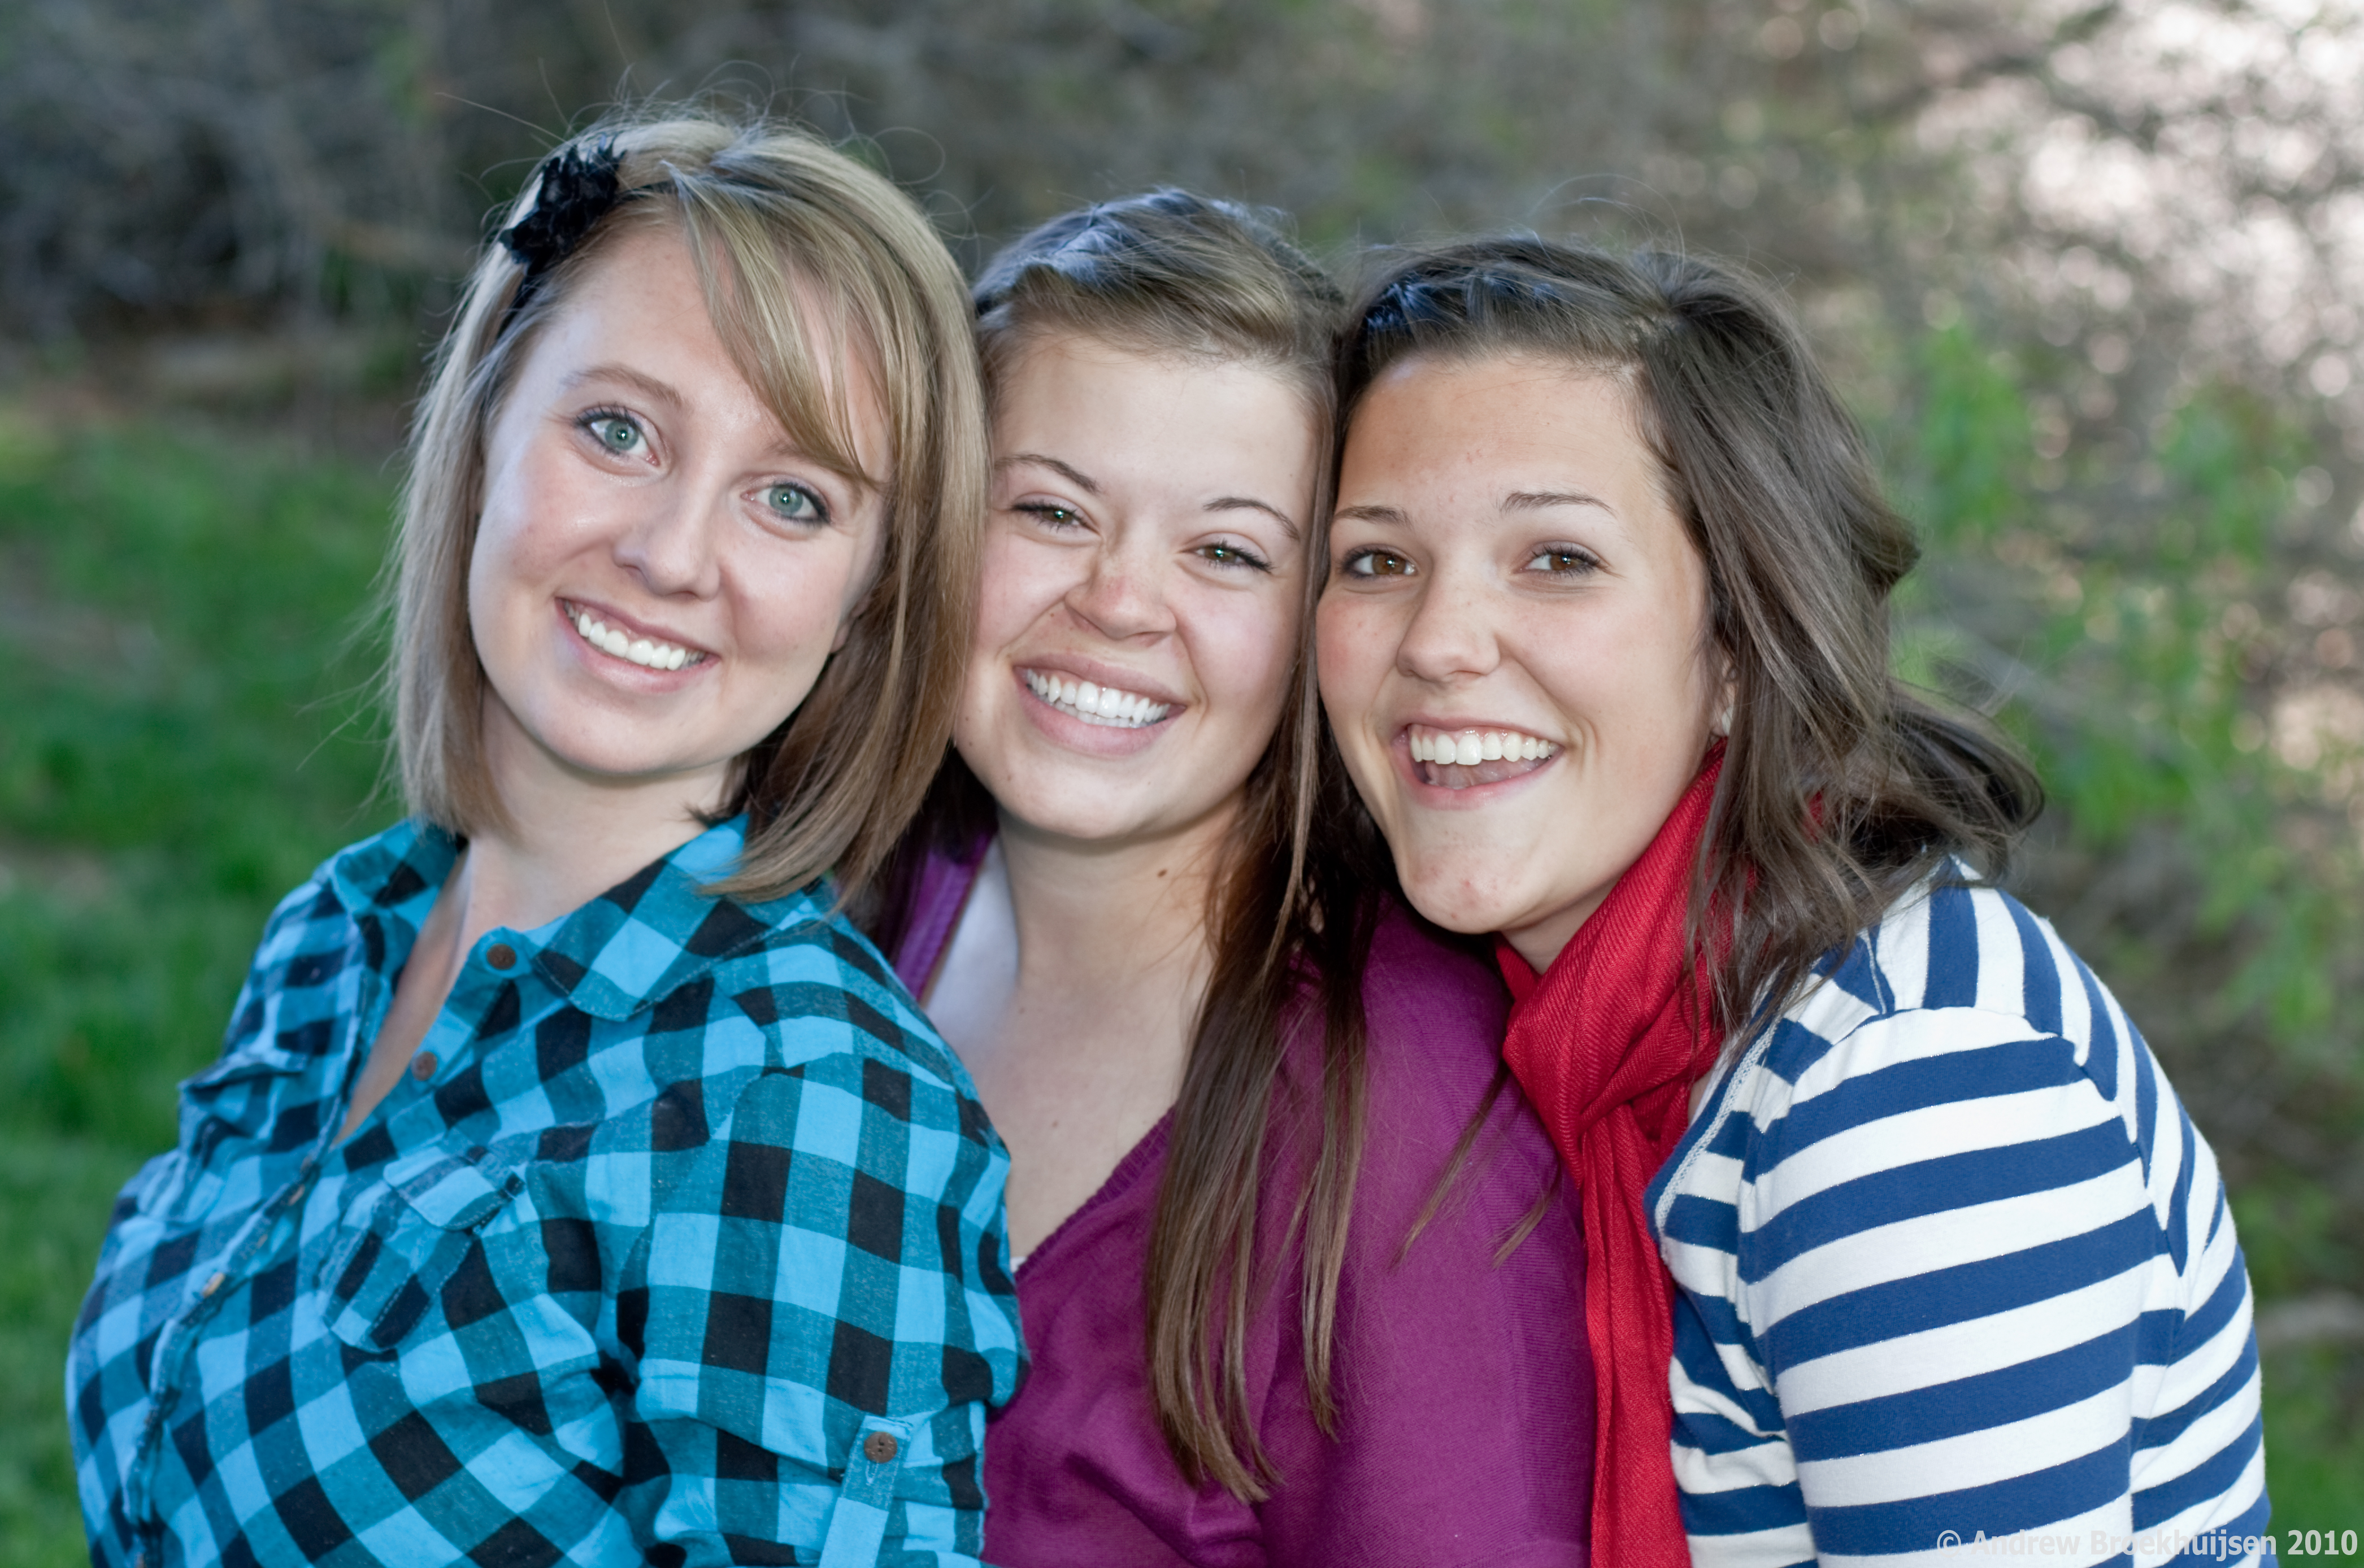
Oftentimes at work when there are no customers, I find myself reading books about stuff like studio lighting, Lightroom and Photoshop techniques, etc. Today I learned about adjustment brushes in Lightroom. I kind of already knew they existed, but just figured there wasn't much point to learning how to use them when I could do all the same stuff in Photoshop, and more easily.
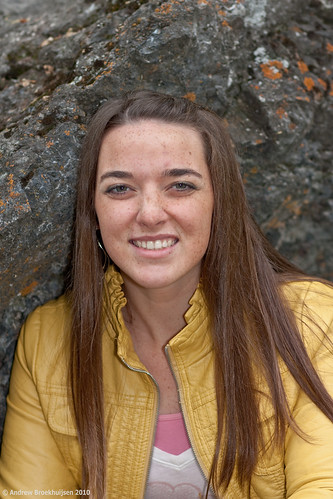
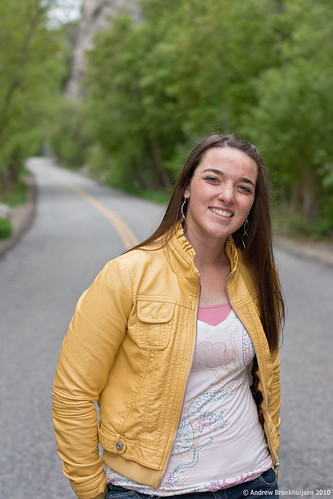
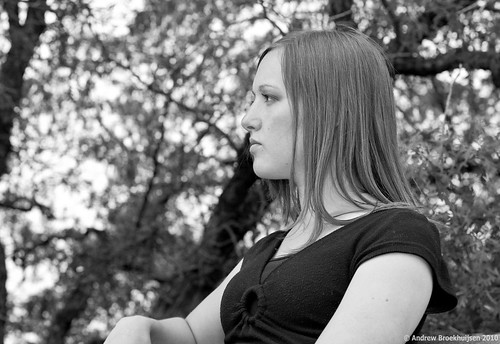
Anyway, I was wrong. Between adjustment brushes and a few other tricks I read up on, I was able to revisit a portrait I did of my friend Linnea (one of the photos from this post) and make VAST improvements on the final product. See for yourself:
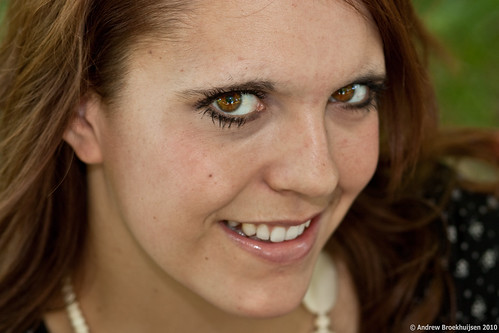
click to enlarge, or see it on Flickr
Aperture: f/4
Shutter Speed: 1/30
ISO: 100
Focal Length: 85mm
Tripod
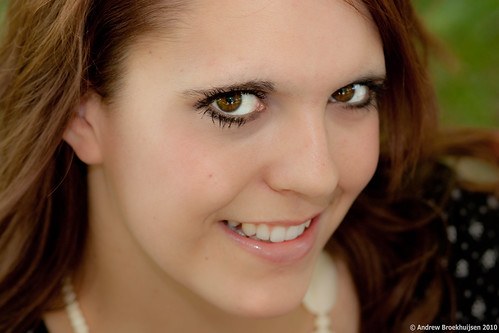
click to enlarge, or see it on Flickr Aperture: f/4
Shutter Speed: 1/30
ISO: 100
Focal Length: 85mm
Tripod
The first one looks good. But the second really crosses a few lines into looking more professional, in my opinion. The irises are more saturated, the whites of the eyes are brighter and cleaner, the overall exposure is more pleasant, the skin tones are just right, the browns in the hair are more pronounced, the portrait is sharper where it should be sharp and softer where it should be soft. I would like to take a moment and personally thank Adobe for making such delicious, relatively automatic skin retouching features that make everyone look like a model with perfect skin.
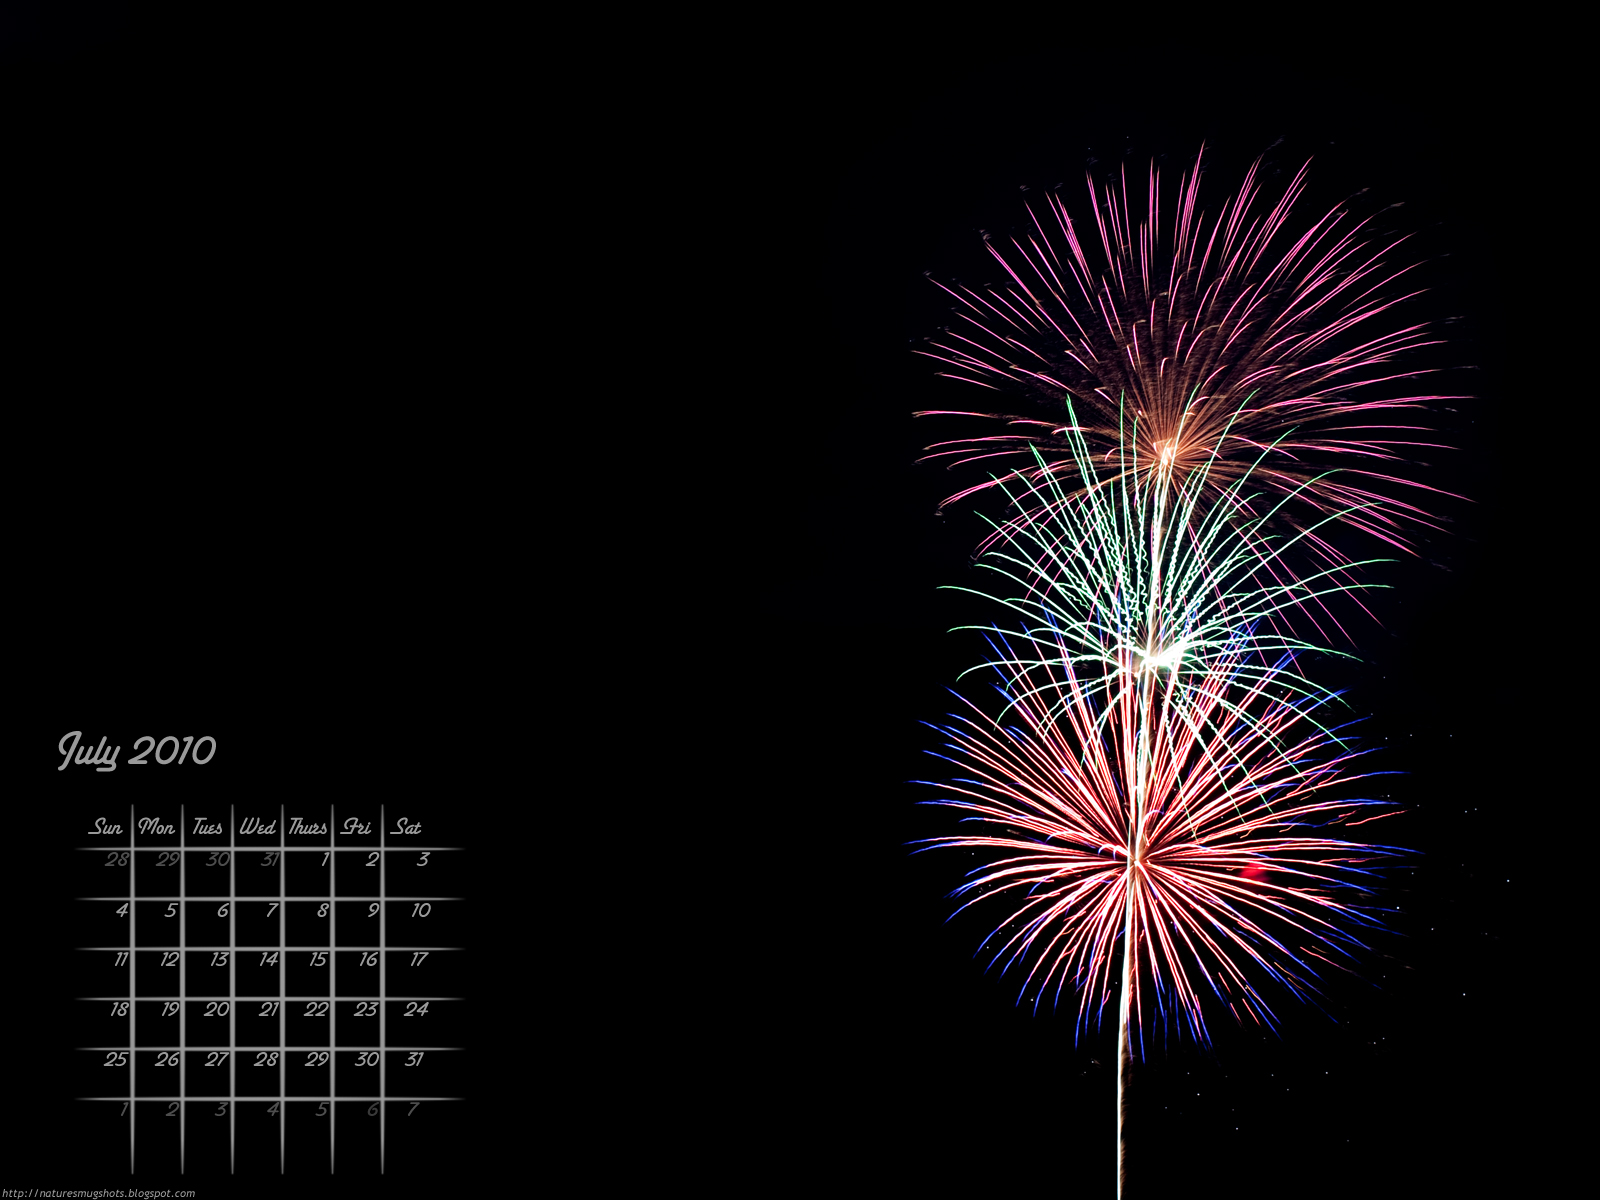
Sorry it's so late. I was determined to have fireworks for the calendar, and it took me longer than I thought to find some and photograph them.
Anyway, you know the drill. Share with your friends or whoever.

1600x1200
Happy July!
Just got back from a week long vacation in Stanley, Idaho, as well as camping for a family reunion. Which is why I still don't have the July calendar up yet. Luckily, I did shoot some fireworks in Stanley, so I'll probably put it up tomorrow.
Stanley is a beautiful area. I think I have more shots that turned out well, but these two were the first to immediately grab my attention after I dumped my memory card. Thank goodness for polarizers... now I just need a wide-angle lens that has better optics than my kit. Which would be virtually any other wide-angle lens. Wide angle lenses are expensive though. So for now, I'll settle for the kit.
click to enlarge, or see it on Flickr
Aperture: f/22
Shutter Speed: 1 second
ISO: 100
Focal Length: 18mm
Tripod
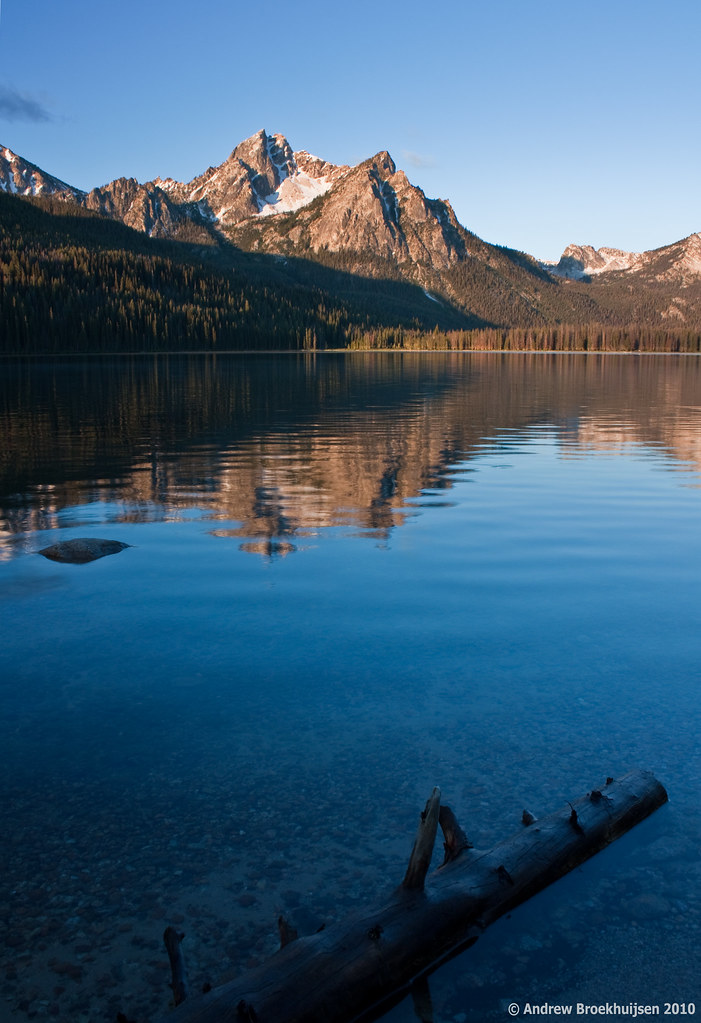
click to enlarge, or see it on Flickr
Aperture: f/10
Shutter Speed: 1/5
ISO: 100
Focal Length: 18mm
Tripod
I'm a little disappointed in the depth-of-field on the second one. Should have gone narrower than f/10; the mountains are not crisply in focus. Guess I won't be printing that one as a 30x40.
More to come as I find more time to dig through the photos in the last card dump. And I'll try to remember to get that calendar up tomorrow as well.
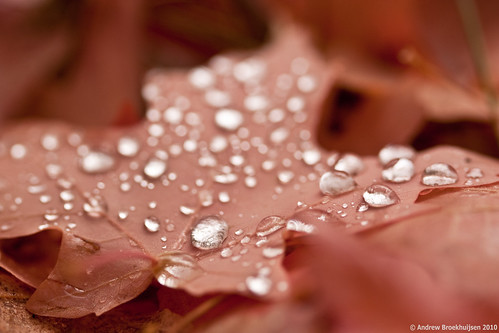
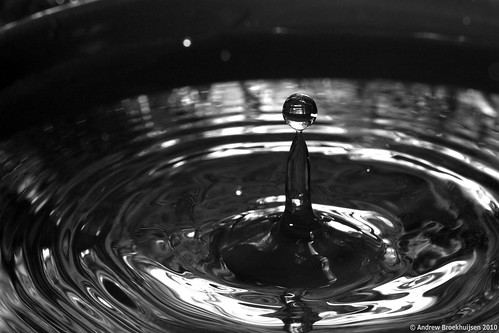
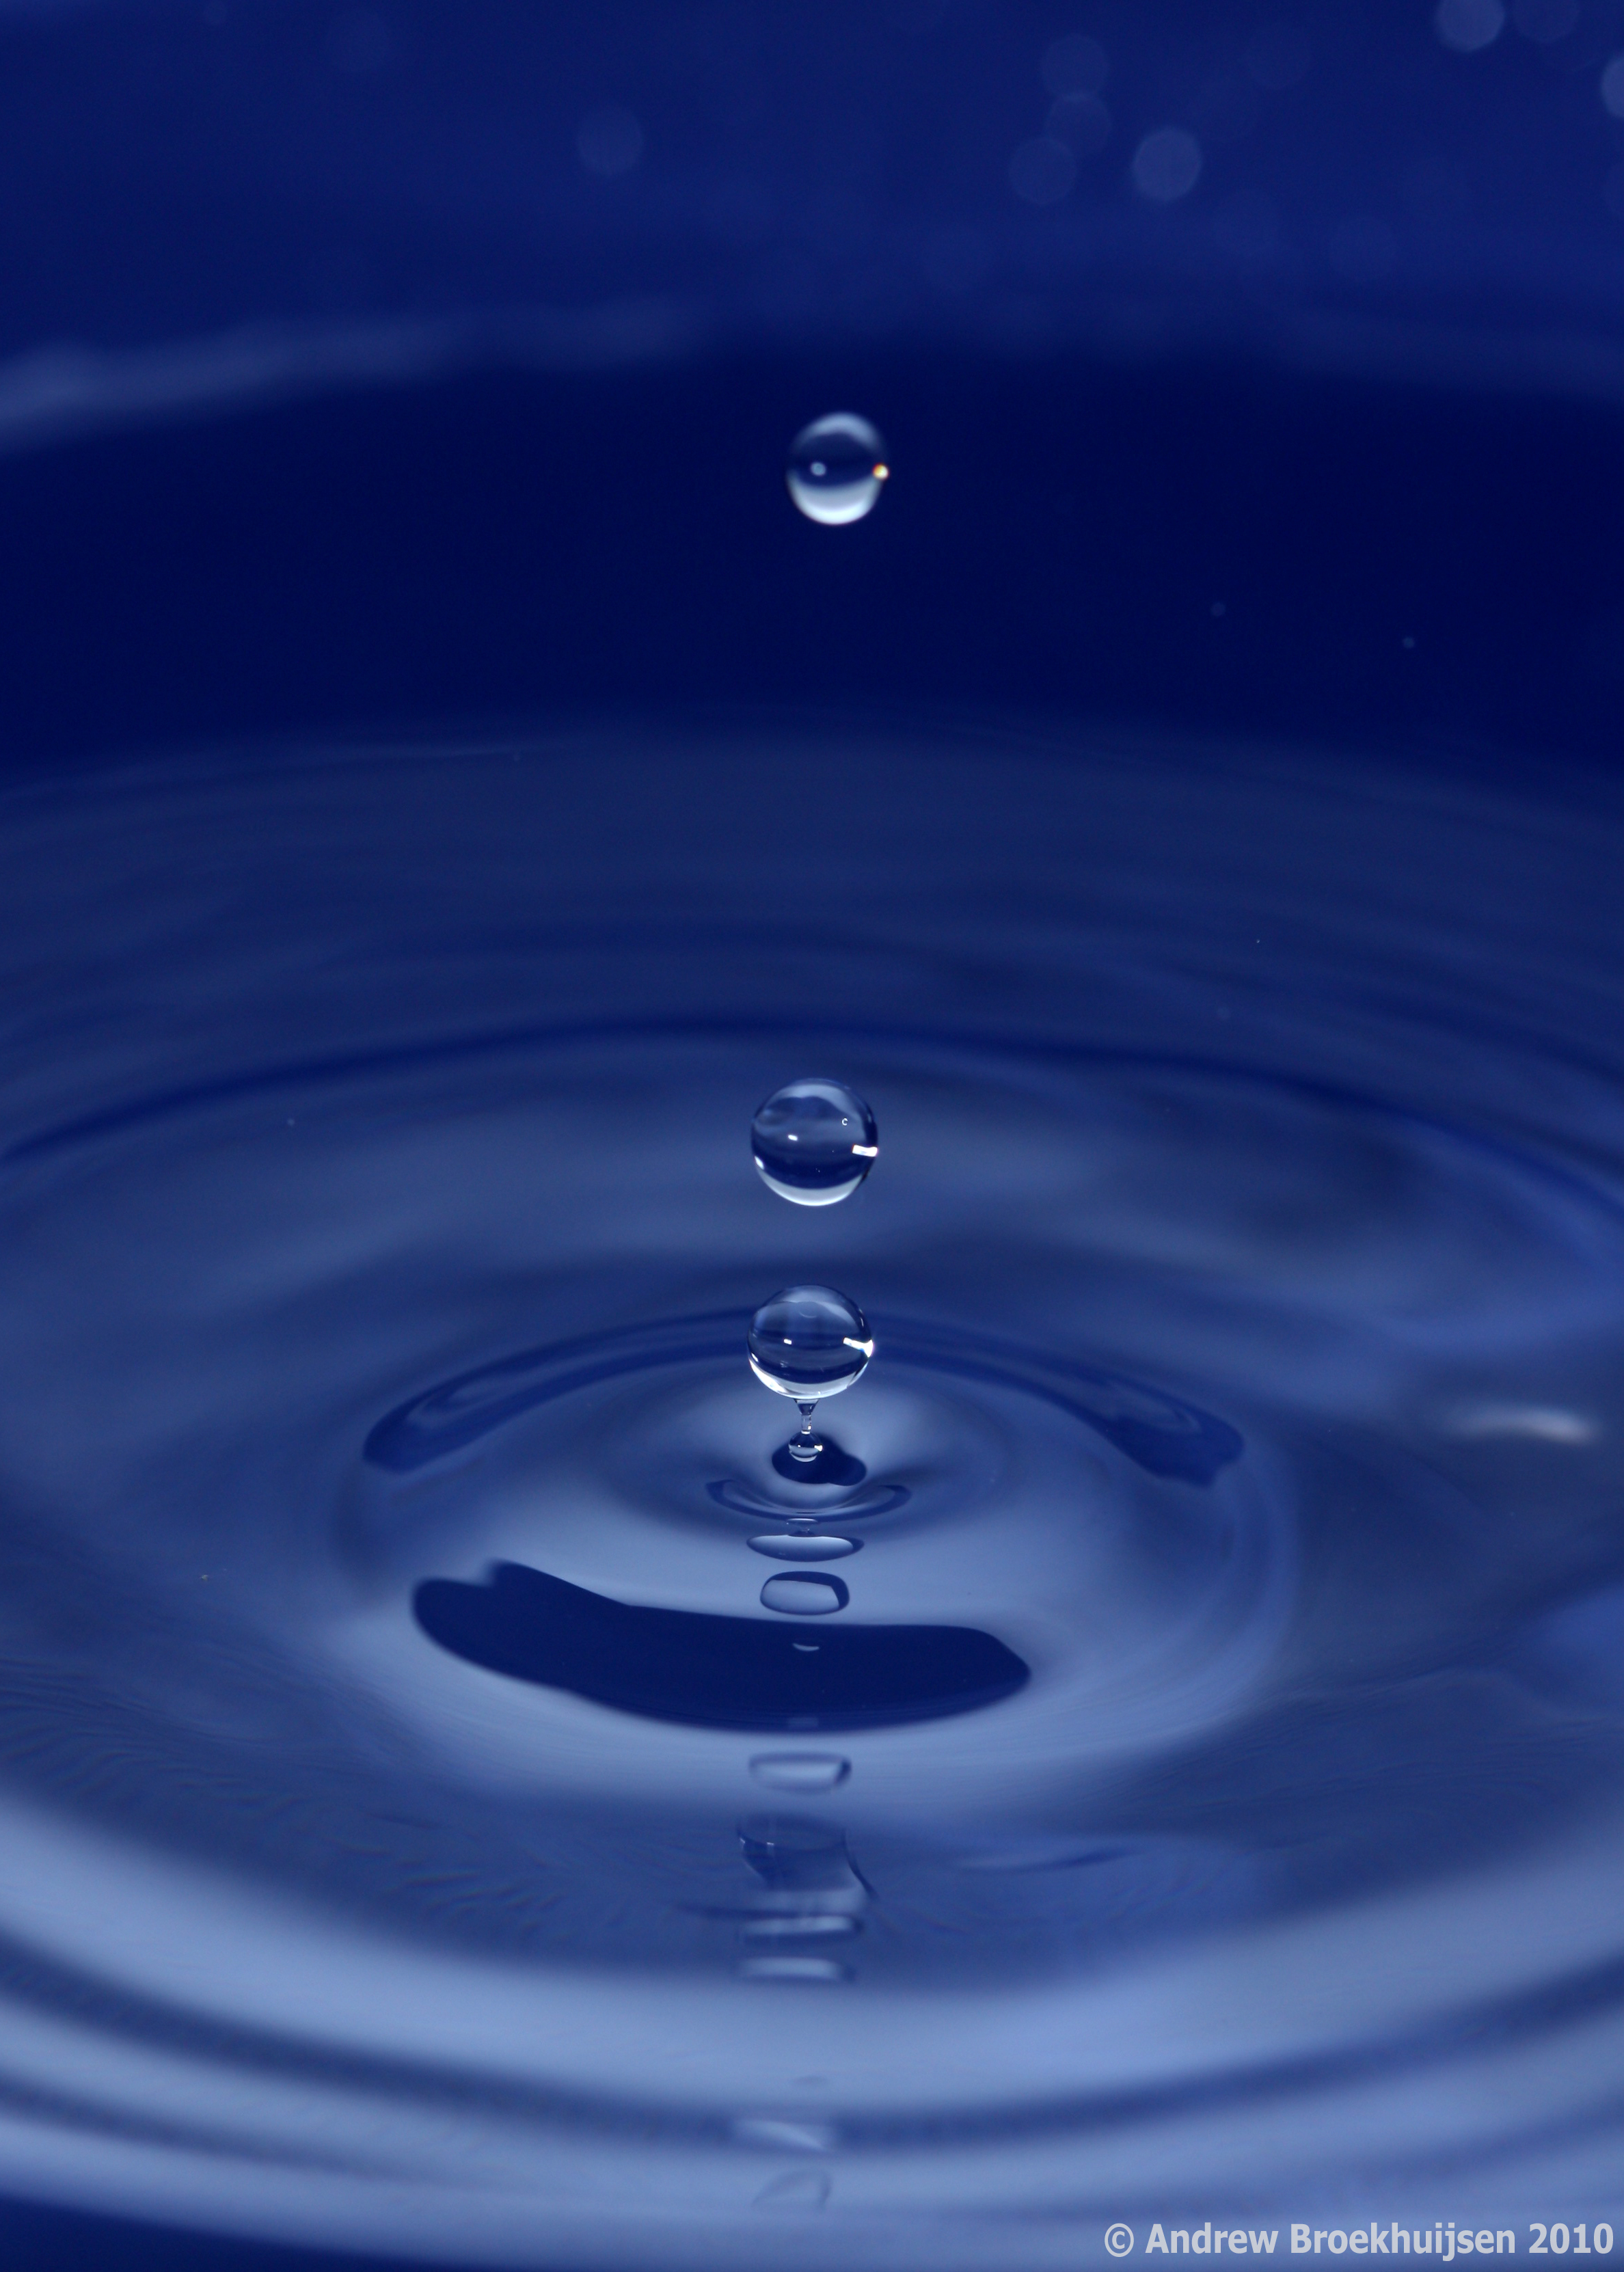
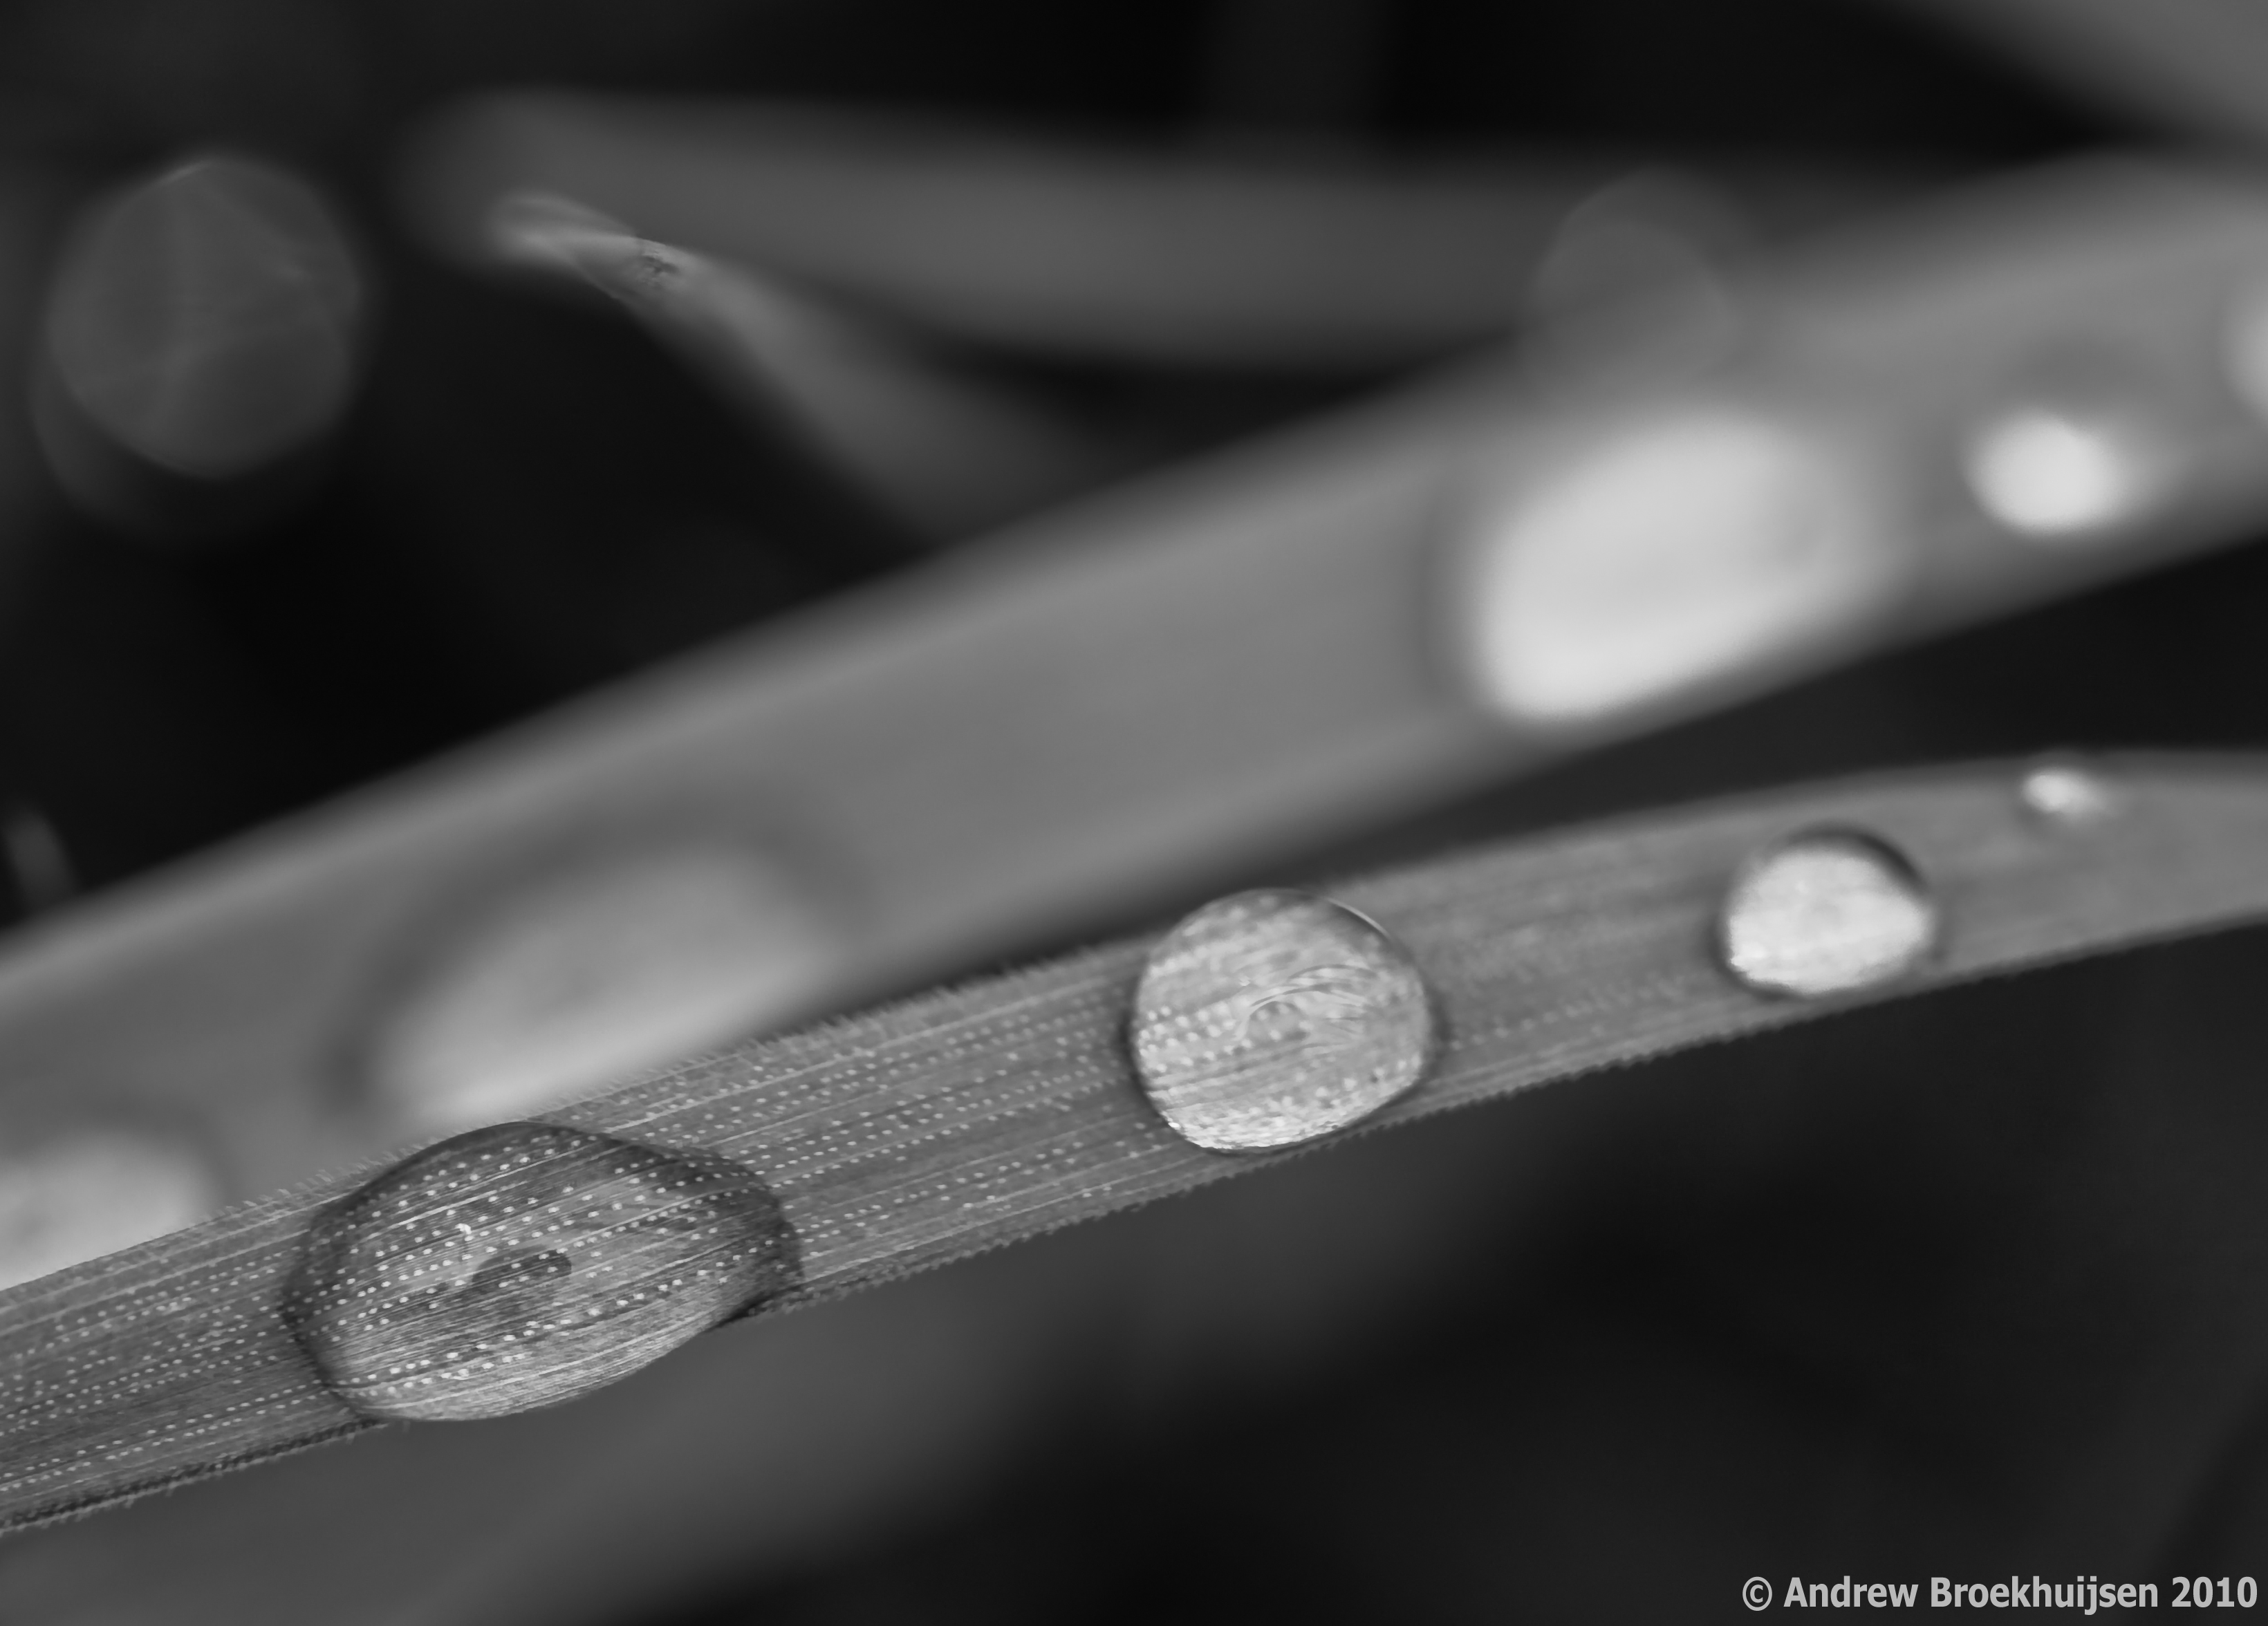
I did a little reading, and it turns out external flashes don't actually get brighter or dimmer. How a flash simulates getting brighter and dimmer (how it adjusts its "power" output) is actually by staying on for an infinitesimally longer or shorter period of time. So if the flash is your only effective light source (your shutter isn't letting in really any ambient light at ISO 100, inside, 1/200th of a second shutter, and f/10), your effective "shutter speed" is much faster than a camera is really capable of. So when my dad's 580EX Speedlite is set at 1/16th power, for instance, I have an effective shutter speed of 1/11000th of a second. Perfect for freezing REALLY fast-moving objects.
Like water droplets.

click to enlarge, or see it on Flickr
Aperture: f/7.1
Shutter Speed: 1/200 (effective: 1/11000)
ISO: 100
Focal Length: 100mm
Tripod
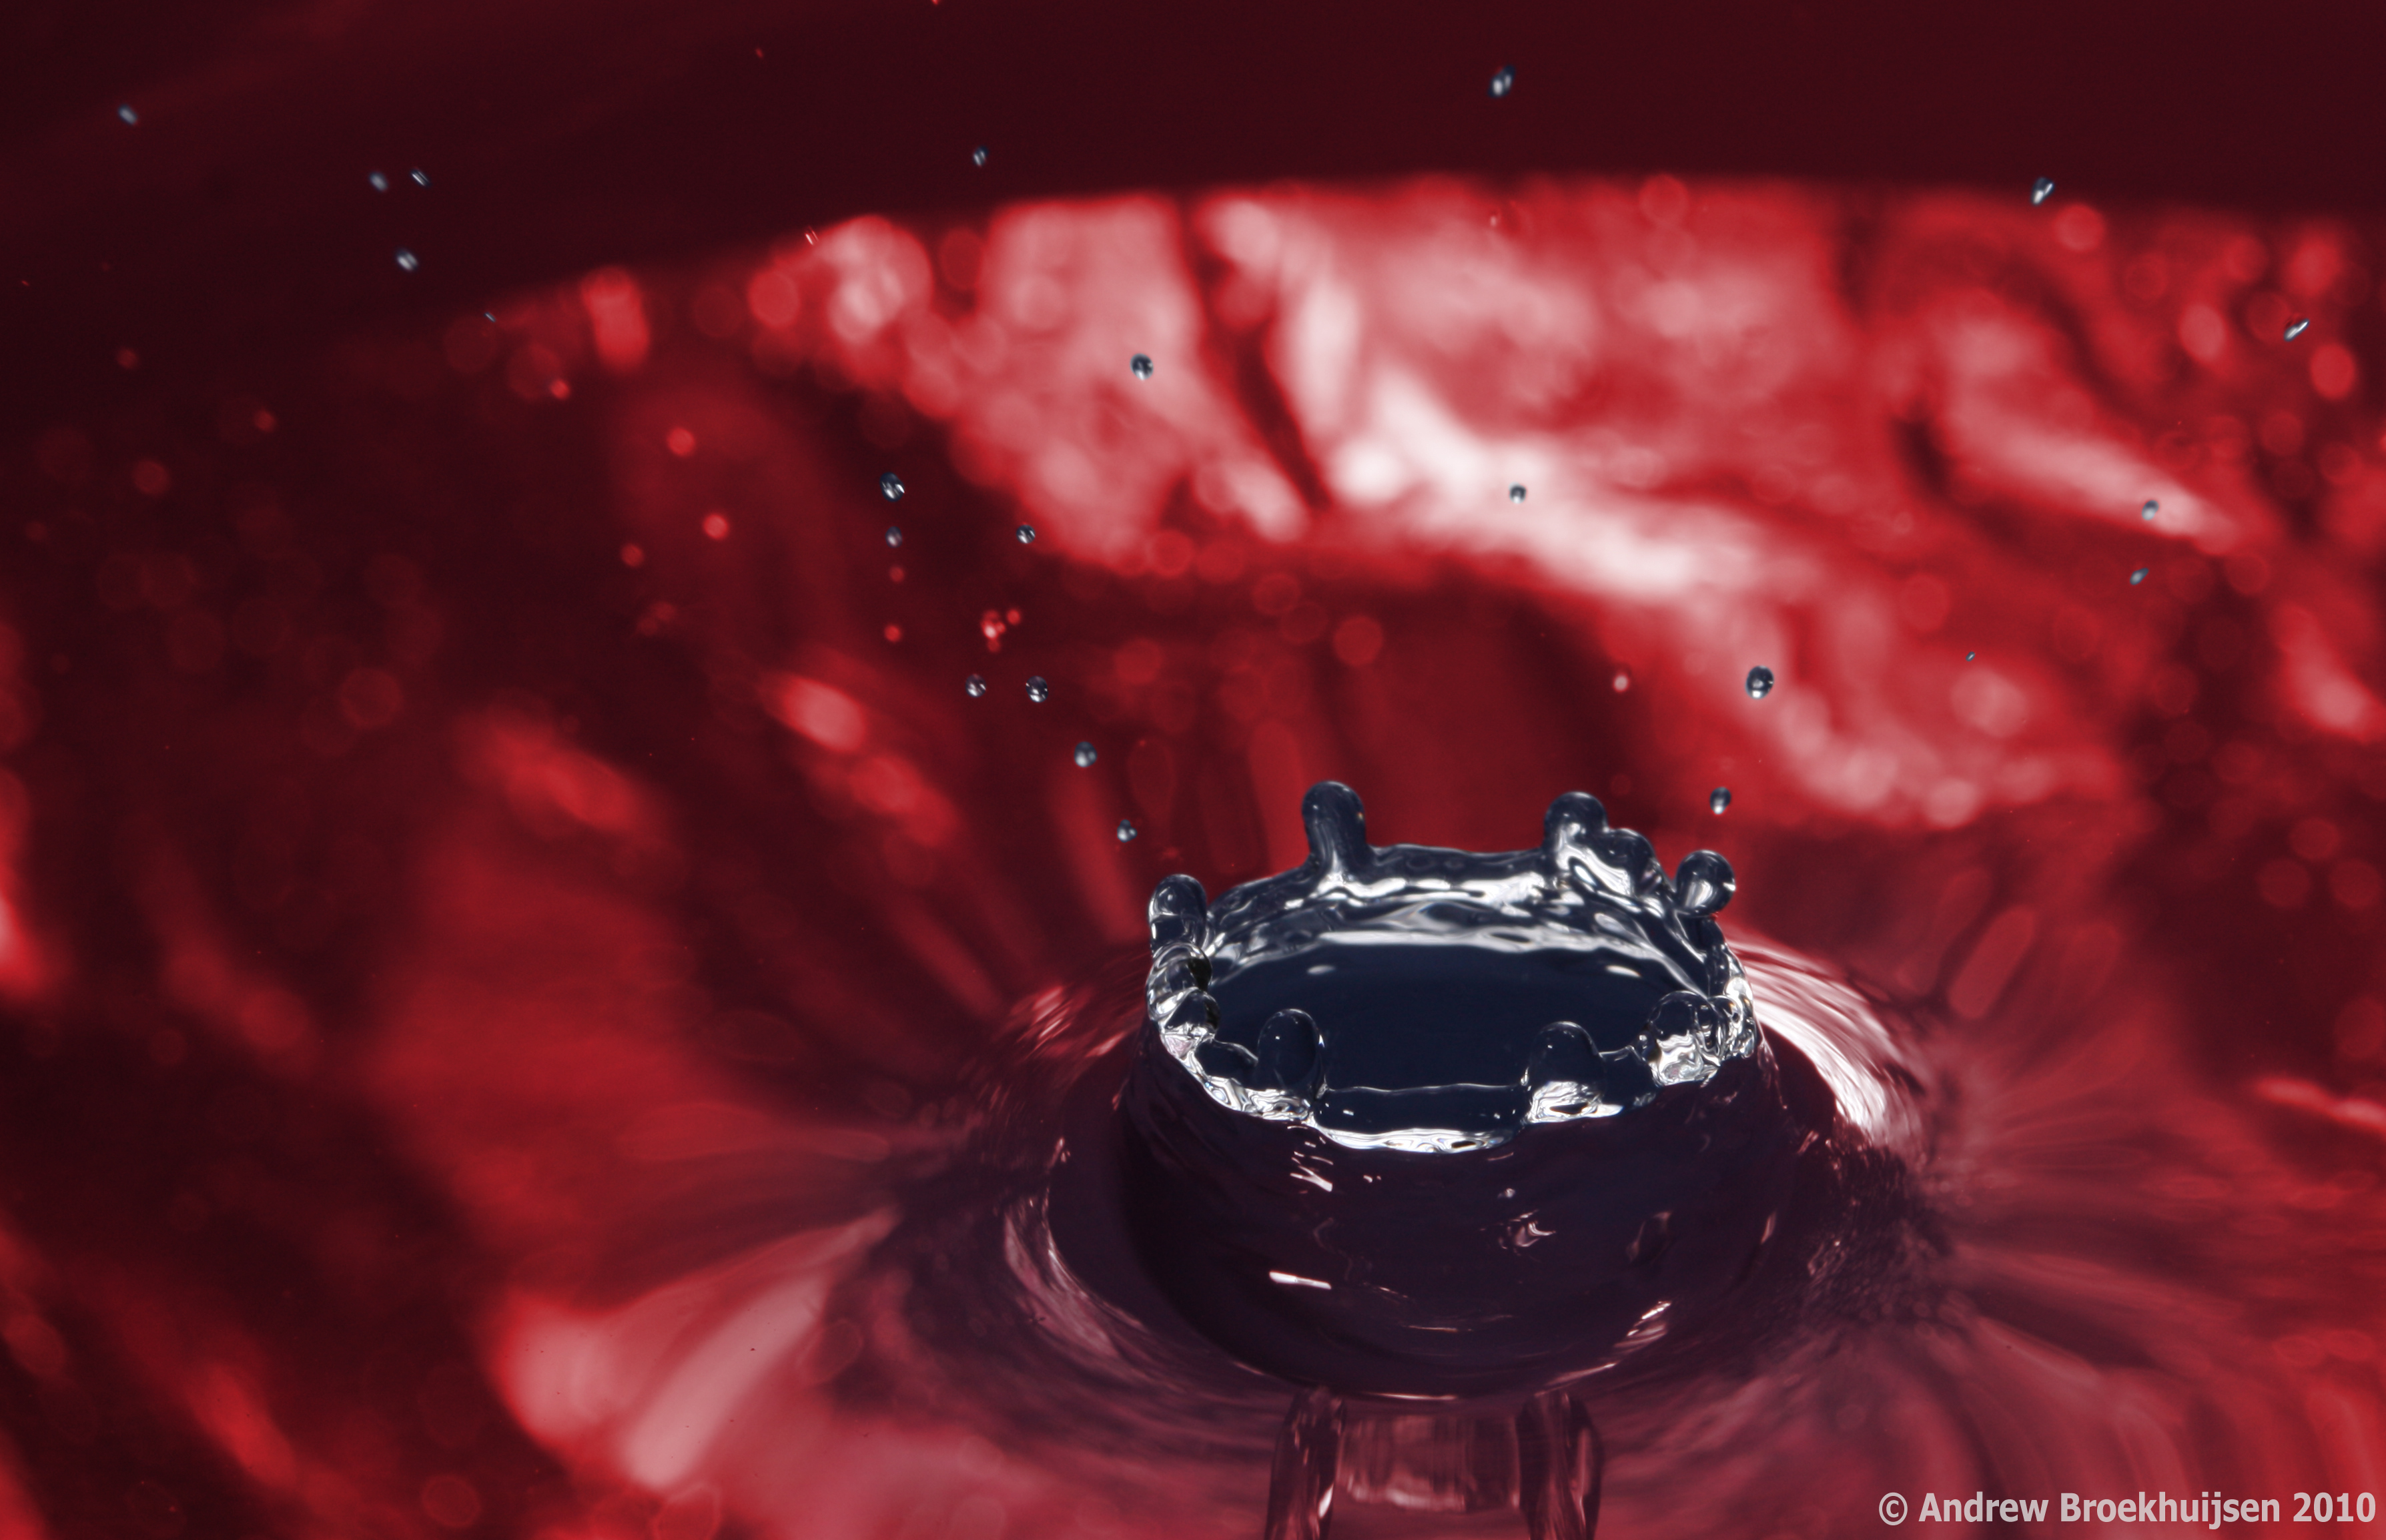
click to enlarge, or see it on Flickr
Aperture: f/13
Shutter Speed: 1/200 (effective: 1/11000)
ISO: 100
Focal Length: 100mm
Tripod

click to enlarge, or see it on Flickr
Aperture: f/13
Shutter Speed: 1/200 (effective: 1/11000)
ISO: 100
Focal Length: 100mm
Tripod
The first was shot in "Tungsten" white-balance, which casts it quite blue. The second was shot in "Sun" white-balance, which is pretty much irrelevant as I converted it to monochrome. The third was shot in "Sun" as well, but I played with it for fun in Photoshop using a few masks and recolor layers.
One thing I found interesting was that in the third one, you can see motion blur in the tiny specks of water zooming away from the splash zone. They must be moving incredibly quickly if 1/11000th of a second isn't freezing them.
The setup for this is quite simple; much more simple than for smoke photography. Just put your flash off-camera using a TTL cord or wireless system. I set mine to the left of the camera, at about a 45° angle, pointing at the same bowl of water as the lens. The bowl of water was directly in front of the lens. I varied the height of the camera on the tripod via the center column a few times during the shoot; it's not critical. Behind the bowl of water was first a sheet of white paper (in the first photo, the light was bounced off a plain white sheet of paper, giving it that smoother look), then a sheet of rather crumpled aluminum foil (as seen in the second and third photos). That's about it. Use any method to drip water steadily into the bowl. If possible, try to make the drops hit the same area of the water; this will make your focus end up better. Manually focus your camera (and re-focus every time you change angles or anything) by placing some object exactly where the drops are hitting, and focusing on that. A pencil works great. Then shoot a whole lot of photos.
You will quickly learn about the different stages a drop of water goes through. The drop of water hits the surface from above, causing a crater-like dent in the surface, quickly followed by a column of water rising from the center which launches one or more round droplets of water in the air; they then fall down and the surface returns to its original smoothness. So the first photo is near the end of the cycle. The second is at the apex of the column, and the third is just before the column begins to rise.
Experiment with various backdrops to bounce different colors, styles, etc. of light through your water. Also play with white-balance settings, flash and aperture settings, compositions, etc. Lots of trial-and-error. I imagine you can play with ISO as well, but I had no trouble leaving mine on 100, even with rather closed aperture settings for the deeper DoF, which is easier to work with. Keep in mind that you're halving the amount of light you let in every time you double your effective shutter speed, so use your aperture and/or ISO settings to compensate accordingly. And leave your shutter speed at 1/200th (or whatever your maximum sync speed is), it doesn't affect anything.
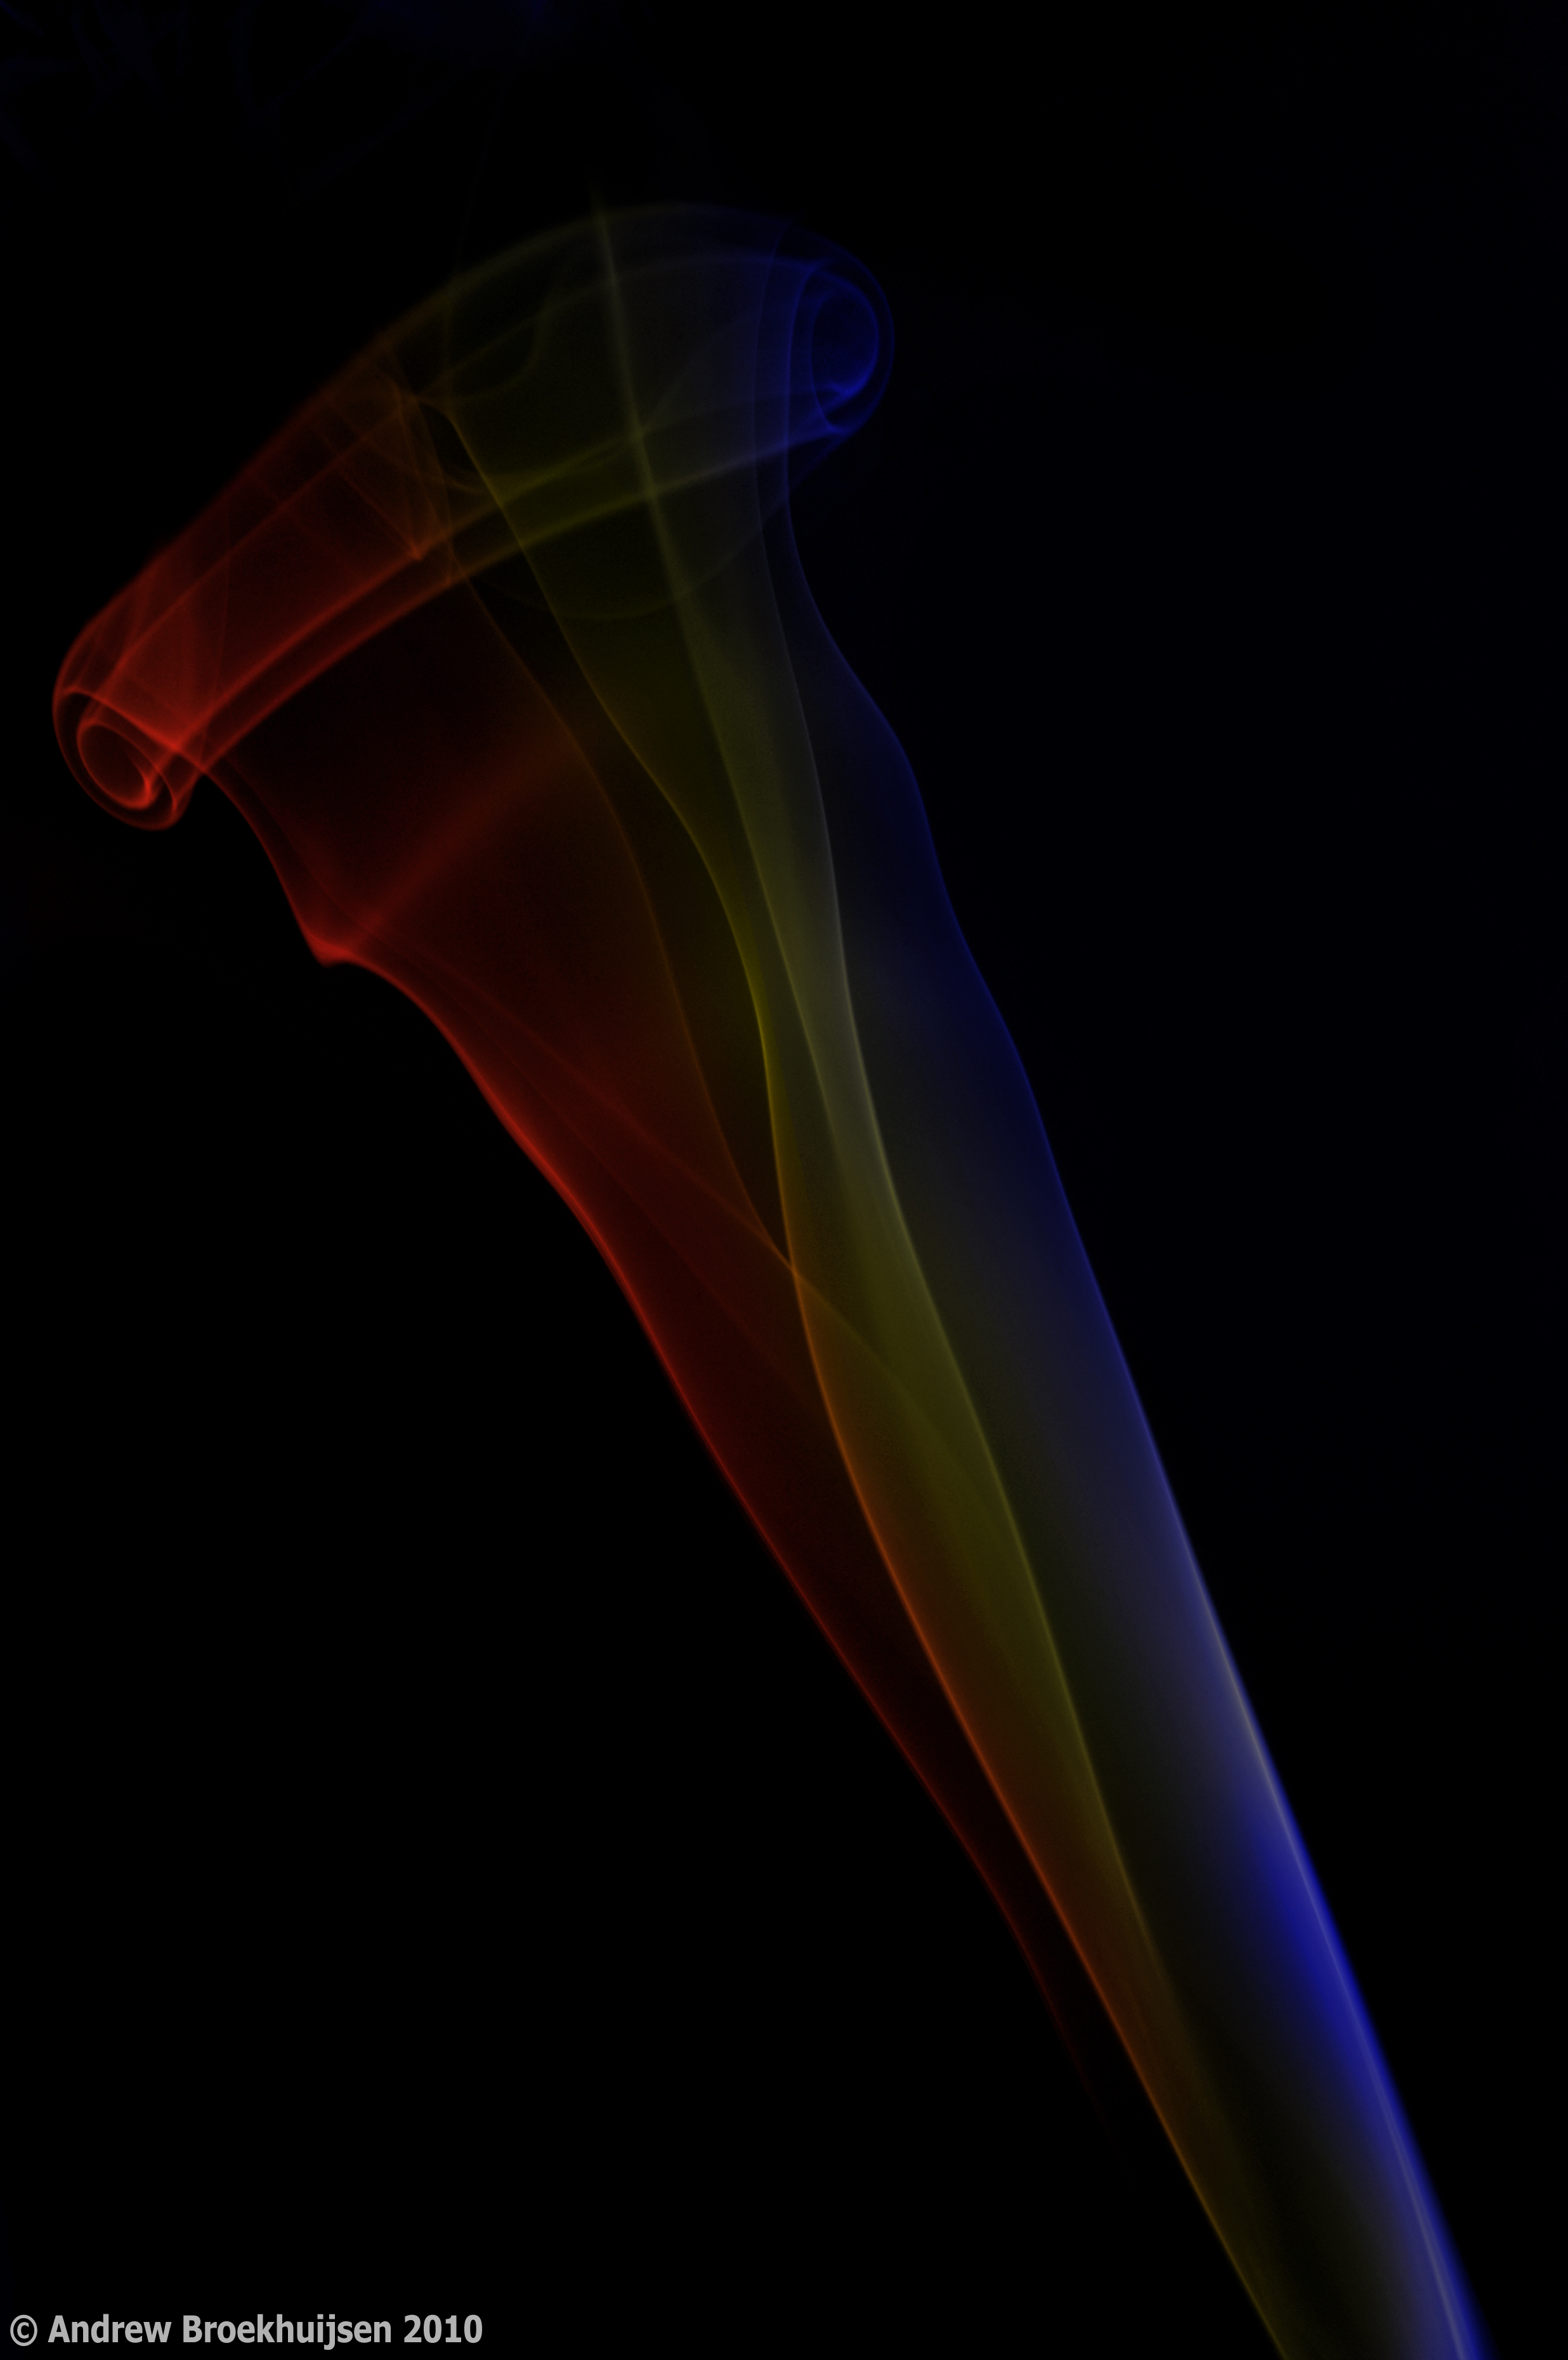
If you remember a while back, I was playing around with smoke photography. Due to the fact that I didn't have a DSLR, or an external flash, I had to use a bit of a workaround. Now that I've upgraded my camera, and have access to my dad's 580EX Speedlite, I was able to do the "correct" setup this time.
The basic technique involved is to set up some smoking object against a black background (I used a black posterboard this time instead of just shooting in a pitch black room). You have to make sure light hits it from the side without spilling onto your background (which you want to remain totally black with no detail). In order to do this, I made a crappy snoot out of another piece of black posterboard. It wasn't pretty, but it got the job done. Since you want a wide depth-of-field to capture the smoke throughout all the planes it wafts through, a small aperture is required. To avoid any image noise, you must have a fast shutter speed (which also freezes the action) and a low ISO. So to counteract all of your settings that tend not to let in a lot of light, it's necessary to introduce a vast amount of light from your side light source. I cranked the flash brightness REALLY high. It worked.

click to enlarge, or see it on Flickr
Aperture: f/14
Shutter Speed: 1/250
ISO: 100
Focal Length: 48mm
Tripod
From there, you just light something on fire. I used paper because the incense I bought for this purpose freaking smells like someone died. It's that bad. So paper got the job done. Once that something burns out, smoke plumes start going up. Generally if you're in a ventilated room (which I highly recommend), the smoke will go smoothly up in a nearly straight or straight plume. To disrupt it and make a slightly more interesting picture, you can block the smoke's path with an object, fan it lightly, blow on it, etc.
Once you have your shots, take them into Photoshop and adjust the levels to make sure your background is true black. You may also have to use a black brush to flatten a few areas and remove distracting pieces of smoke from others. Many people choose to invert their image at this point to put the smoke on a white background. I felt the colors I used looked better on black. You can then use any method you want to colorize the smoke if you so desire. I like to make multiple layers of different colors and then blend them with masks so the smoke is multicolored.
As a last step, you can add some contrast or adjust levels further. Be careful with adding contrast or saturation; this tends to cause posterization very quickly. The blacker you get your background in-camera and the better you separate your smoke (hint: more light), the less contrast you will be tempted to add, and the smoother your smoke will turn out. The above example is actually posterized pretty badly.
Okay, so she's a friend of mine, and I'm letting her pay with cookies. But it's progress. And I've decided I like fixing the white balance to fit the mood of the photo. These were summer portraits, it must have been 95 degrees when I shot them, so I warmed them up quite a bit.
click to enlarge, or see it on Flickr
Aperture: f/1.4
Shutter Speed: 1/400
ISO: 100
Focal Length: 50mm
Tripod
click to enlarge, or see it on Flickr
Aperture: f/4
Shutter Speed: 1/30
ISO: 100
Focal Length: 85mm
Tripod
Right now I'm pushing REALLY hard to finish my guitar, so things on the more creative side of the photography front are a bit quiet. I'll pick it up soon though.
So before I continue with my post, I'll say that I've realized I can't really continue trying to post a photo a day here. I don't take a photo I feel is worth sharing every day, and my time is somehow more limited now than it was during the school year. So I'll be posting photos whenever I feel like I've taken one worth sharing from here on out.
I just spent three days in southern Utah on a camping trip. Photography opportunities were a little more scarce than I had hoped, but I still got what I feel were two good shots.
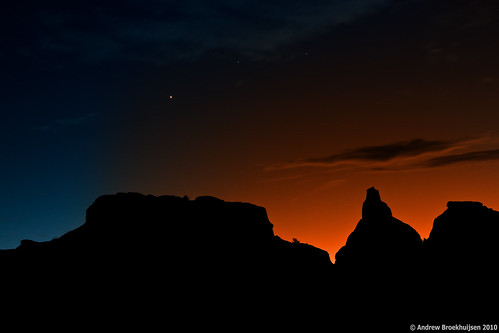
click to enlarge, or see it on Flickr
Aperture: f/7.1
Shutter Speed: 10 seconds
ISO: 100
Focal Length: 39mm
Tripod
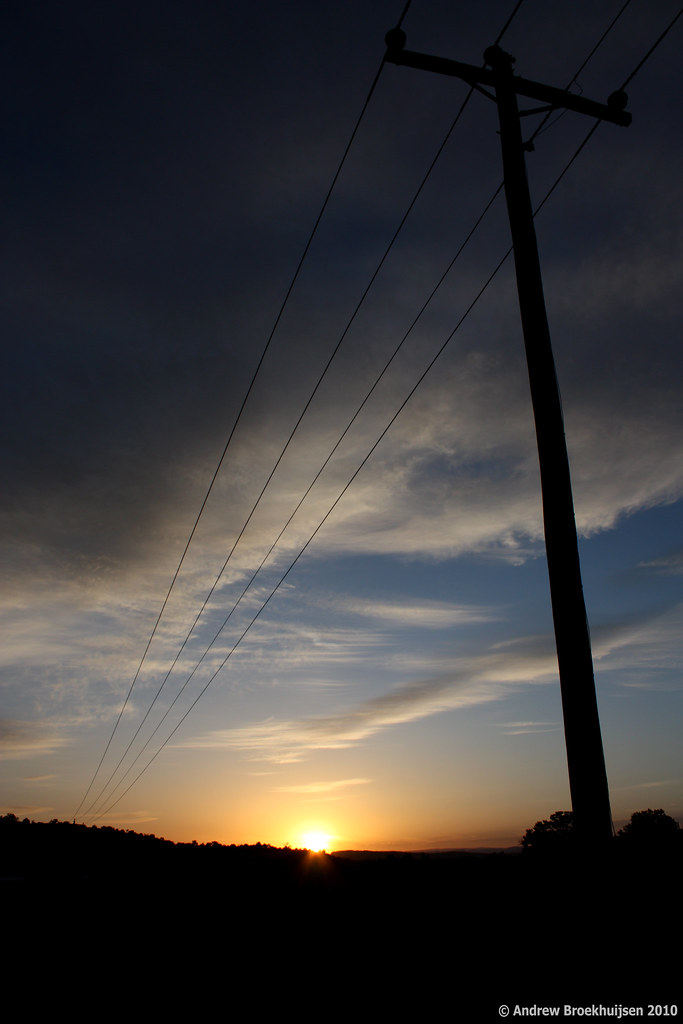
click to enlarge, or see it on Flickr
Aperture: f/8
Shutter Speed: 1/250
ISO: 100
Focal Length: 18mm
Tripod
Turns out sunset and sunrise are really good times for photography. Who knew?
I admit to some artistic recoloring of the first photo, that probably got a bit out of hand. But I decided the red was a little more interesting than a completely blue photo. Looking at it now, I think I'll go back and re-do it to look more believable sometime. That red of red is overkill.
The second one I really like, except I'm kicking myself for not using a narrower aperture and really cranking an awesome star-flare out of the sun. Oh, wait, I did. But somehow on all the shots I took at f/22, the entire picture was overexposed without my correcting for it in-camera. And since I forgot to switch to RAW shooting before I took this, I didn't have the tools to fix the exposure and keep my flare. Oh, well. Live and learn. There are other great places to shoot sunrises.
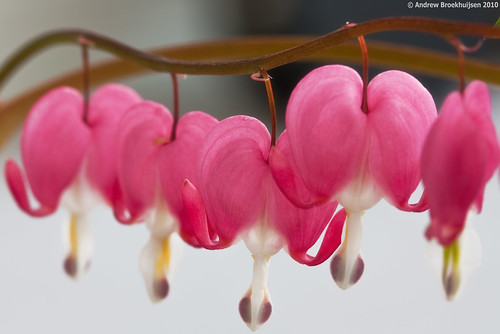
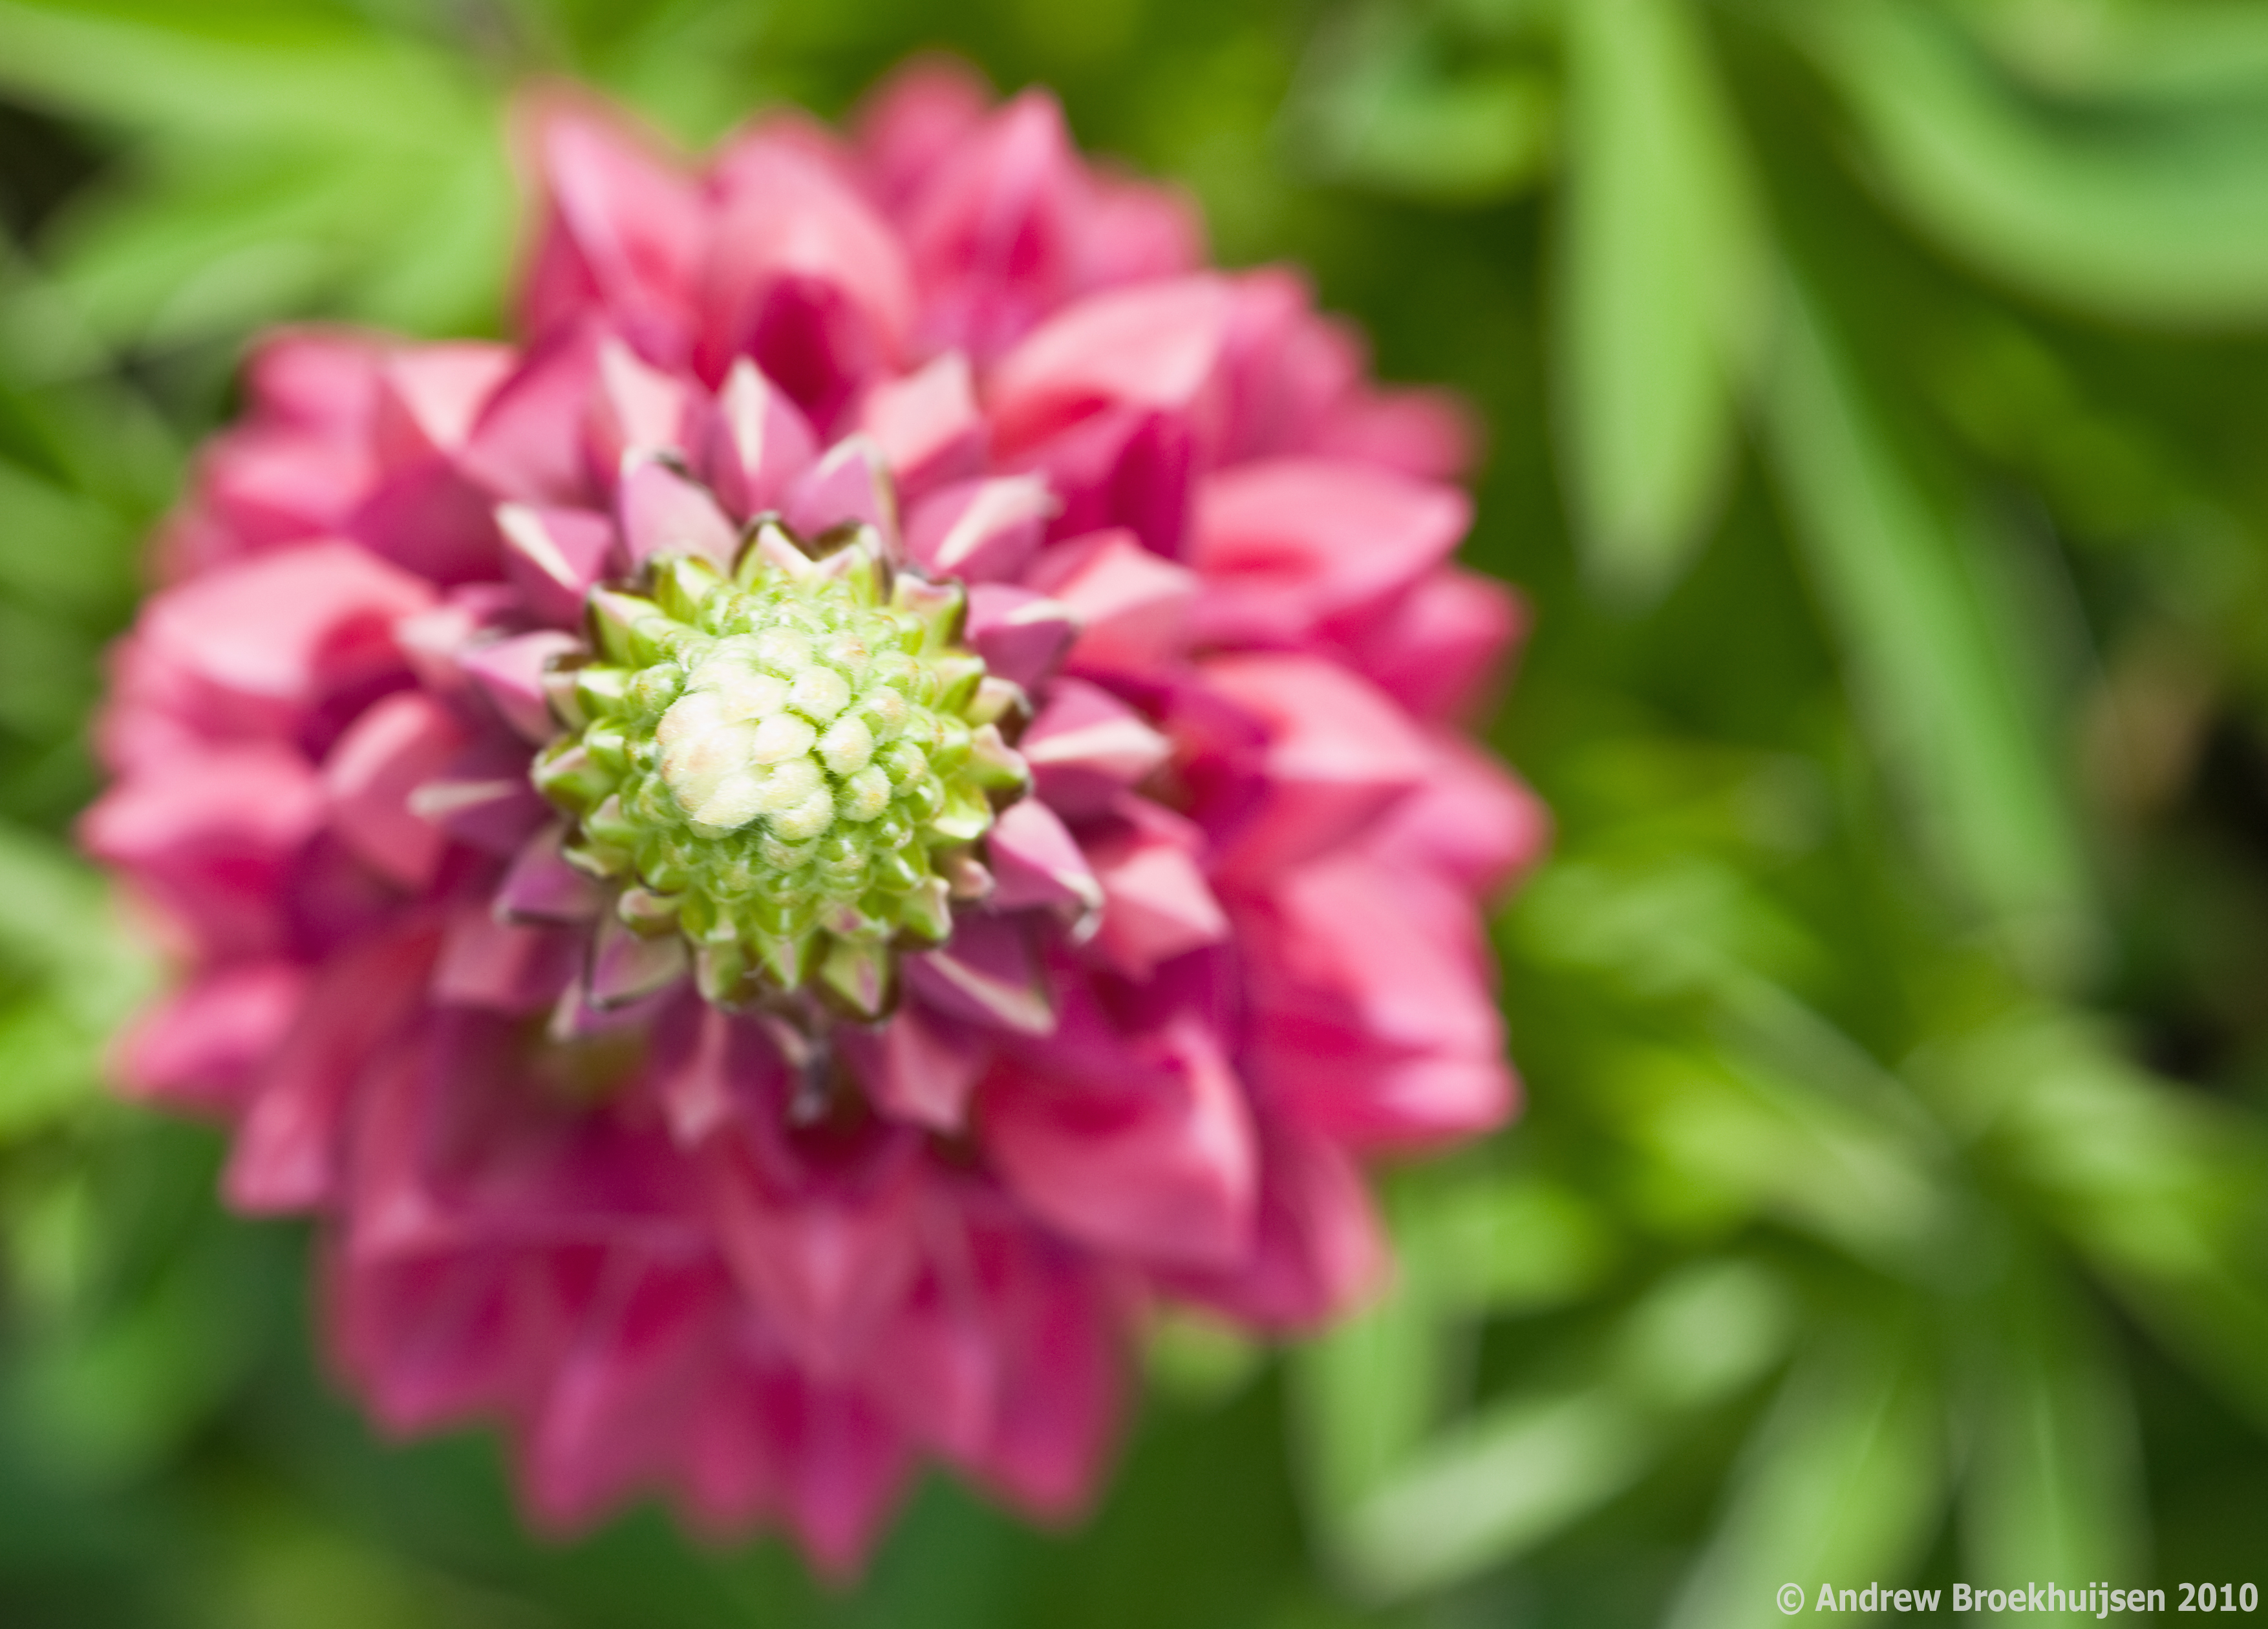
I noticed a cool-looking flower today while doing some yard work. It looked pretty symmetrical from the top, in an interesting way. So I decided to photograph it from that angle.

click to enlarge, or see it on Flickr
Aperture: f/8
Shutter Speed: 1/40
ISO: 100
Focal Length: 100mm
Tripod
Didn't turn out quite like I hoped. Though the angle is good and the DoF is okay, I think I want to be more careful on the focus for the very top part of the flower. Also, as the top of the flower is a definite highlight, the exposure was clipped to high for it. So I'll probably go back and re-shoot this one on a cloudy day (or using some sort of diffuser to block the sunlight).
This is it, now that my site is launched and my portfolio is filled out, I will no longer be doing free portrait sessions. I have yet to decide on prices, but no more free ones. Anyway, I think it's a good thing I did all these free ones though - it really helped me get used to the settings and equipment I need to get good portraits.
click to enlarge, or see it on Flickr
Aperture: f/2.8
Shutter Speed: 1/60
ISO: 100
Focal Length: 85mm
Monopod
click to enlarge, or see it on Flickr
Aperture: f/3.2
Shutter Speed: 1/200
ISO: 100
Focal Length: 50mm
Monopod
I've definitely noticed some growth in my skills as a portrait photographer. Out of my favorite two shots, neither of them had to be cropped; I had them framed and composed correctly in-camera. This is nice because it makes for faster editing later on. Also, there were fewer necessary adjustments to get everything correct; most notably that I didn't need to use the "Recovery" slider in Lightroom this time around.
I think I'm ready to head into the world of paid portraiture.
Sorry for the late post this month. Here's the calendar. Feel free to distribute freely, as usual. Also, if you need an aspect ratio other than 4:3, I can do that no problem, just let me know in the comments.
Click to enlarge
Also, I think I turned the opacity on the calendar layer down a little more than I usually do. Sorry about that.
Today I was able to make use of all my new equipment, namely my new tripod head and my remote shutter release. I was trying a technique called a "light stencil." It's a form of light painting that involves the use of a stencil cut out of paper to shape the light. It seems quite simple but is in fact difficult to execute. It took me the better part of an hour and lots of experimentation to get this one, and it's not even that great.
When light painting, the aperture has less to do with the depth-of-field, and is really used only as a deciding factor for how bright your various light "paintbrushes" will look. Shutter speed can be as long as you need, and I use ISO primarily to balance out distance between me and a flash, if I use one.
click to enlarge, or see it on Flickr
Aperture: f/7.1
Shutter Speed: 26 seconds
ISO: 100
Focal Length: 18mm
Tripod
More to come as I improve on my methods here. I will say light painting is infinitely more fun when I don't need to worry about fitting everything in in 15 seconds.
To finalize and round-off my portfolio before I print it, I've been going portrait crazy for the past week. I decided I had enough "standard" style portraits in there, so I went for a couple of different-ish ones.
click to enlarge, or see it on Flickr
Aperture: f/5
Shutter Speed: 1/200
ISO: 100
Focal Length: 50mm
Monopod

click to enlarge, or see it on Flickr
Aperture: f/4
Shutter Speed: 1/100
ISO: 100
Focal Length: 50mmHandheld
I mostly decided to go black & white because it makes the photo's tone a little more serious and reflective, which helps compensate for models that have a hard time not smiling. :)
Anyway, these are the last two portraits I'll show you for a while. Last night I did some fun light painting with a new remote shutter release I bought (infrared) at a sick discount from the camera store where I work. Makes things very fun. And in case you were interested, tomorrow I buy a joystick-style ball head for my tripod and monopod. Buying camera gear is the bomb.
In other news, today I began construction on my official website at http://www.andrewbphotography.com. There's a link on the side of this page if you don't feel like typing. It won't be done until sometime this week probably. I am also looking at a real domain name (andrewbphotography.com) and pricing for a host, etc. So this site might not be around for very long. We'll see. Hopefully this will help me get some paid portraiture work over the summer and kind of jump-start my semi-pro photography "career."
Another shoot today. This time, just one person. In a way it was kind of nice because I never had to worry about chopping off parts of one person's face or something. Basically it just changed the dynamic. I did have one photo that I am going to convert to black-and-white, but I haven't gotten around to it yet.

click to enlarge, or see it on Flickr
Aperture: f/3.2
Shutter Speed: 1/125
ISO: 100
Focal Length: 50mm
Monopod
click to enlarge, or see it on Flickr
Aperture: f/2.8
Shutter Speed: 1/200
ISO: 100
Focal Length: 100mm
Monopod
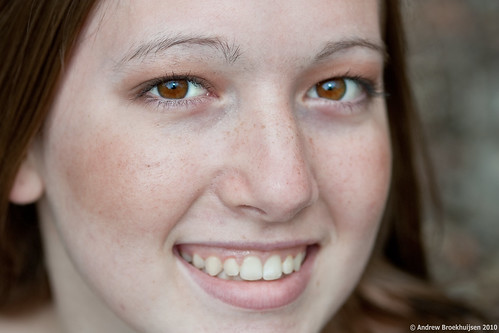
I must say, I've been very happy with most of the close-up headshots. Eyes are fun to work with in post-processing when they're big, have juicy catch lights, and are the main focus point of the image.
I also learned that before you take the photo, you should make sure that the model does not have any hairs on his/her face that would be distracting. Especially make sure that said hairs do not cross over the eye of the model. Otherwise you might spend 45 minutes in Photoshop, carefully cloning them out.
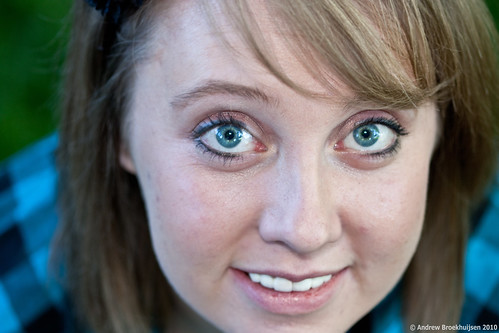
As I mentioned last post, I sort of took out an ad on Facebook in an attempt to pad out the "Portraits" section of my portfolio before I get it printed. The first resultant shoot of that ad was today. I must say, it went quite well. I had a number of good shots, got a lot of good experience working with models, various lenses for different types of shots, and other equipment. Great learning experience, great fun, and a few of my friends got some free portraits out of the deal. Here are my favorite two from the shoot, which will be going into the portfolio.
click to enlarge, or see it on Flickr
Aperture: f/2.8
Shutter Speed: 1/40
ISO: 100
Focal Length: 100mm
Monopod

click to enlarge, or see it on Flickr
Aperture: f/2.8
Shutter Speed: 1/40
ISO: 100
Focal Length: 50mm
Monopod
The top is among my favorite portraits I've ever shot. I made a really concerted effort to get the lighting, catchlight, depth-of-field, angle, composition, and focus just right, and I think I may actually have succeeded on all counts. Not to brag, or anything :)
The 2nd was my favorite from all the landscape-oriented portraits I took. Is that an oxymoron?
Ugh. I haven't ever been this bad about updating my blog. My apologies. I'll get better, I promise.
Anyway, here's the update: I've been reading a LOT about the Zone System and HDR lately, and been wanting to try both. I decided a scene where there were pretty deep shadows and a very bright sky would be a good candidate for HDR, so I gave it a shot (or 5 bracketed shots).

click to enlarge, or see it on Flickr
Aperture: f/11
Shutter Speed: (bracketed)
ISO: 100
Focal Length: 18mm
Tripod
The Good: HDR definitely brought the colors to life, though I think they're a bit over-saturated. This is predominantly because I still suck at tone-mapping. Everything seems to be exposed correctly. The left side was a single exposure, which I set to be somewhere in between correctly exposed for the sky and the rest.
The Bad: HDR made my mountains look fake, and really bad. I knew beforehand that it tends to kill detail in midtones, which is why most people who are good at HDR like to use exposure blending (which is essentially masking out various places of the HDR and substituting a real photo) as well in their HDR photos.
The Ugly: Despite the fact that I checked the "fix ghosting errors" box in Photomatix, the clouds look like an acid trip. I think the solution is to actually use my AEB setting in-camera rather than bracketing manually. That would allow me to get three frames bracketed 2 stops apart in less than a second, minimizing cloud drift, etc.
I'll continue to experiment with HDR. I feel like I totally understand the concept, I just need mucho practice at tone mapping.
As my place of work is starting to print and bind photobooks now, they have offered all the employees a free 20-page hardcover. Which is rad. I'll be using mine for a portfolio, so after roughing out what the design would be like, I concluded I needed more portraits to round it out. Approximately 38 seconds after offering to shoot free portraits on Facebook, I filled up the next two weeks with shoots. So expect a lot of portraits in the near future.
First, the good news. I spent a lot of time studying up on HDR today, and some on the Zone System as well. I'll definitely be delving into those more deeply, and soon. But for today, you get boring flowers. Not that the flowers are boring. Just the fact that I shot them exactly how I shoot any other flowers.
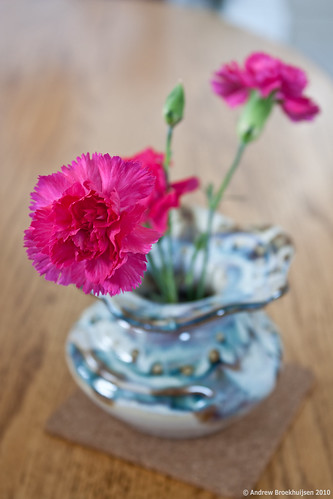
click to enlarge, or see it on Flickr
Aperture: f/5
Shutter Speed: 1/8
ISO: 100
Focal Length: 41mm
Tripod
Hopefully better stuff will be up soon.
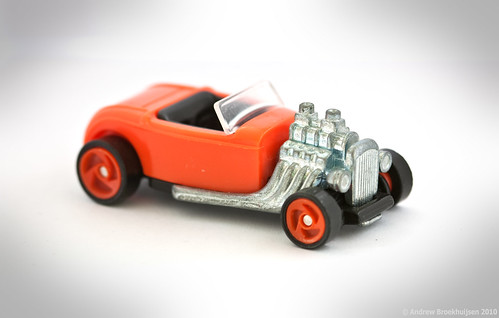
I haven't been feeling very inspired for the last few days. I know this happens to everyone, but it's a frustrating situation. Anyway, here's today's shot: a toy Rolls Royce in a DIY softbox. I was going to process it to go in the Motionless set, but it didn't seem to fit the theme very well.
click to enlarge, or see it on Flickr
Aperture: f/4
Shutter Speed: 0.3 seconds
ISO: 100
Focal Length: 100mm
Tripod
I kind of liked the color here, although it's not my first choice for a multi-million dollar car. Yeah. Hopefully something more interesting will enter my head soon.
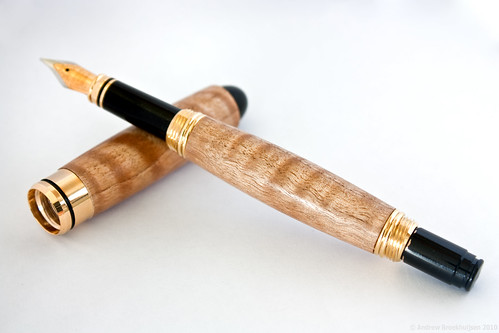
Now that we're FINALLY starting to get some nicer weather around here, we have kind of "re-opened" our wood shop. As it's nearing the end of the school year, I have begun to make pens for some of my teachers. One teacher in particular (who teaches the Newspaper class, as well as some English classes) really enjoys writing. As in, poetry. I figured she would probably appreciate a fountain pen. But I wanted one that would really fit her personality. She's unique, not not in a negative, weird way. She's just awesome. So is Fig-Asian Satinwood, as I discovered.
click to enlarge, or see it on Flickr
Aperture: f/7.1
Shutter Speed: 0.3 seconds
ISO: 100
Focal Length: 53mm
Tripod
Even though I was working with a light tent, I wanted some directional light to try and capture the "holographic" effect the flame in this wood gives, especially under polish. I don't think I did it justice, but facing the open side of the softbox into the light helped a little bit. It also gave me that rather obnoxious glare coming off the main barrel of the pen. I guess that's a fair trade off.
Also, because I haven't been very good with keeping up with this blog (or photography in general) the past few days, I have already noticed a really big oversight in the process of taking this photo. I got to the "pick the best photo to use" stage of post-processing and realized... I shot all of my exposures at f/7.1. I didn't vary the aperture once. f/7.1 happened to be a reasonably good aperture for the job though. If it hadn't, I would have gone back and shot again. I need to be doing photography, every day, otherwise I start slipping. It doesn't take long.
One final piece of news: I got hired at a camera store nearby! Dream job, here I come. I start work in... 2.5 hours. Woot!
Today was the final choir concert of the year at Timberline Middle School. I went there, I love singing, and the choir teacher there is the one who taught me how to sing, and how to love singing. So I make it a point to get to as many of their concerts as possible. I'm glad I went.
Also, while I did have an interview for a job at a camera store, I didn't actually get around to taking any good photos today. So I figured it would be a good time to draw on my mostly untapped roll from Hello Dolly at TMS.

click to enlarge, or see it on Flickr
Aperture: f/2.8
Shutter Speed: 1/250
ISO: 800
Focal Length: 135mm
Monopod
I do wish I had gone with a slightly faster shutter speed here, but I still think this turned out pretty well. The action was mostly frozen anyway.
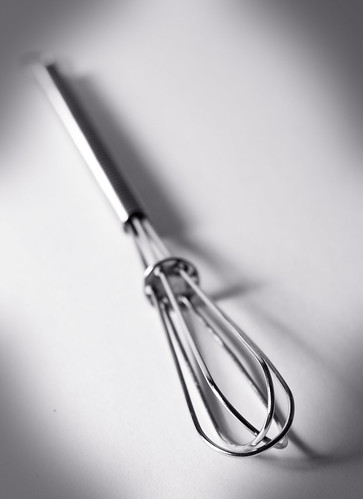
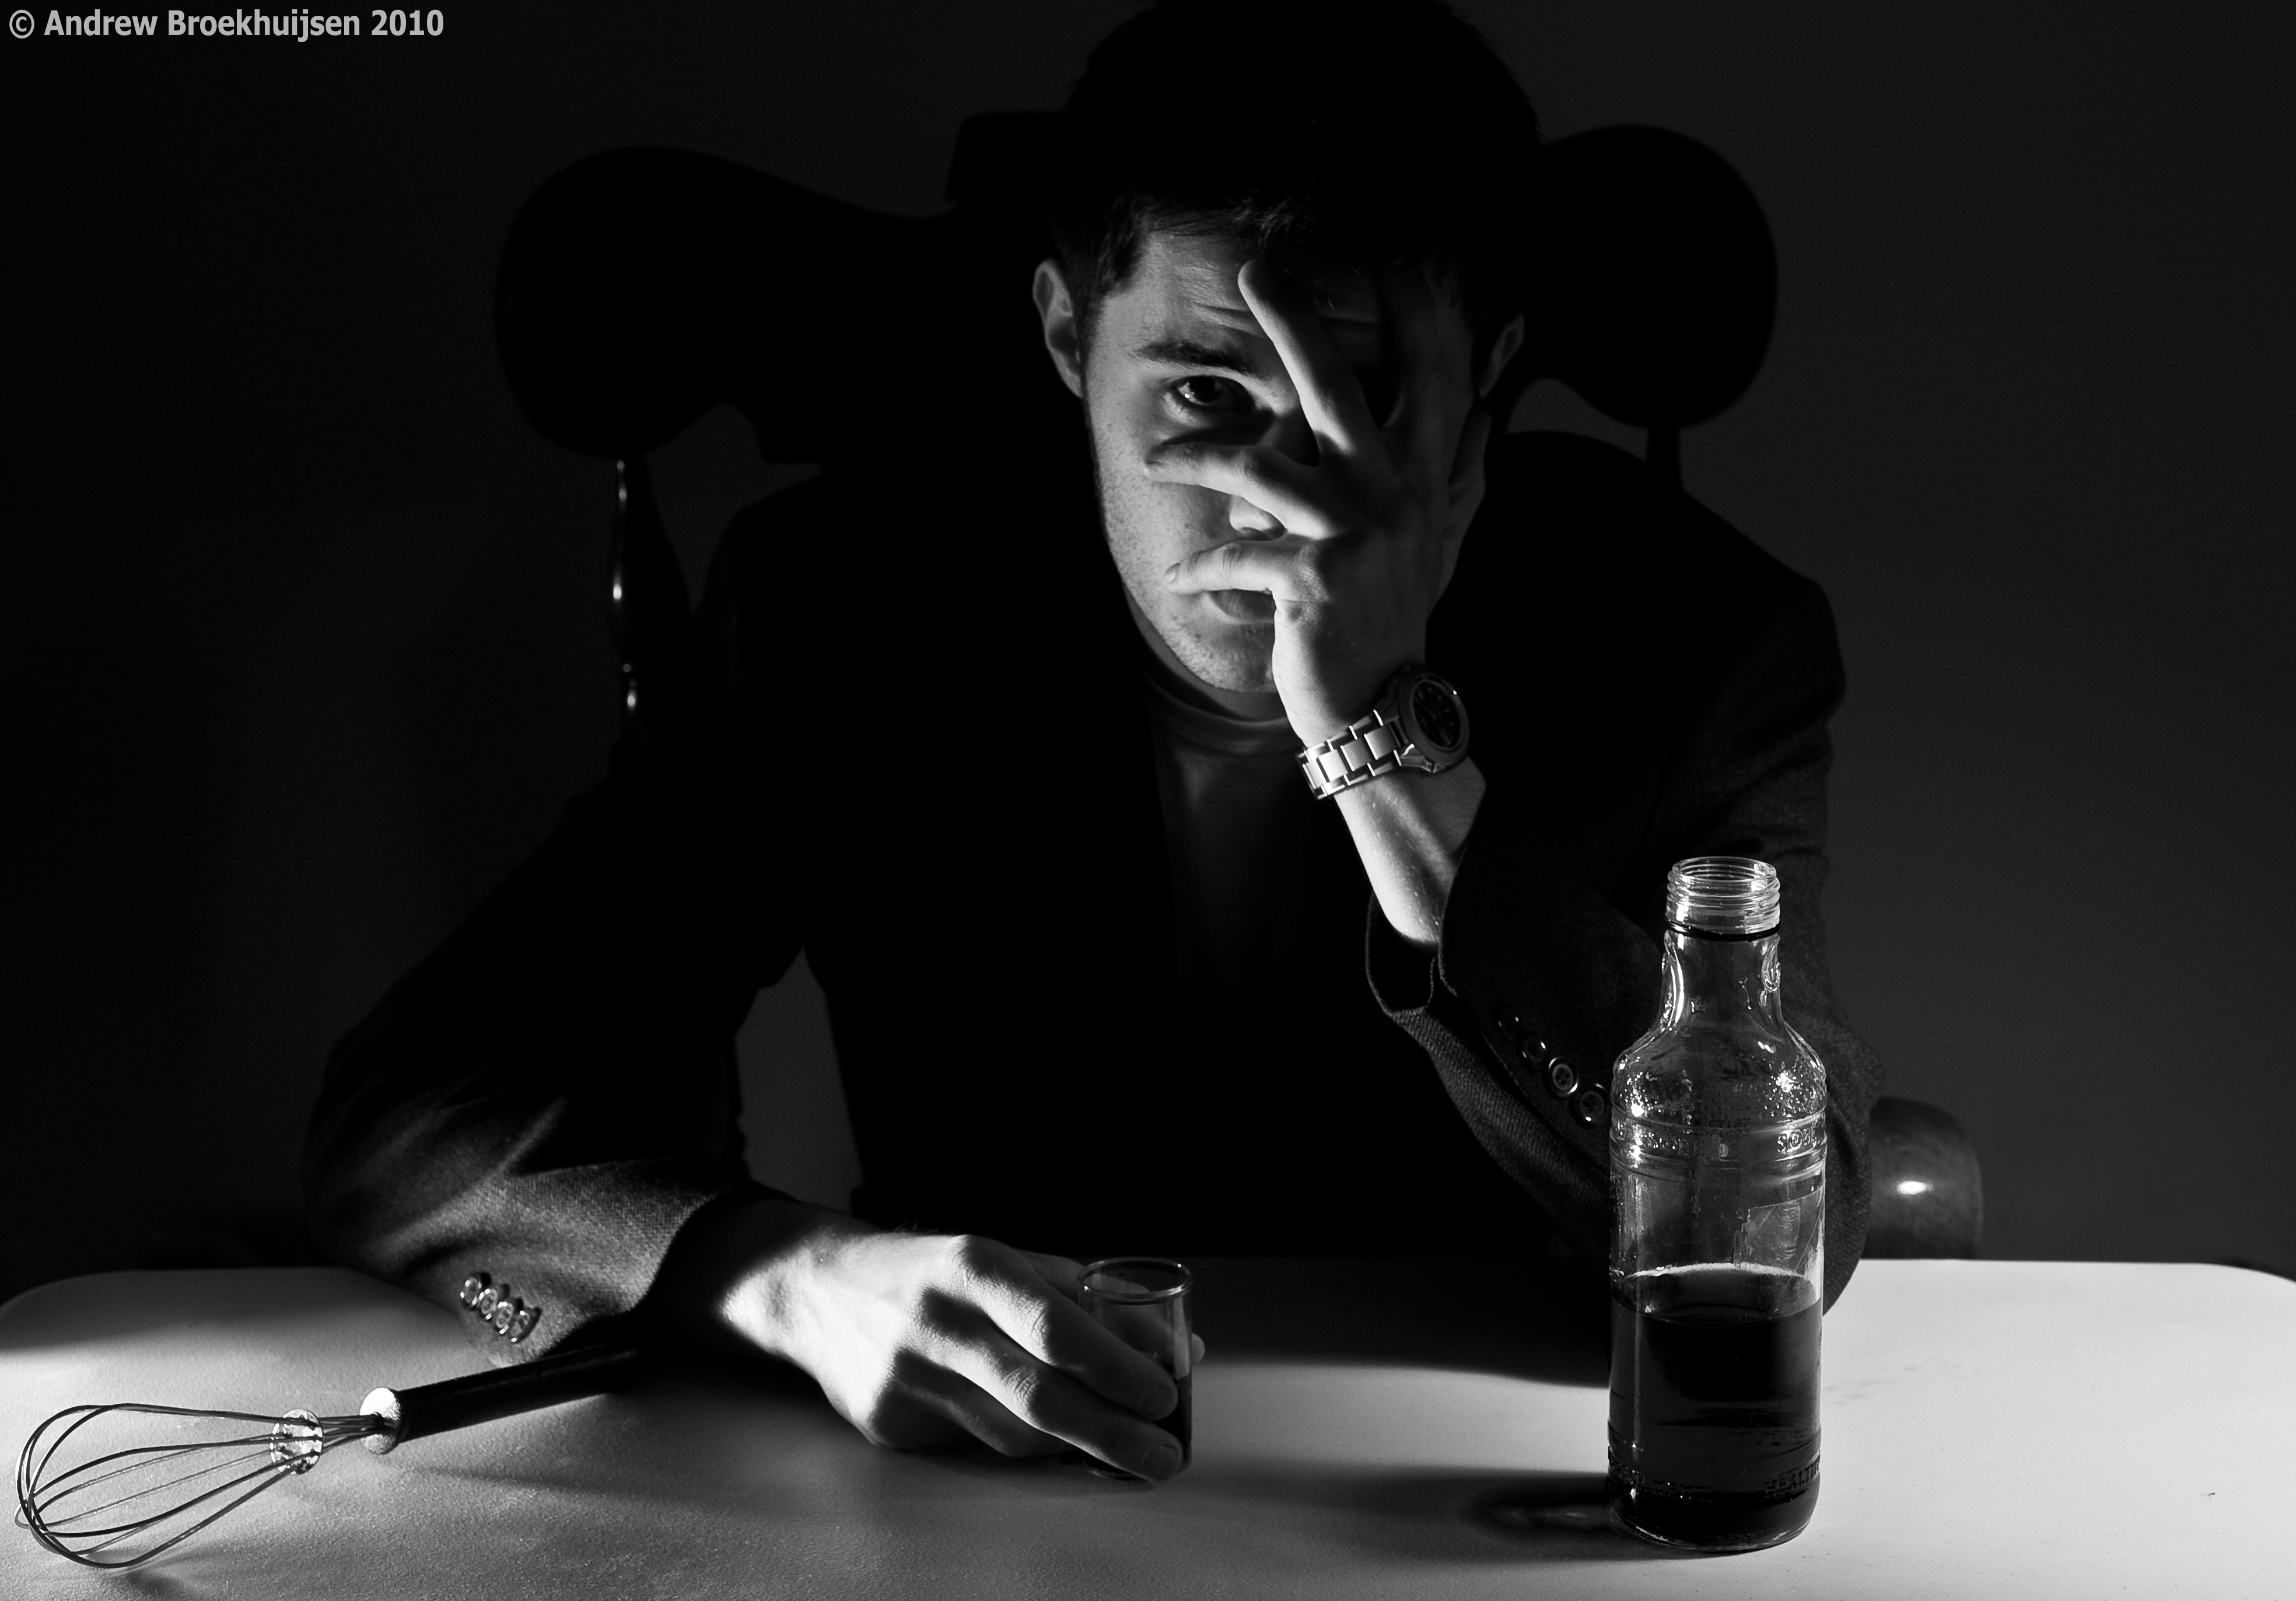
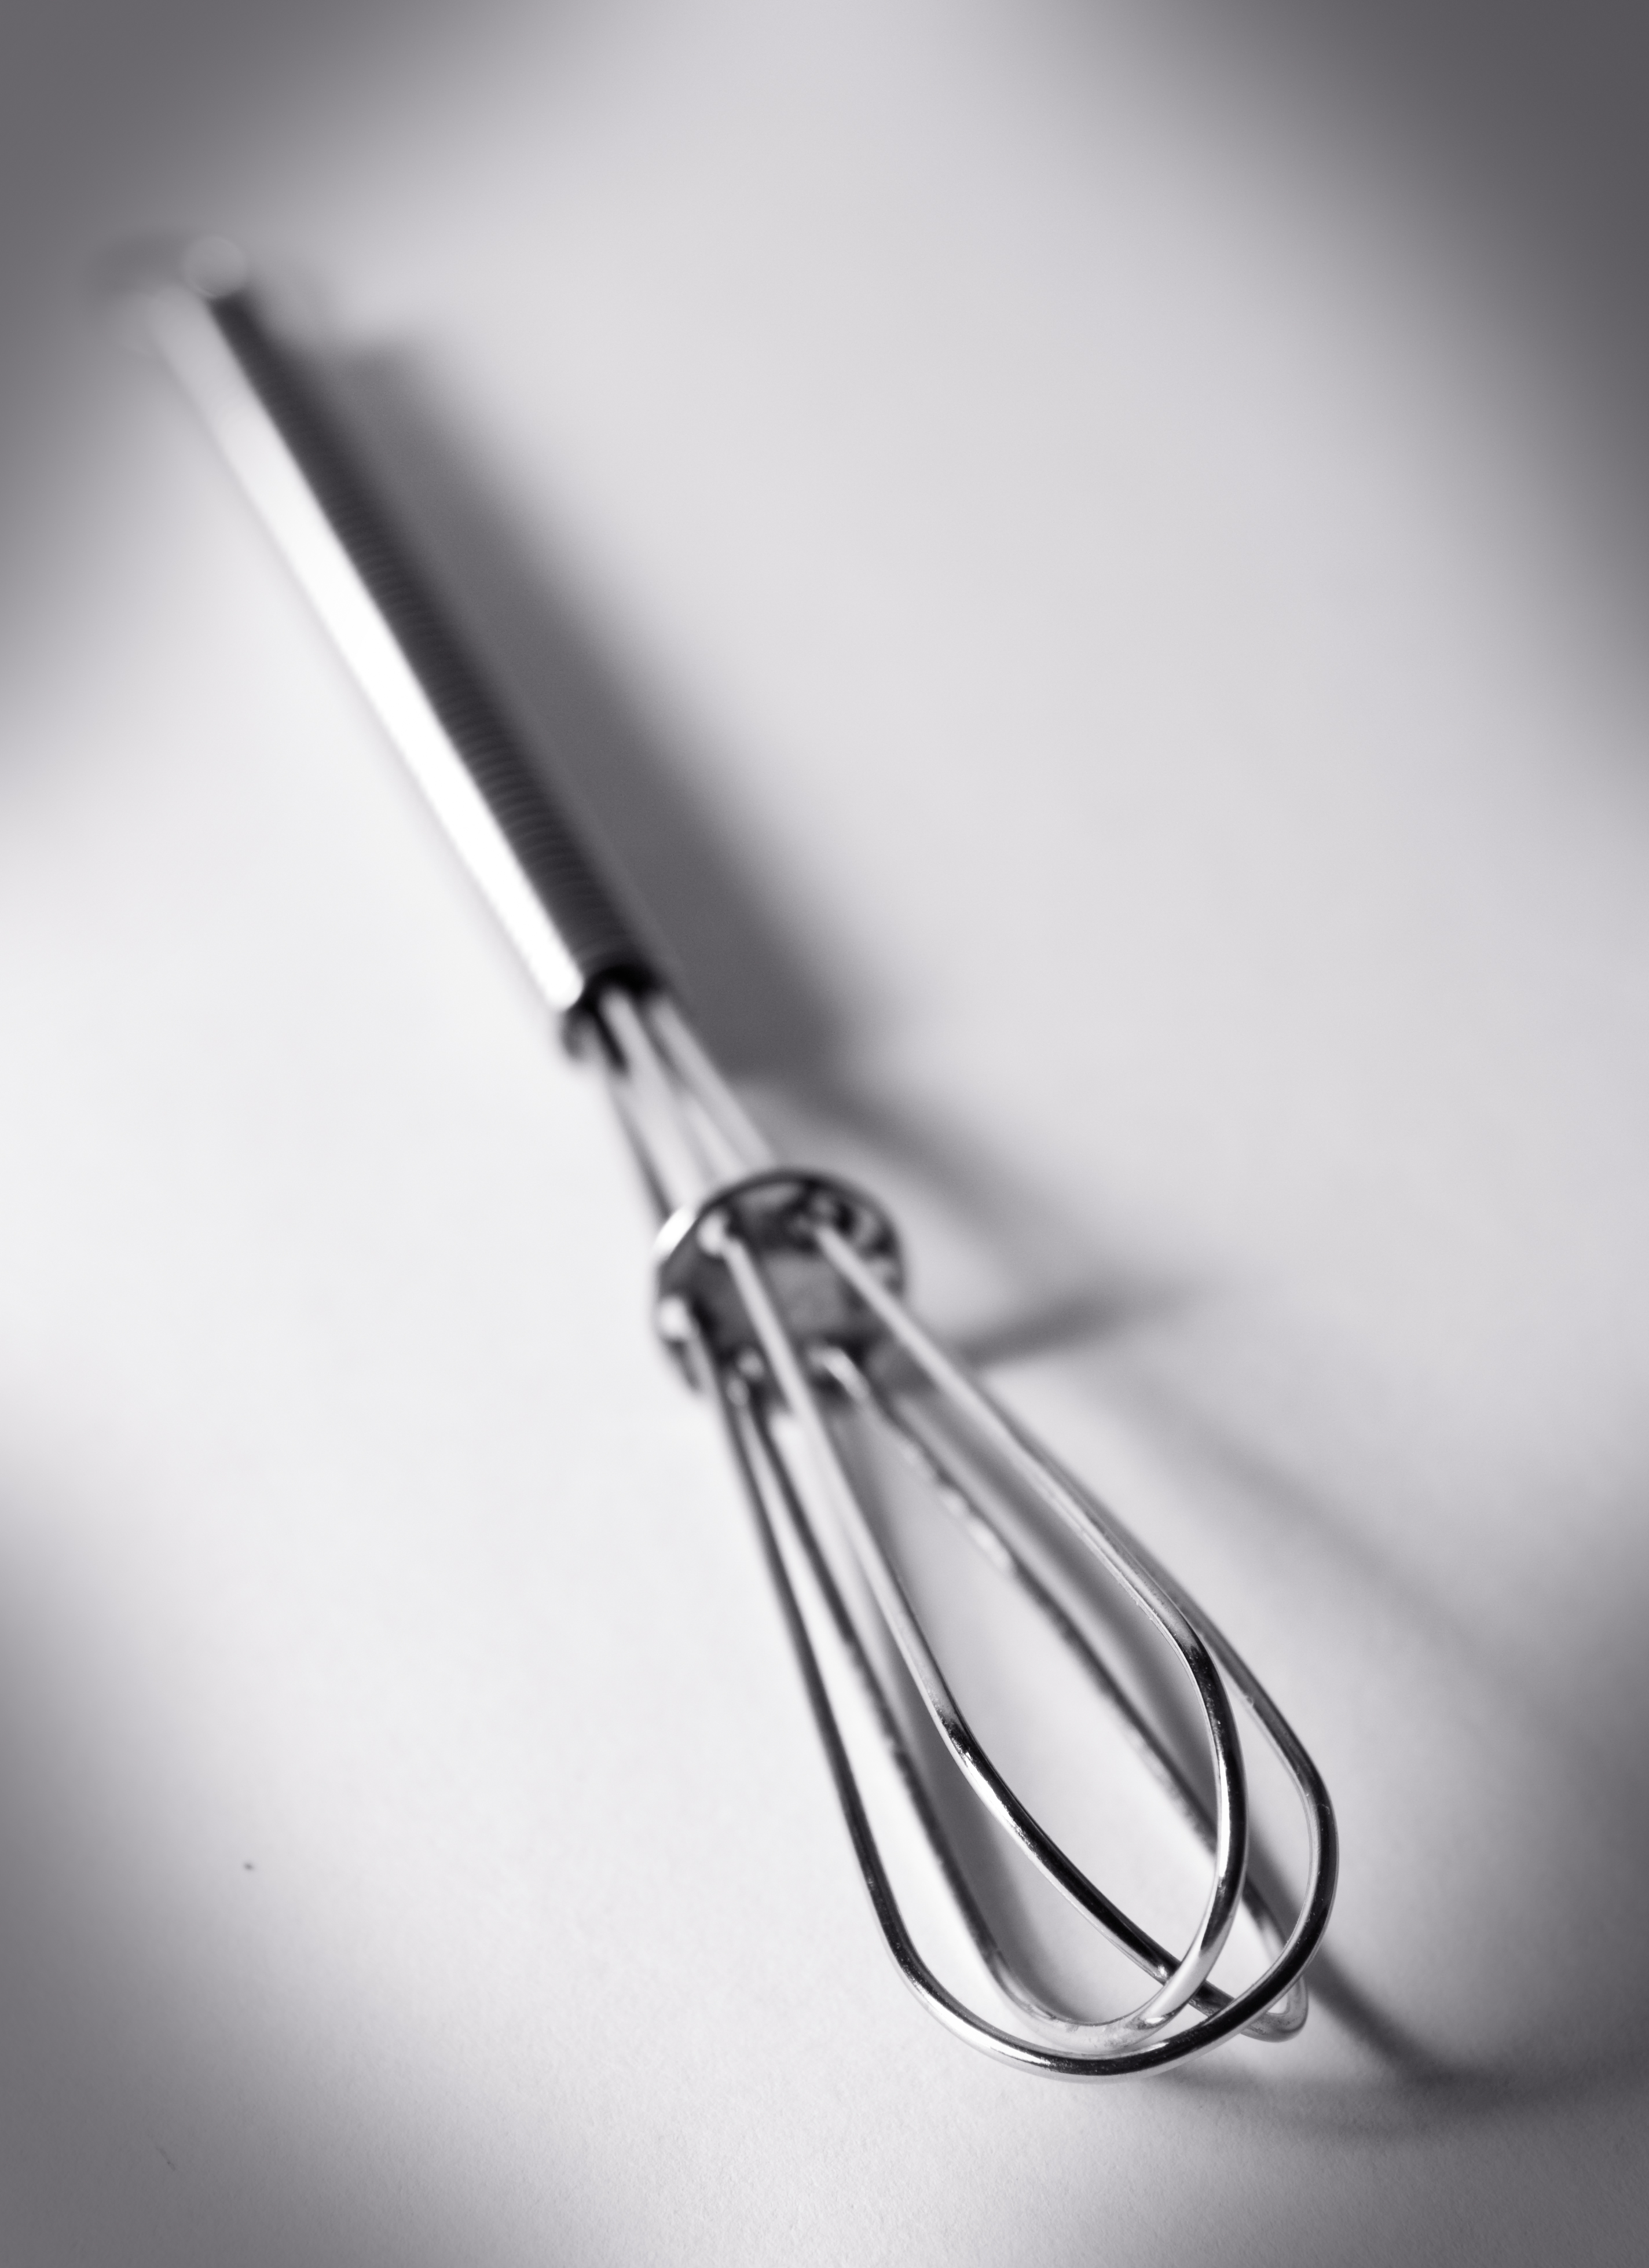
I was in a creative mood today, so I decided to try something interesting. Before I go any further with this post, I've realized that I need to explain what "Assassin" is, which will both help this photo make a lot more sense, and explain the title of the photo from this post.
Assassin is a game being played at my school by about 70 people right now. Essentially, we are given a "target" by the person running the show, and our job is to eliminate that target using a whisk. Then we report our kill, and receive a new target. We are also being constantly hunted by someone else, but we are not told who. I always need to be watching my back. Last man standing wins $50. It's a blast.
Anyway, I decided to take somewhat of a satirical picture showing what might happen to us all psychologically in the long run.

click to enlarge, or see it on Flickr
Aperture: f/5.6
Shutter Speed: 0.6 seconds
ISO: 100
Focal Length: 42mm
Tripod
The lighting and setup for this shot was ridiculously complicated. I used three separate desk lamps, each with a custom-shaped DIY snoot. One was about 10 feet to the left of the camera, about the height of my head, pointing at my face and the chair. That light provided the illumination on the right side of my face. There was another one just to the left of the camera, barely above the level of the table, and pointing slightly up. That one provided the illumination on my right hand and the wire whisk. The last light was on the right side of the camera, higher up, lighting the back-right corner of the table, which provided most of the ambient light as well. Other than those three directional desk lamps, the room was pitch black.
The "beverage" was actually just water with green food coloring. I chose green because there was no other green anywhere else in the shot, so I figured it would give me very independent control over the tone of the liquid. That idea worked out nicely.
I'm extremely pleased with the way the lights behaved. It took a lot of effort and experimentation. I had no assistant, which meant I was stuck with guessing at pre-focusing, setting the self-timer, hitting the shutter release, running to the chair and posing, then checking out the results. Then I would tweak the lighting slightly, rinse, and repeat. In the end though, it paid off. It's nice when plans come together perfectly, with the lighting, pre-planning of drink color, etc. for post processing, and everything else that went into the creation of this shot.
I try to use a tripod for macro shooting whenever possible, but sometimes I see an opportunity and I don't have mine handy. This is what happened today. There were a few problems with this; first of all I was using a 100mm macro lens, which is quite a long focal length to be shooting with handheld anyway, but especially for a close subject. Second, it was windy, and therefore the subject was moving. And third, various clutter around the subject was confusing my autofocus enough that I switched to manual—something I usually hate to do when I don't have a tripod.

click to enlarge, or see it on Flickr
Aperture: f/3.2
Shutter Speed: 1/125
ISO: 100
Focal Length: 100mm
Handheld
I shot anyway. Considering all the factors involved, I think I got a pretty good result for a 1/125 shutter speed, handheld, with manual focus. But the sharpness issues (caused both by motion blur and slight positioning adjustments after focusing) become quite apparent when you view the full-size image.
Either way, there will be a redux of this sometime when I have my tripod and a spray bottle handy to create water droplets.
Don't ask why the title of this photo is "Assassinate." It's a really long story. And not the kind that's funny, just the kind that makes you say "I wish I hadn't asked why the title of that photo is 'Assassinate.'"
Anyway, I was playing around with different directions and distances of light. I found that when the light source is further away from the subject, the shadows are more defined. Not wanting too many harsh shadows that would make the photo too busy (and distract from the simplicity that is one of the features of the Motionless set), I opted for one of the shots that had the light source closer.
click to enlarge, or see it on Flickr
Aperture: f/8
Shutter Speed: 1/10
ISO: 100
Focal Length: 55mm
Tripod
I'm pretty happy with how this turned out. If I could change one thing, I would have made the light a little more directional from the side. The image could use slightly more contrast. And the DoF is a little shallower than I wanted, but that's not too distracting.
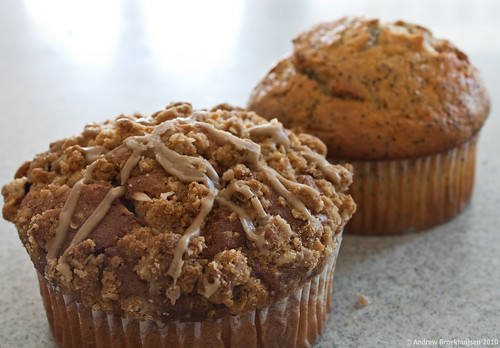
I've done a little bit of dabbling with food photography, but nothing too serious. It's quite a challenge apparently. Well, there's nothing I like more than tackling a photography challenge. Before I started, I noted that most professional food photos I've seen have:
-Shallow DoF
-Frame-filling subjects
-High-key, relatively uniform lighting
-Simple backgrounds
-Utensils
-Camera tilts for odd angles (something I'm not a huge fan of)
-Either spot-on lifelike white-balance, or a slightly cooler cast
The food I had on hand for this was muffins, which generally don't require much utensil usage. I guess in hindsight I could have used a knife, but oh, well. I used my kit lens, usually at around 35mm focal length I think, and at a wide variety of apertures as experimentation. The counter in my house is corian, so it reflects light from windows nicely, but it's also quite uniform. It gave me a ready-made professional looking background. I set up the muffins in various positions to emphasize texture, etc. and started shooting (foregoing the camera tilt... maybe I'll try it next time).
click to enlarge, or see it on Flickr
Aperture: f/8
Shutter Speed: 0.6 seconds
ISO: 100
Focal Length: 34mm
Tripod
The last thing I did after my regular contrast/sharpness/exposure adjustments in Lightroom was going through the steps from this post to get the white-balance exactly right. I tried it with a blue cast first, but it didn't look so good with brown muffins.
I think I could have gone a bit wider in the aperture, but otherwise I'm pretty satisfied with the shot. Sure, there are things to improve on, but considering I basically set a couple of muffins on the counter and shot a few photos, they turned out pretty good.
I know that title sounds ridiculously corny. But it's the name of the plant featured in this post, and I must say it's pretty accurate. Once again, I shot this indoors, so I didn't have to deal with wind. I love that.
click to enlarge, or see it on Flickr
Aperture: f/8
Shutter Speed: 1/2
ISO: 100
Focal Length: 100mm
Tripod
I liked the lines from this shot, although the angle wasn't super creative. That being said, my original idea of having the line start closer to the lens and go further away from it, and at a slight angle to create more depth, didn't work out. Even at f/32, I had too much blur.
To compensate a little for the boring angle, I added a tiny bit of Orton effect. I had to try a lot of adjustments and stuff before I was happy with it... too much Orton looks bad; I've found myself getting more and more subtle about it with each time I apply it.
I bought some dry ice today in an attempt to take some photos for this contest. I had a few ideas in mind, but unfortunately none of them worked out this time. The problem was, I had a pound and a half of dry ice left. So I was drinking a SoBe and figured I could cool it down pretty quick with some of the leftover dry ice. It worked. It also looked pretty cool.
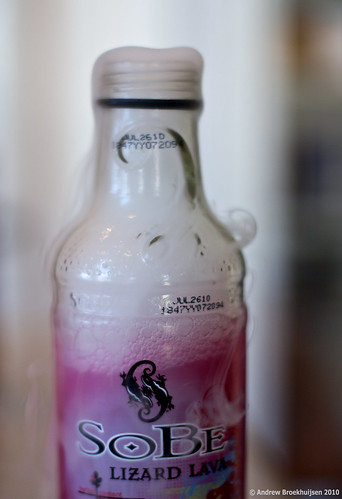
click to enlarge, or see it on Flickr
Aperture: f/1.8
Shutter Speed: 1/80
ISO: 100
Focal Length: 50mm
Tripod
Not a particularly great photo, but it was more for fun than anything. I really think this dry ice thing has some potential if I can figure out how to get the vapor to behave.
On another note, this bottle exploded shortly after this was taken. Turns out putting the lid on with dry ice inside will cause that. Good thing I foresaw that possibility and placed it outside. It was loud.
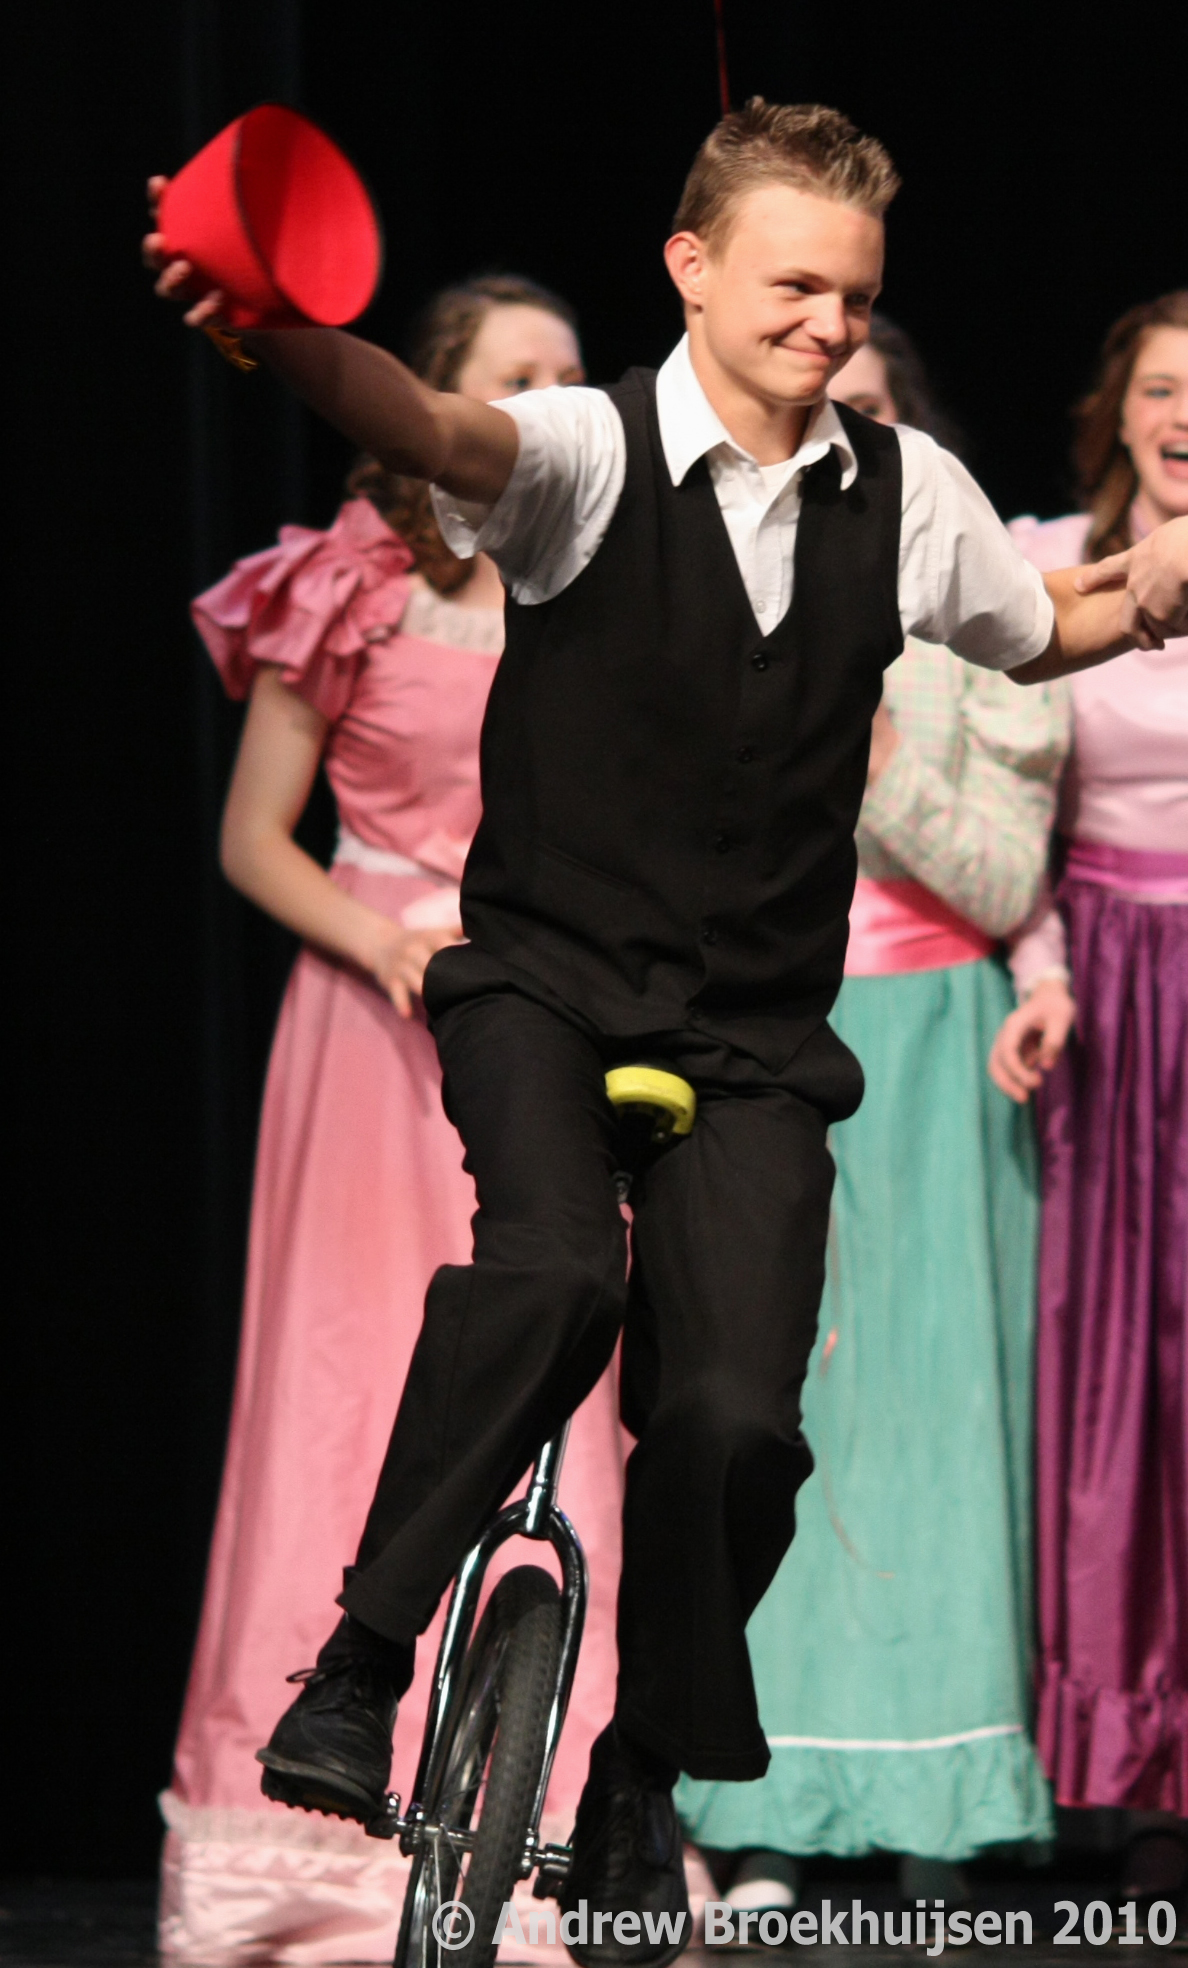
I didn't shoot anything particularly creative today. So I'm falling back on some more Hello Dolly pictures. Cheating, I know, especially when I'm up against things like this, but I'm tired. Today was my last AP test, so I should have more time and energy to devote to photography starting now.

click to enlarge, or see it on Flickr
Aperture: f/2
Shutter Speed: 1/250
ISO: 800
Focal Length: 135mm
Monopod
This guy and his partner were pretty impressive. He looks confident up there on that unicycle... a skill I don't have.


