
I've had this piece of Buckeye Burl sitting around for about three years. When I first got it, I was still relatively new to woodturning. I thought it looked ugly, and it's extremely porous, so I doubted it would polish well. Today, I looked at it and figured that, since it was burl, it would look much better sanded and under polish. The turning was easy because it's a light punky wood. The sanding was easy because for some reason, it seemed eager to sand to a very smooth sheen. I sealed it using cyanoacrilate glue (superglue). I actually had to seal it twice to fill all the air inside the wood. Then I finished sanding, polished it, and voila:
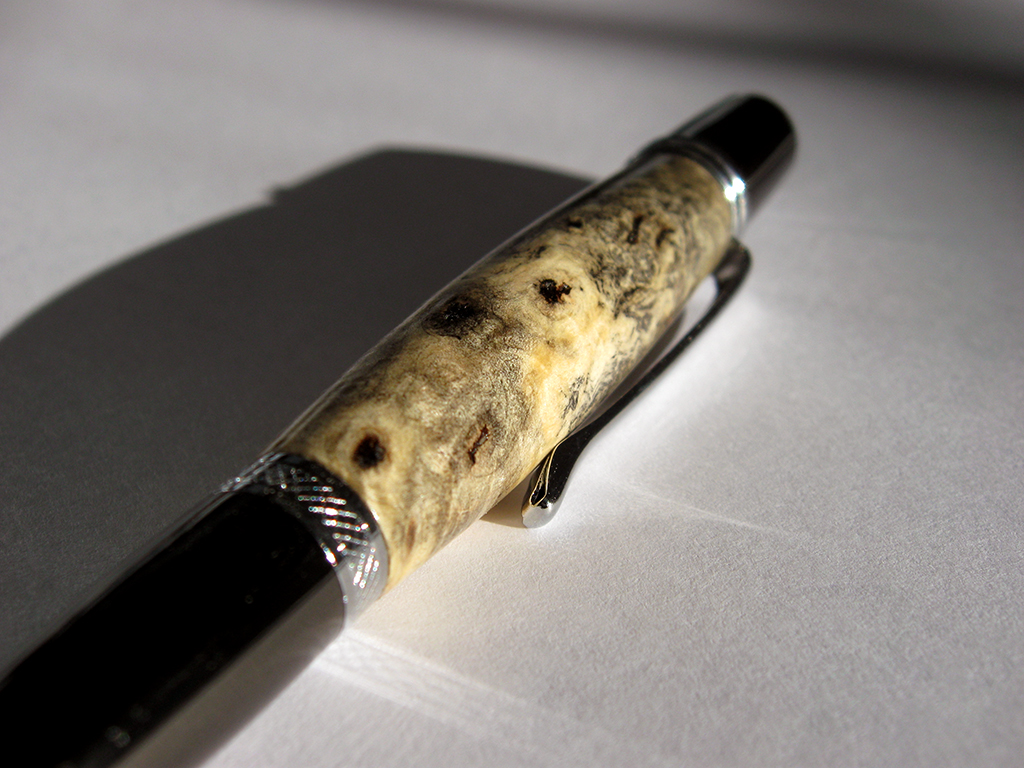
click to enlarge, or see it on Flickr
Aperture: f/2.8
Shutter Speed: 1/1250
ISO: 80
Enough about the woodworking though. This is a photo blog. From a photographic standpoint, I didn't do much to this in post. I shot it in direct sunlight, on top of a piece of regular 8.5x11" printer paper in an attempt to reflect some of the light more evenly. I'm not sure if that worked, but the lighting seems fine. I really liked the shadow cast by the pen, so I kept it. I didn't crop or change the saturation. All I did was use the following trick to get the white-balance exactly right. By exactly right, I mean that the tones showing on the monitor (at least my monitor) match the tones that your eye would see if you were looking at the pen in real life. This is useful when you want your photography to convey precisely accurate representations of what an object looks like. To achieve lifelike white-balance, follow these steps:
1. Create a new transparent layer over your background. Call this layer "Difference."
2. Edit>Fill the "Difference" layer with 50% gray.
3. Change the blending mode of the "Difference" layer to "Difference."
4. Your picture should look like a funky negative. Don't worry. It goes away.
5. Zoom in as far as your computer will allow.
6. Hunt for black pixels. Not just really really dark pixels. You need one that registers a hex code of #000000. I use the eyedropper tool to sample pixels until I get a black one.
7. Mark the pixel using the Color Sampler tool. To get the Color Sampler tool, right click on the eyedropper tool in your toolbar. It should be directly under.
8. Now delete the "Difference" layer. You only needed it to locate a pixel that was exactly 50% gray in your photo.
9. Add a Levels Mask Layer. In the box that pops up, make sure you click on the little eyedropper icon that is between the other two.
10. Click on your marked pixel. Press "Okay."
11. Flatten your image. Your white-balance should be perfectly neutral.

Woah, that is very impressive! You do nice work! It's fun that you get to photograph your own creations! I think your focus and DoF here really emphasizes that gorgeous Buckeye Burl.
ReplyDeleteThat's amazing. I've never thought to use Super Glue to finish wood. Is that difficult?
ReplyDeleteAs far as the photo is concerned, I really like the shadow as well. It's a great photograph.