
Like water droplets.
click to enlarge, or see it on Flickr
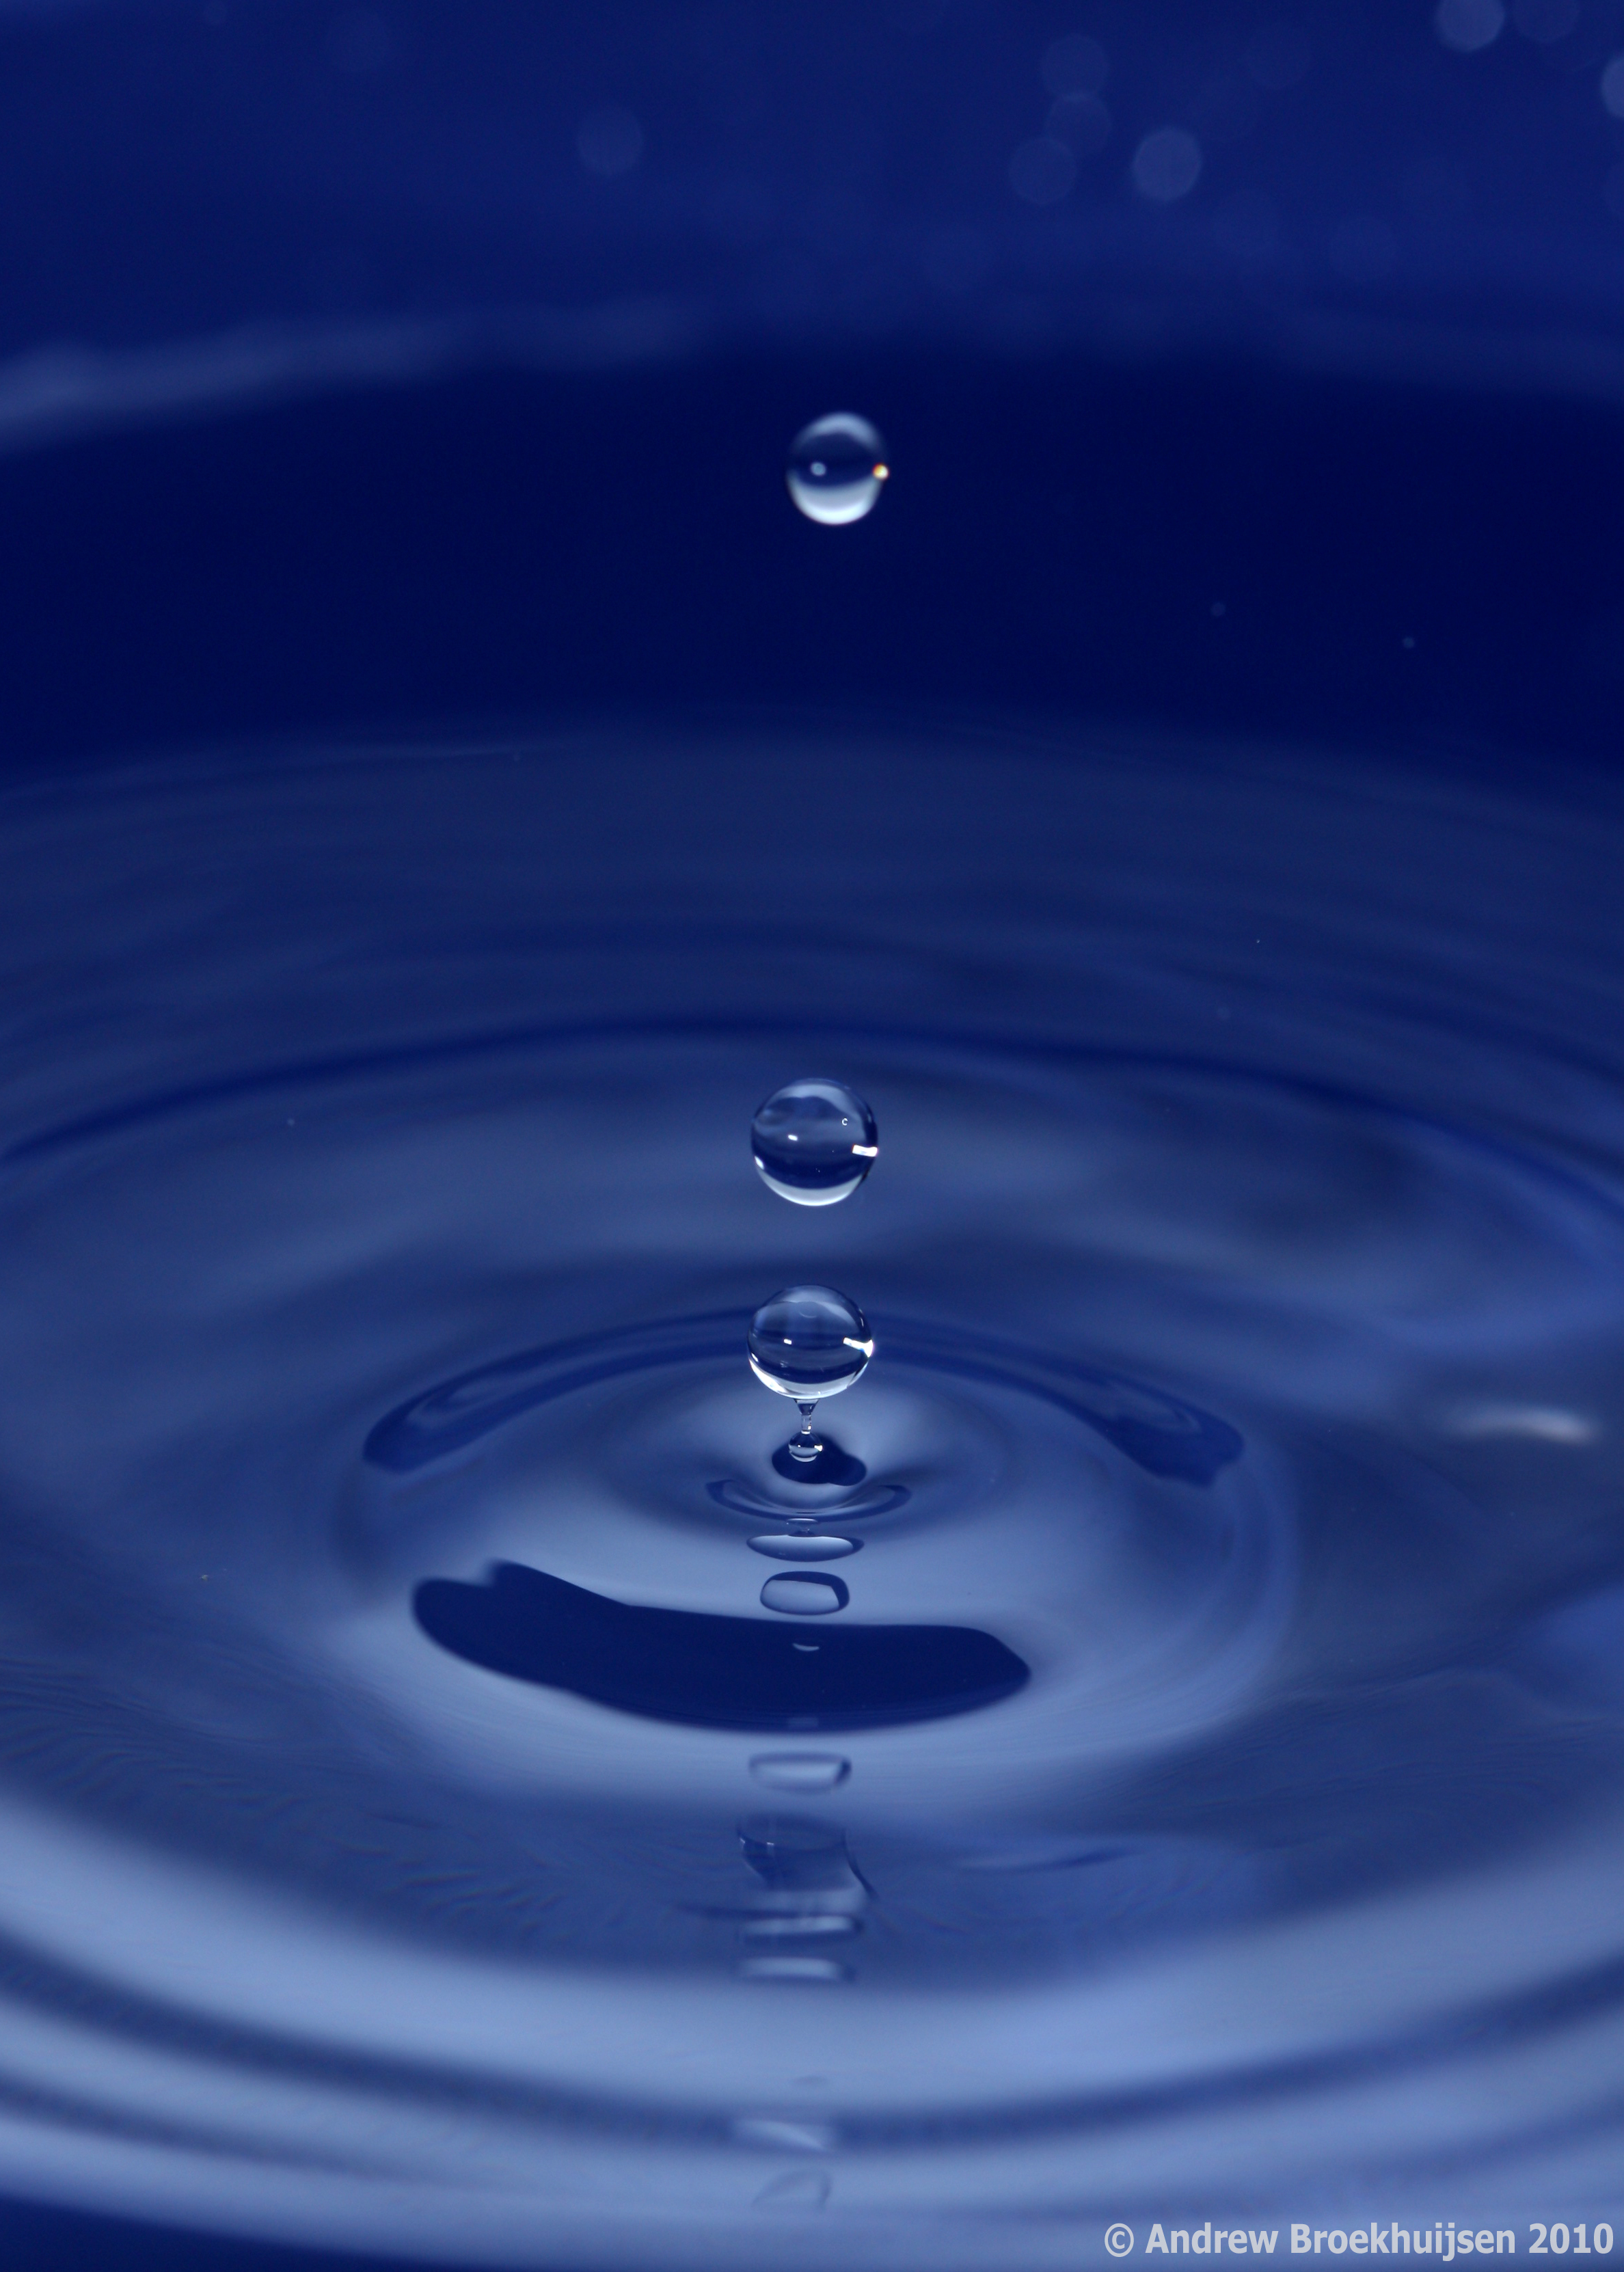
Aperture: f/7.1
Shutter Speed: 1/200 (effective: 1/11000)
ISO: 100
Focal Length: 100mm
Tripod

click to enlarge, or see it on Flickr
Aperture: f/13
Shutter Speed: 1/200 (effective: 1/11000)
ISO: 100
Focal Length: 100mm
Tripod
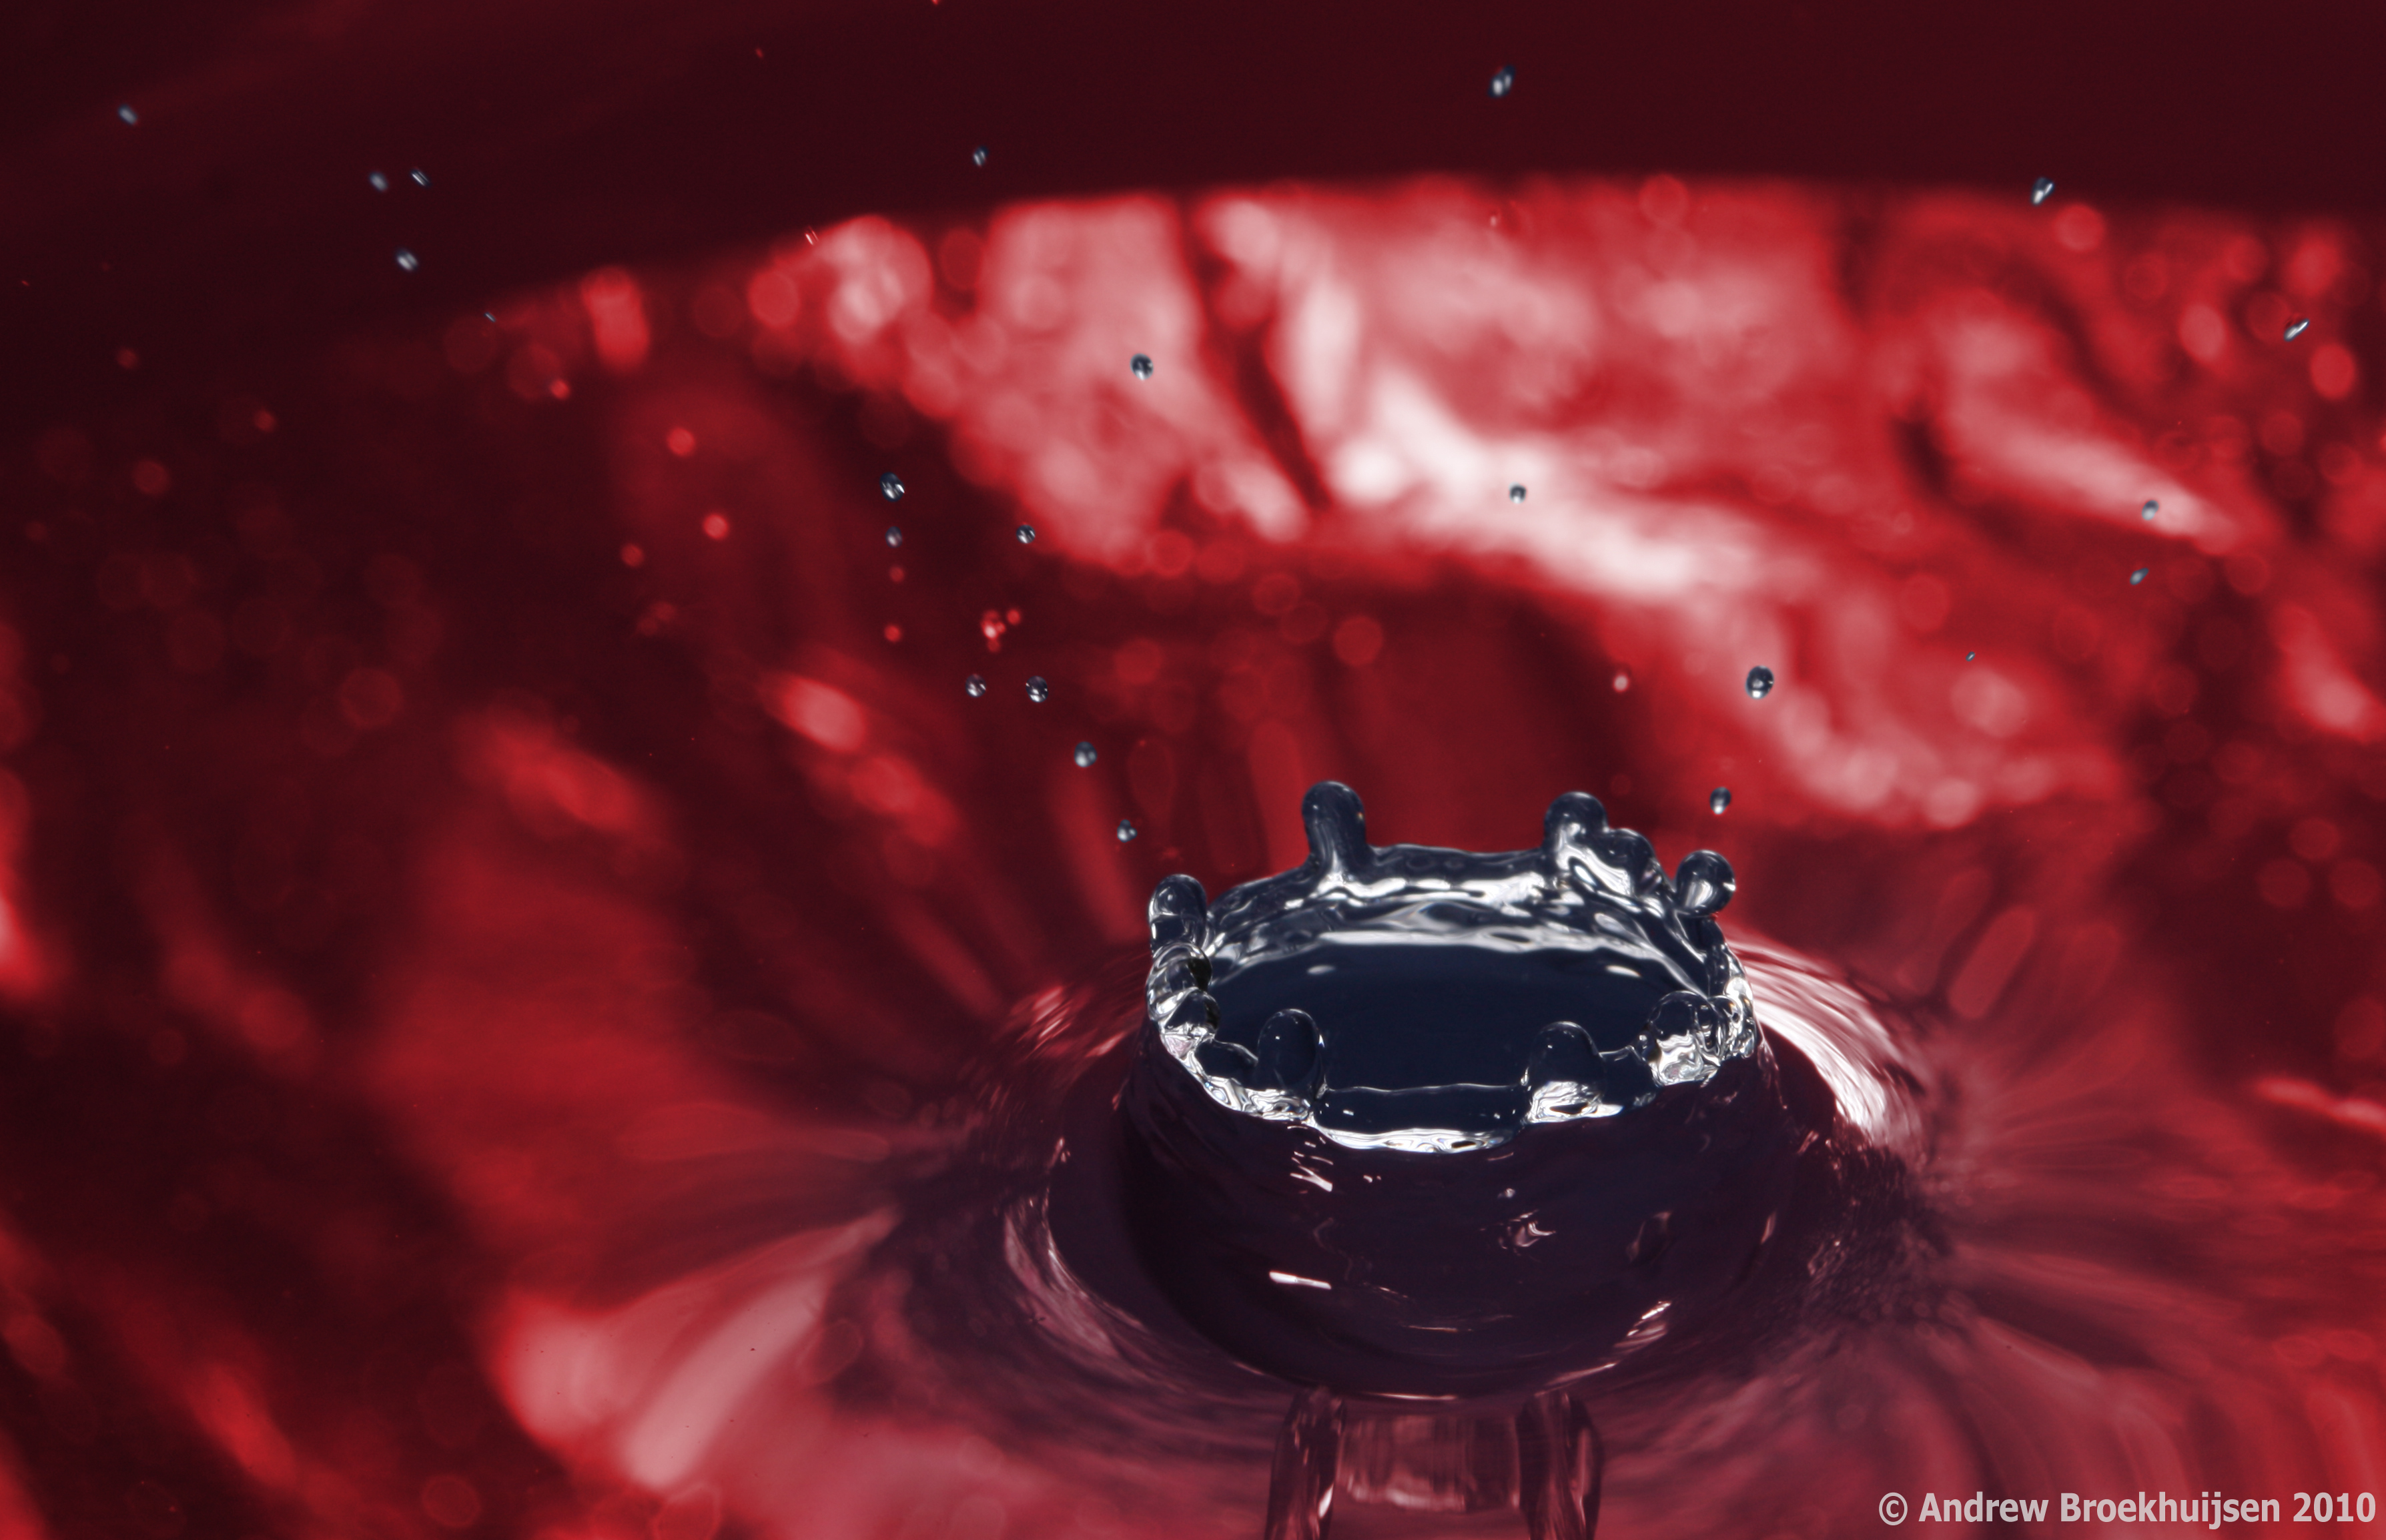
click to enlarge, or see it on Flickr
Aperture: f/13
Shutter Speed: 1/200 (effective: 1/11000)
ISO: 100
Focal Length: 100mm
Tripod
The first was shot in "Tungsten" white-balance, which casts it quite blue. The second was shot in "Sun" white-balance, which is pretty much irrelevant as I converted it to monochrome. The third was shot in "Sun" as well, but I played with it for fun in Photoshop using a few masks and recolor layers.
One thing I found interesting was that in the third one, you can see motion blur in the tiny specks of water zooming away from the splash zone. They must be moving incredibly quickly if 1/11000th of a second isn't freezing them.
The setup for this is quite simple; much more simple than for smoke photography. Just put your flash off-camera using a TTL cord or wireless system. I set mine to the left of the camera, at about a 45° angle, pointing at the same bowl of water as the lens. The bowl of water was directly in front of the lens. I varied the height of the camera on the tripod via the center column a few times during the shoot; it's not critical. Behind the bowl of water was first a sheet of white paper (in the first photo, the light was bounced off a plain white sheet of paper, giving it that smoother look), then a sheet of rather crumpled aluminum foil (as seen in the second and third photos). That's about it. Use any method to drip water steadily into the bowl. If possible, try to make the drops hit the same area of the water; this will make your focus end up better. Manually focus your camera (and re-focus every time you change angles or anything) by placing some object exactly where the drops are hitting, and focusing on that. A pencil works great. Then shoot a whole lot of photos.
You will quickly learn about the different stages a drop of water goes through. The drop of water hits the surface from above, causing a crater-like dent in the surface, quickly followed by a column of water rising from the center which launches one or more round droplets of water in the air; they then fall down and the surface returns to its original smoothness. So the first photo is near the end of the cycle. The second is at the apex of the column, and the third is just before the column begins to rise.
Experiment with various backdrops to bounce different colors, styles, etc. of light through your water. Also play with white-balance settings, flash and aperture settings, compositions, etc. Lots of trial-and-error. I imagine you can play with ISO as well, but I had no trouble leaving mine on 100, even with rather closed aperture settings for the deeper DoF, which is easier to work with. Keep in mind that you're halving the amount of light you let in every time you double your effective shutter speed, so use your aperture and/or ISO settings to compensate accordingly. And leave your shutter speed at 1/200th (or whatever your maximum sync speed is), it doesn't affect anything.

Daaaaang, Dude! Those are AWESOME! I am in awe of your skills!
ReplyDeleteIt looks like you executed this perfectly! I've always wanted to do this too - but again, it sounds complicated with the equipment I don't have (speedlight) and patience!!! Nicely done - this looks so very cool! I love all of them. Thanks for the detailed instructions! :)
ReplyDeleteThat first one makes me think of the Power in Purity EFY CD cover, but better! Maybe you can do some EFY CD covers :P
ReplyDeleteSorry it's been a while since I've been to your blog. It's been incredible busy around here the last few weeks.
ReplyDeleteThis is an excellent lesson. I learned a lot from it. Great work, and incredible photos.
YOU ARE THE MAN..............
ReplyDelete