skip to main |
skip to sidebar
I just got back from a lovely vacation with my dad, where we hit various photo locations, saw family, etc. One of my favorite pictures from the trip was taken at Seal Beach in Orange County, California.

Aperture: f/16
Shutter Speed: 1/20
ISO: 100
Focal Length: 18mm
Tripod
It was an uncharacteristically cloudy and rainy day at the beach, which had several nice side-effects: diffuse light, awesome moody clouds (recovered from the RAW file via Lightroom), and very few people at the beach to clutter up my shot. The one guy standing about halfway down the pier kind of bothers me, but he fits in with the shot okay, and I didn't want to spend an hour cloning him out.
Anyway, I got this and a whole bunch of other shots I'm very happy with on the trip. More to come as I get around to editing them.
Ansel Adams, for those of you who don't know, is probably the most famous black and white photographer of all time. I recently read an article about him, which described his approach to photography, and his "zone system."
I won't go into great detail, but basically, Adams was about getting the sharpest possible images of landscapes, and then expanding the tonal range of the photo to get stunning results.
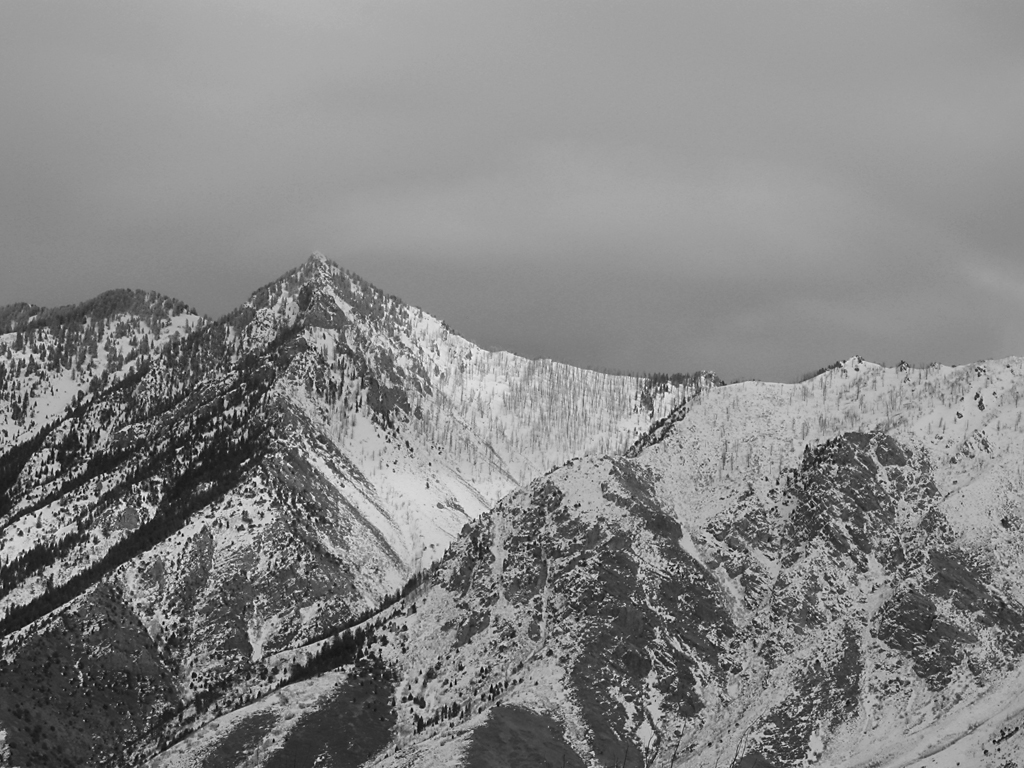
I wanted to try an Ansel Adams-style B&W today. Here's how it turned out.

click to enlarge, or see it on Flickr
Aperture: f/7.1
Shutter Speed: (5 exposures)
ISO: 80
Tripod
The way around the relatively low (compared to an eye) dynamic range of a digital camera is similar to HDR. So similar, in fact, that I use the same program as I do for HDR: Photomatix. Apparently, snow should be exposed at Zone 7 if possible, which basically means it should be very white, and close to losing detail, but not washed out. So to expose this image, I used "spot" metering on my camera, and pointed it at the brightest spot in the image. It's pretty close to the center; right where the snow is purest. Your camera's meter wants you to expose everything at Zone 5, which is a "proper" exposure. Every stop on your camera is a Zone, so to get Zone 7 snow, I bumped it up two stops from what the meter told me to. From there, I took another photo at every stop going down until my histogram had no more white pixels. For this photo, that was 5 exposures.
In post-processing, I put the 5 images into Photomatix, and told it to "average." This gave me a nicer-looking image, but more importantly, expanded the number of tones I had to work with. From there, I applied a Channel Mixer Mask layer to desaturate the image, and bumped up the contrast quite a bit (which I could now do without worrying about posterization). Now I had my Zone 7 snow, but the trees were in Zone 2 or 3—dark, but with some detail. This is better than just getting an "average" exposure where my snow is probably at Zone 6, and my trees and rocks are at Zone 4 or 5.
Finally, I applied an Unsharp Mask to really make the details pop, just like Ansel Adams liked it. I know you're not supposed to do this until you're ready to print, because it's a destructive editing technique, but I have no plans to print this. It's kind of a poor photograph—not a very good vantage point, and nothing interesting in the foreground. I just wanted to test out the Ansel Adams approach to landscape photography.
Link me any images you try with this technique in the comments.