skip to main |
skip to sidebar
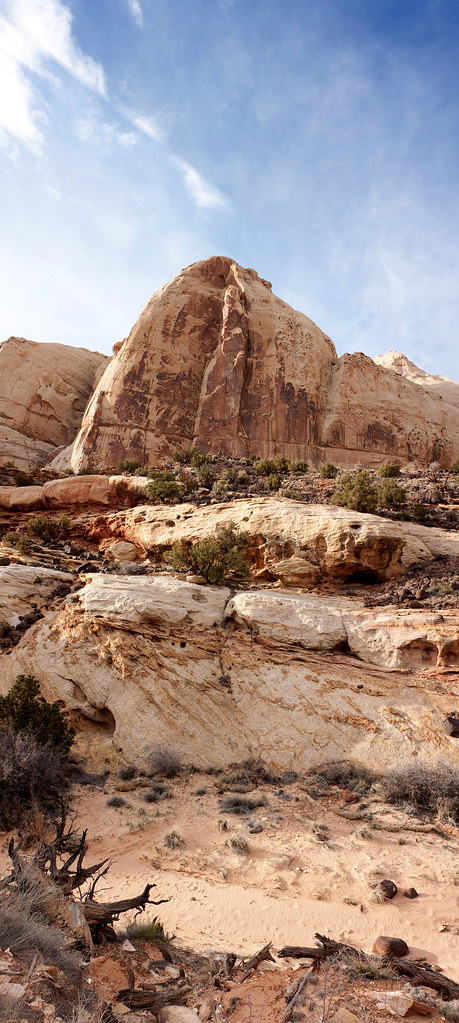
While at Capitol Reef, I decided to try a vertical panorama, something that I had heard of, but never attempted. Long story short, it worked really well. The nature of this image means that when I crunched it down to 1024 pixels tall, it got really skinny, but rest assured that in full quality, it looks nice :)

click to enlarge, or see it on Flickr
Aperture: f/8 (all frames)
Shutter Speed: 1/200 (all frames)
ISO: 100
Focal Length: 55 mm (all frames)
Tripod
The composition isn't spectacular, but this was more an exercise than anything else.
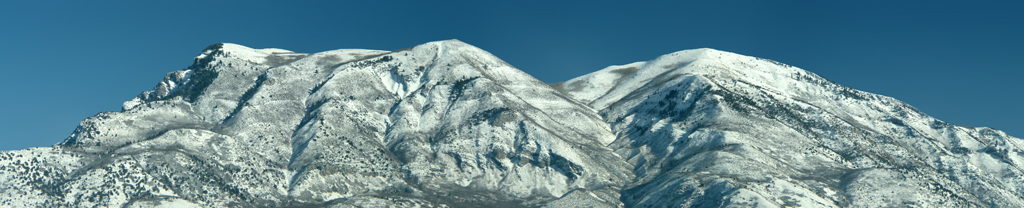
I found a better vantage point for taking basically the same panorama of the mountains—right in front of my school. Since it's significantly closer, the mountains get better detail, and I can also take enough raw material to chop of any clutter in the foreground, which is nice.

click to enlarge, or see it on Flickr
I wish I could upload a larger resolution to Flickr, but since I'm currently on a free account, they knock down all my files to a maximum of 1024 pixels wide. Even 1024x208 doesn't do this justice though. In fact, my monitor (1680x1050) doesn't do it justice. To view a panorama, I really want to do a print.
I learned that using a polarizer while taking panoramas is a big no-no. It made some pretty extreme lines between frames, even after the best blending job Photoshop would give me. What I ended up doing was selecting the mountains, copying them into a new layer on top, selecting the sky, copying into a new layer just below the mountain layer, and Gaussian blurring the crap out of the sky copy layer. That hid the lines pretty well, but also made the sky look rather fake, and erased the nice clouds I had going. I also boosted my blue in the Levels box a little too much, which partially posterized the sky. It's not really noticeable in 1024x208, but if I ever want a print, I'll be re-doing this.
So, a decent photo, but a great learning experience. When I finally do one with a final print in mind, I'll re-shoot on a similarly sunny day (or maybe a cloudy day...), and WITHOUT a polarizer. I over-edited this to get rid of the lines, and that won't do if I'm going to spend $50 on a print and a custom frame.
Panoramas are all about capturing more than you can fit into a single shot. For instance, here in Utah, I have a lovely view of the Wasatch mountain range, even just from my house. But even if there was a 0mm lens, it wouldn't be wide enough to capture the whole thing at once. So I decided to create a panorama of it (using my new tripod and telephoto lens).
Basically, you shoot as many overlapping images as it takes to cover the area you want. I then turn over my batch to Photoshop CS, which does quite a good job of stitching them together. Once you have a single image, you can then go on to do color corrections, etc. Here's the finished result of my first ever panorama:

click to enlarge, or see it on Flickr
I mostly did this as an exercise to help me learn what to do and what not to do while shooting; I realize I could have found a FAR better vantage point so as to avoid having random tops of houses and trees in the shot. Also, I apologize for the relatively low resolution. The full-res file is approximately 92 megabytes, which would use up all of my remaining upload space for December on Flickr.
Next time I post about panoramas, I'll include a specific tutorial on how I create mine. But if you already have some sitting on your harddrive, feel free to post links!