
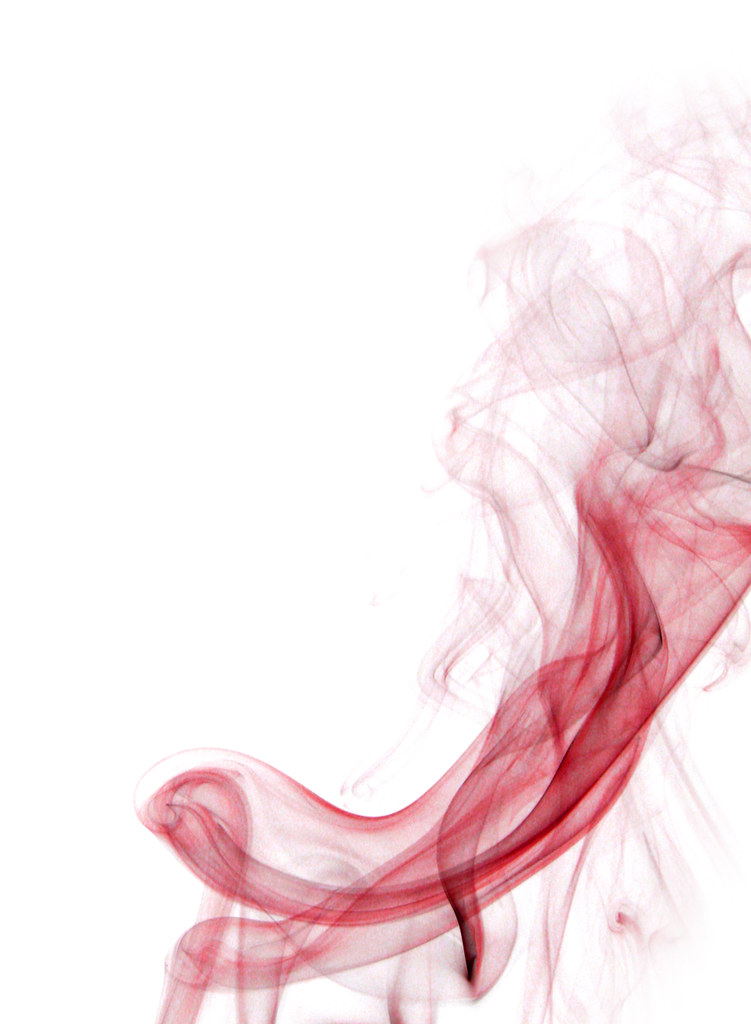
click to enlarge, or see it on Flickr
Aperture: f/6.3
Shutter Speed: 5 seconds
ISO: 80
Tripod
Here's a run-down of the process.
Set up your equipment in such a way that you have a pitch black background (one that the computer would see as #000000).
You'll need something generating smoke (incense sticks are recommended, but I didn't have any, so after many unnsuccessful attempts using a candle, I finally started burning paper in a small glass container). Your smoke-generating object should be out of the frame, but only just; you want smoke wafting up through your frame. The closer you can get to filling the frame with smoke, the better, but I used zoom instead of getting close to the smoke with my camera. The two don't mix very well.
An aperture of f/8 to about f/13 is recommended. I used f/6.3 because... I don't remember why. But it seems to have worked okay. I also set my white balance to both "Cloudy" and "Flourescent." "Cloudy" gave me a more lifelike smoke color, but it doesn't really matter if you're going to post process it like I did anyway.
You need lighting from the side. The best way to go is an external flash gun that is synched to your camera. I don't have one, so I figured out a workaround. This workaround actually solved my lack-of-speedlight problem as well as my lack-of-pure-black-background-object problem. I just shot in pitch blackness. Keep a flashlight handy! With zero light getting into the room, I could set the exposure to be really long, and then have my wingman (my brother in this case) fire his flash at the brightest setting from the side of the smoke after my shutter opened, but before it closed.
Before you can start shooting, you need to lock your focus. I just held the tip of the lighter directly over the smoke-generator (with the lights on), and in the center of the frame, autofocused on it, and then locked the focus by switching to manual. Any time that adjustments are made to the position of the camera or the smoke-generator, you will need to repeat this focusing process.
So basically, I would light a dense wad of paper (denser balls will smolder and burn more slowly, generating more smoke volume), let it go out on its own, and then wait for a relatively vertical plume of smoke. Then I would open my shutter, tell my brother to fire his flash, and wait for the exposure to finish. All I had to do was put in more paper balls as needed and re-focus every once in a while.
Nasyarobby's blog post (linked at the beginning of this post) has another link to a video description of how to do this if you have the gear. I think the main reason for my less optimal results are not so much that I had to use a bunch of workarounds as that I didn't have a very consistent source of smoke, and I haven't yet mastered the art of filling the frame tightly with smoke. Because I tended to only get about a quarter of the shot that was useable (or not just plain black), I ended up cropping a lot, which accounts for the grain in the expanded version of today's photo. I may have over-stretched my megapixels.
Next time I post about smoke photography, I'll include instructions on how to get the white background, the colored smoke, and a few other little tips I picked up from various videos. If you're not patient enough to wait, you can probably find a video on YouTube by the same guy as the one linked from Nasyarobby's blog that shows most of the PP tips.
Any linked photos, advice, etc. in the comments are welcome!

Ooooh! I'm jealous! I saw his post and thought I wanted to try this too! I'm so glad you did - it looks awesome!! This is what I should have done today instead of photographing objects! LOL! Sounds like I may have to wait for another set of hands to help me set this up for lighting, etc. But I want to try this. Great job on the setup, and a lovely shot!
ReplyDeleteAwesome! I saw this on DPS and I've been thinking about trying it. Thank you for the workaround tips, as I do not have an off camera flash so this may be impossible for me. Does it really need to be shot in the dark???
ReplyDeleteOh I've wanted to try this too! Thanks for the tips! Yolanda - maybe we could get together and help each other accomplish this?
ReplyDelete